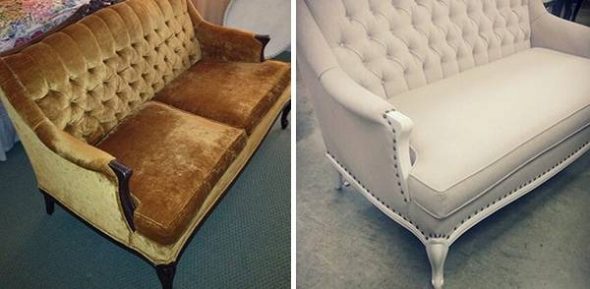
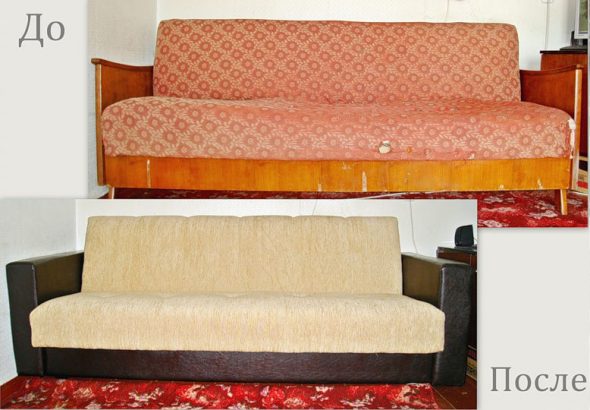
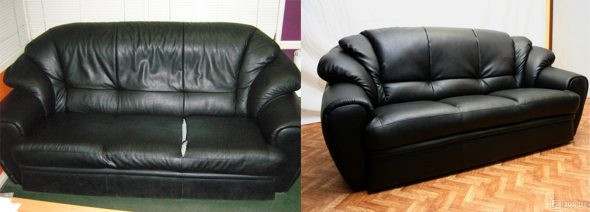
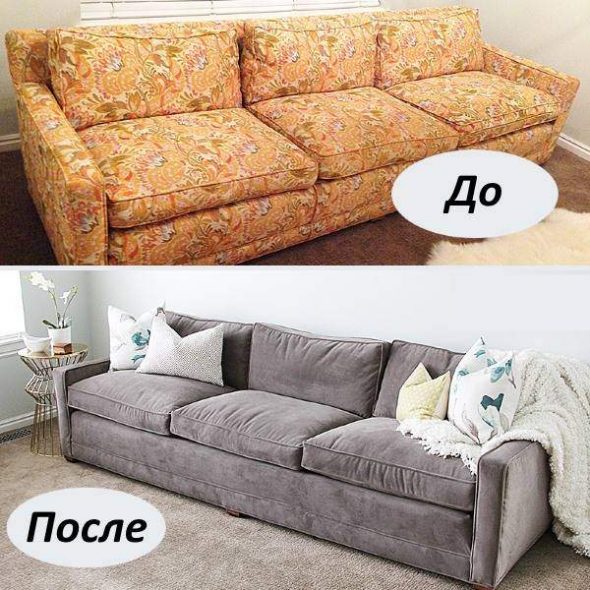
Furniture wear and tear is inevitable at home. The solution to the problem may be to restore the sofa yourself. Most often, external elements require replacement, regardless of the type and quality of the material. The fabric fades in the sun, wears out, the foam rubber loses its elasticity and sags.
Advantages of DIY restoration:
- buying materials is several times cheaper than new furniture;
- preservation of antiques;
- choice of color scheme and design, according to personal tastes and the overall interior of the room;
- independent choice of material based on quality, environmental friendliness, cost;
- the ability to take into account the weak points of the old sofa and strengthen them.
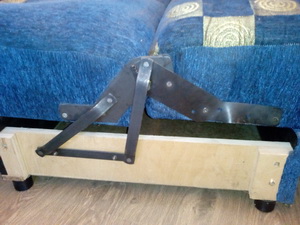
In addition to external wear, internal breakdowns occur over time. A squeak appears somewhere, the folding mechanism does not work, springs break.
The wooden base can crack or break. In order for the restoration of an old sofa to be of high quality, you need to know its approximate structure and repair methods.
Content
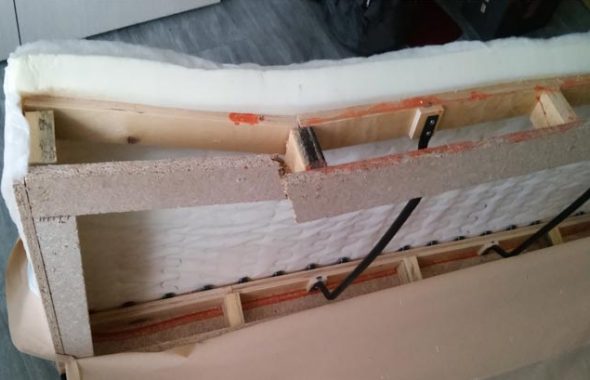
Methods of restoration
Conventionally, the sofa can be divided into four parts. This is a wooden base made of solid wood and chipboard, steel springs and a folding mechanism, filler (foam rubber or batting) and upholstery (fabric, leather, leatherette), decorative elements (wooden overlays, buttons).
There are several ways to restore a sofa with your own hands, depending on the complexity:
- minor repairs to upholstery and decor;
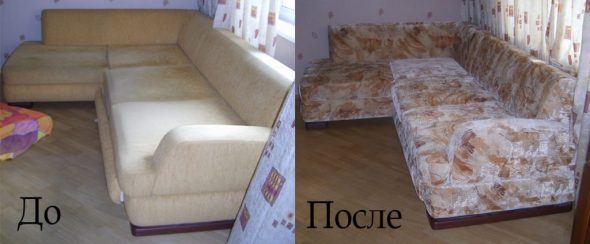
- complete replacement of upholstery (reupholstery);
- replacement of upholstery and filler;
- replacement of upholstery, filler, repair of mechanisms;
- complete repair of all parts.
It is not worth taking on the job if we are talking about antiques, or if the old sofa has complex design elements. It is also better to entrust work with capricious materials, such as leather, to professionals, or replace the material with fabric.
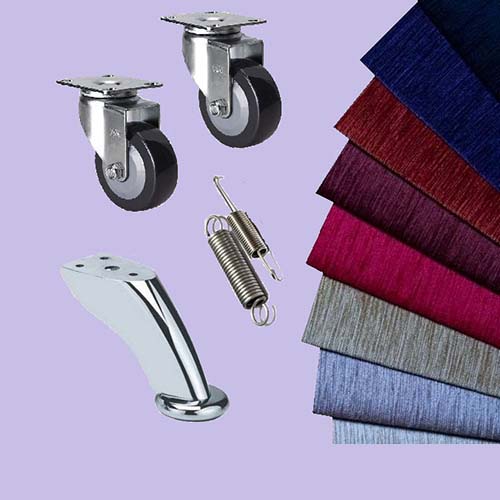
Necessary materials and tools
Restoring an old sofa will take time. It is a creative process that requires desire, tools and good material. Everything you need to repair a standard 180*90 sofa is listed in the table. It is better to purchase filler and upholstery fabric with a reserve.
| Name | Purpose | Quantity |
| tapestry, velor, or suede | upholstery fabric | 210*120 cm |
| Simple, single-color fabric | fastening case | 210*120 cm |
| special furniture foam rubber | filler | 200*110 cm |
| Thick fabric, like a carpet | protection of the spring block on both sides | 370*190 cm |
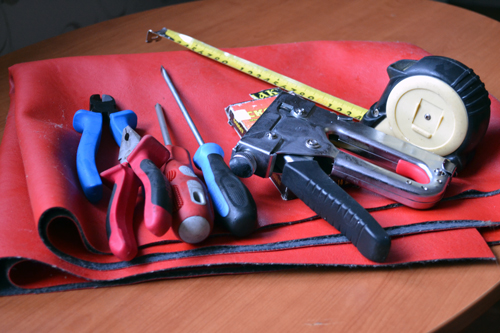
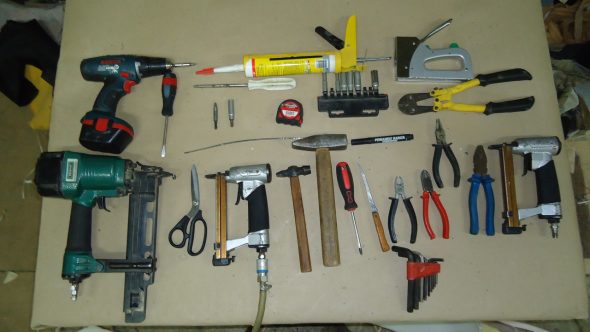
The following tools may be required:
- construction adhesive;
- furniture stapler;
- strong nylon thread and a needle for it;
- open-end wrench, pliers, screwdriver;
- a jigsaw, or, in extreme cases, a regular saw (if chipboard needs to be replaced).
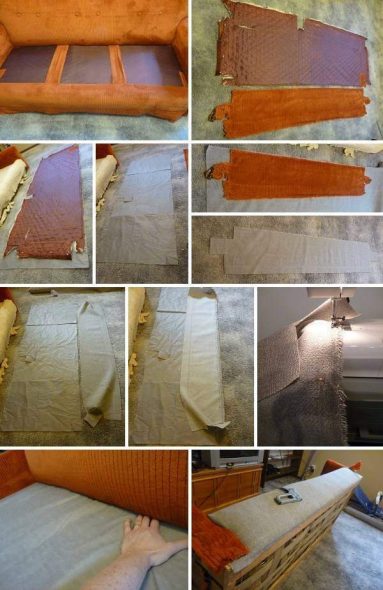
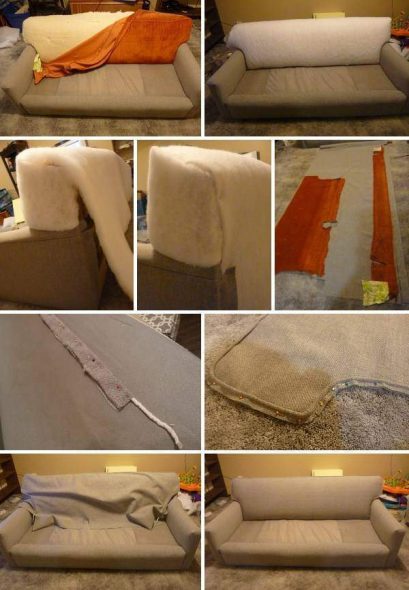
The fabric should be cut out for the cover in advance. Sewing dense elements is difficult, so you can order the material from a seamstress. To avoid making a mistake with the sizes, use old fabric as a template. When cutting, be sure to leave 5-10 centimeters for fastening, taking into account the height of the seat (width of the back).
Restoration process: step-by-step instructions
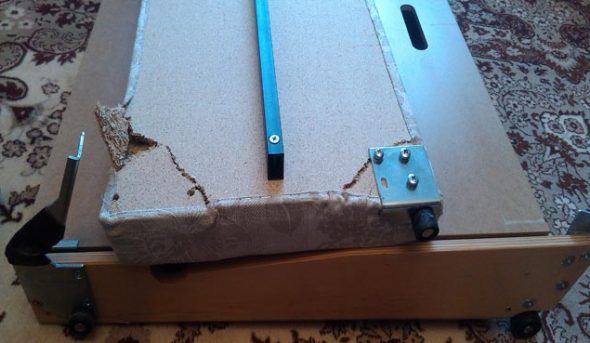
Before you restore a sofa with your own hands, you need to check the condition of the main frame. If there are cracked or sagging bars, it is better to replace them. Solid wood rarely requires repair, but laminated chipboard breaks often. It is not worth repairing it, here you need to completely replace the broken part.
The repair of the back, seat and armrests is slightly different, but in general, the restoration scheme for different parts is approximately the same.
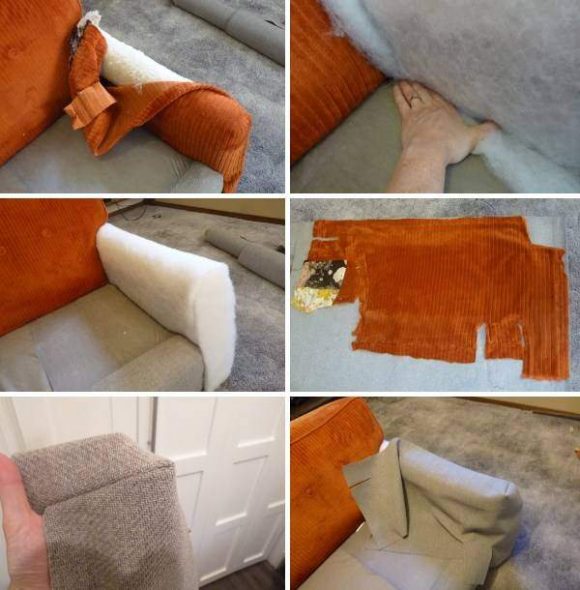
First of all, dismantling work must be carried out:
- remove the side armrests (usually the bolts on them are made on the inside, here you may need a hex key or pliers);
- remove the seats and backs from the fasteners to the lower frame;
- remove the old upholstery and remove the staples as well;
- carefully remove the old filler and check for suitability for reuse;
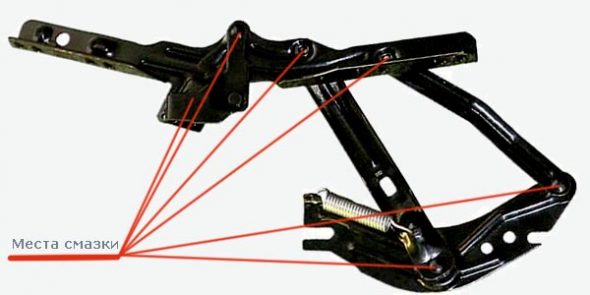
- remove the springs, check their condition, clean them if necessary, lubricate them, replace them completely or partially;
- check the condition of the chipboard, replace the sheets if necessary.
It is better to put all small parts from disassembly in one container so as not to lose them.
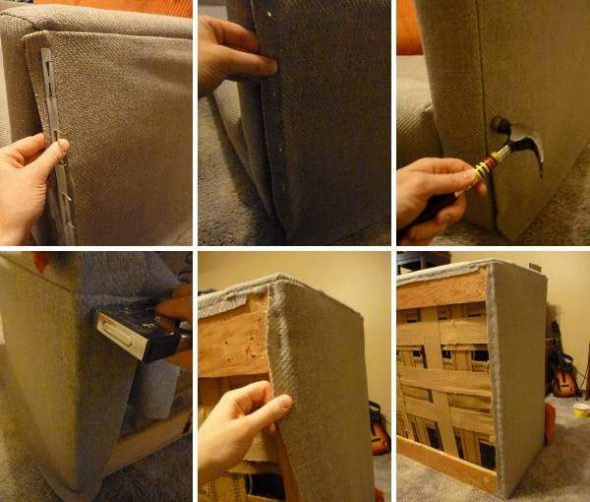
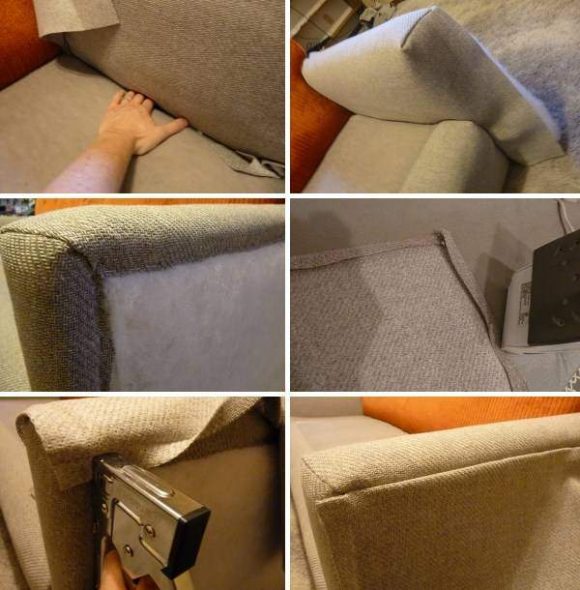
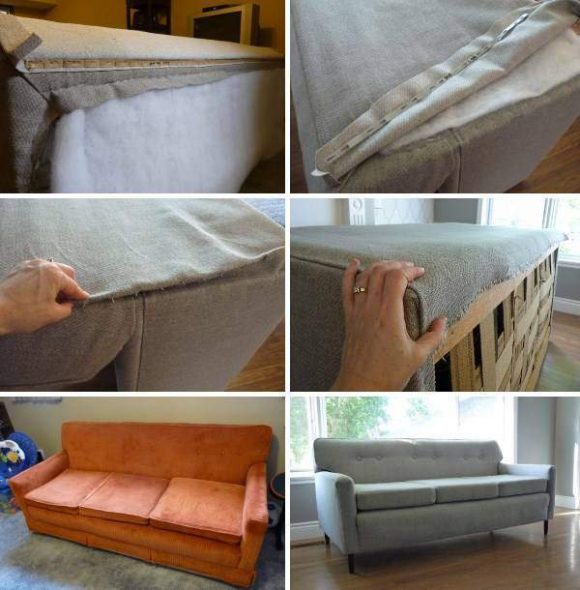
At the second stage, we replace the old elements. It is best to use both glue and a stapler to fasten the parts. But if necessary, you can make do with improvised means. For example, instead of a stapler, use small nails:
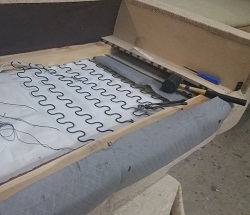
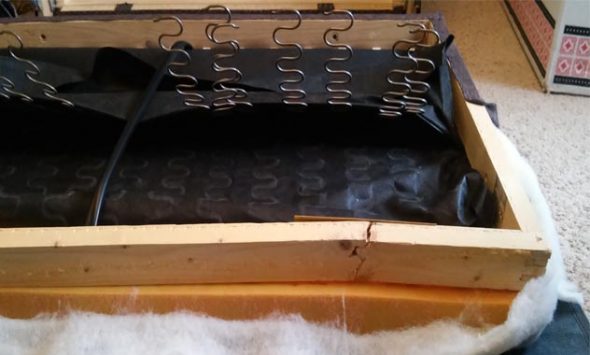
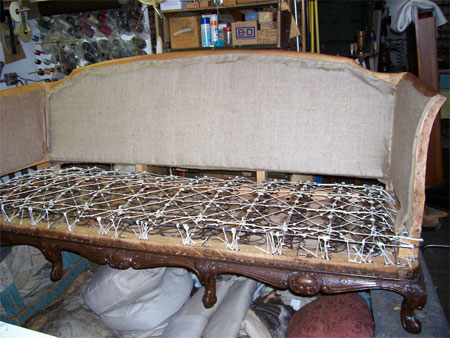
- Place thick fabric on both sides of the spring block, fold the edges inward on each side and stitch with nylon thread;
- lay the spring frame on a wooden base, fasten the springs through the fabric with a stapler. If you don’t have a tool, you can make arched staples from steel wire or thin nails, hammering the “head” to the side;
- lay new or suitable old filler;
- tighten the entire structure with a fastening fabric, like upholstery, and secure it;
- put on a new cover, secure with glue and a stapler.
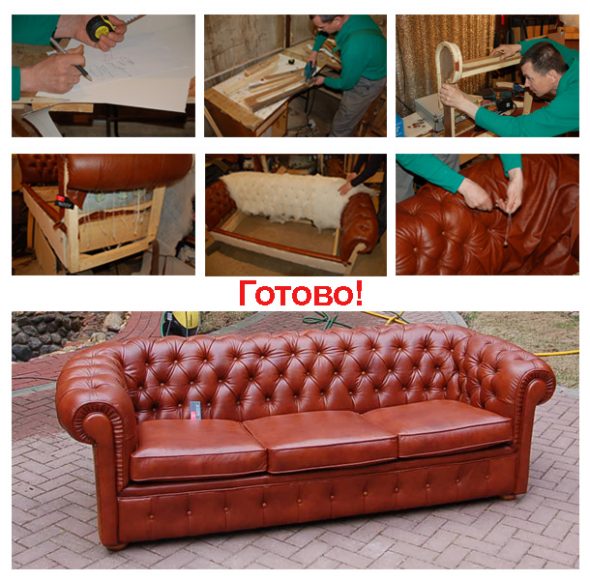
The final stage is decoration
Restoring sofas with your own hands is an interesting activity, as is decorating them. Here you can simply lay out beautiful pillows, or make a carriage coupler.
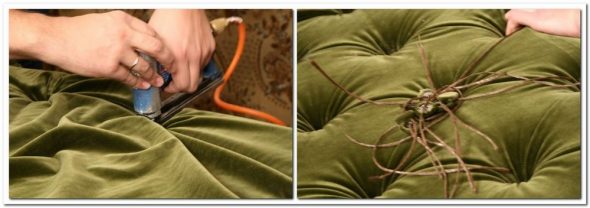
Usually, backs are decorated in this way, leaving the seats solid. The elements of the tie are simple, you need to prepare buttons or metal rivets. Cross diagonals can be emphasized with a ribbon. In order for the foam rubber to lie evenly, you need to cut small circles in the filler at the replacement stage - places for future buttons. Then, cover with fabric and sew on the selected elements. To tighten the buttons, you can use a stapler or strong threads, tightening them on the other side.
If the design has wooden elements, you can glue a figured wooden massif in the same color to the front part of the armrests. Then all the furniture parts are assembled back. It is important to check all the fasteners so that nothing comes off during use. That's it, the restoration of the old sofa is finished!
Video: sofa repair with design change. sofa restoration. timelapse