Without a heating system, it is impossible to operate residential premises. During the renovation of an apartment or the construction of a private house, it is often necessary to install or replace convectors. Installing heating radiators is a simple operation that can be carried out on your own without the involvement of specialists.

Content
Types of radiators
It is also a battery, an emitter - a heating device of the convective-radiative principle of action. Heat is removed by radiation, convection and thermal conductivity.
The coolant – water – circulates inside the product. The devices are available in different configurations. In addition, they differ in the materials they are made of.
The most common types are:
Sectional
The design of such devices is made up of sections that are connected to each other. The dimensions of the elements and their number are determined based on the required power.
Sectional batteries are made of cast iron, aluminum, steel and alloy (bimetallic).
Cast iron radiators are one of the first types of heating devices that were installed in residential premises. During the Soviet construction years, they were in all new buildings. Cast iron is a corrosion-resistant material that is least susceptible to wear from aggressive components of water passing through the heating system.


The advantage of such devices is that they are durable, retain heat well and heat the room evenly. The disadvantage of cast iron sectional products is that they weigh a lot, have a rough surface and sharp corners.
In addition, the design of the model itself makes it difficult to clean around the device. However, custom cast iron radiators with a special antique design are now often made to order.
Aluminum sectional radiators have a high level of heat exchange. They are considered to be receivers of cast iron devices. The front panel is even and smooth. Aluminum emitters weigh less, but they are capricious to the chemical composition of water, so they wear out more often.


Bimetallic sectional radiators are made of 2 metals: steel and aluminum. This combination provides the following advantages: corrosion resistance, durability, modern look, high heat transfer coefficient. The disadvantage of such devices is the high price.


Monolithic
Such devices are made from an alloy of aluminum and steel (i.e. they are bimetallic).
The heat-dissipating surface is made in the form of 1 non-separable block.


These batteries are capable of withstanding high operating pressures and temperatures and are installed in large work areas. They have good thermal inertia, i.e. they heat up and cool down quickly.
Panel
Such products are also called convectors. They are made of steel panels, inside which there are heat carrier channels.
The surface of the sheets can be smooth or ribbed. Their thickness is 1.2-2 mm. These devices are compact, modern in design, economical, and represent a budget solution for a private home.


The disadvantages are instability to water hammer and susceptibility to corrosion. Because of this, this type of device is not used in multi-story buildings.
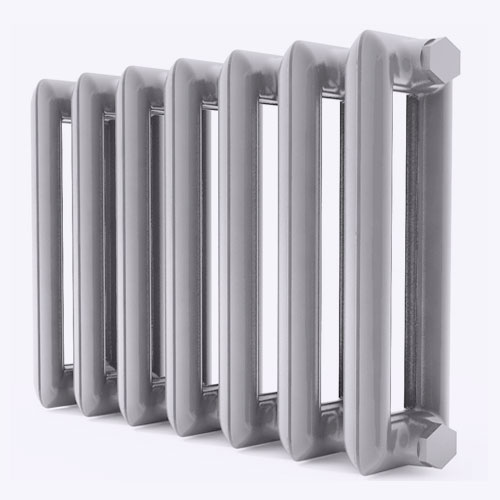
Tubular
They are made of steel. The design is a single system in the form of tubes welded together vertically. These radiators come in different sizes and are similar to Soviet cast iron batteries, only smoother, neater and lighter. Nowadays, such devices are often used in interior designs. The production process is more expensive, which affects the cost of the products.


Benefits of DIY Installation
- The main advantage is saving money. Specialists often set a high price for their work.
- In addition, it is possible to independently choose the location of the device and control the progress of the process.
- For a private home, any type of radiator is suitable due to the autonomy of the system. In multi-storey buildings, you should choose a device that can withstand a pressure of 12 bar.
Disadvantages of DIY Battery Installation
- It is necessary to understand the issues related to the heating system.
- You need to have special tools and equipment.
- In addition, it is not always possible to carry out installation alone.
- Due to lack of professional skills the process may be delayed.
What is required for installation
For all types of radiators, the set of equipment, tools and materials is approximately the same:
- air vent;
- plug;
- shut-off valves;
- brackets;
- consumables.
Air bleed
Air may accumulate in the radiator, which prevents the heating system from working properly. It must be released. A Mayevsky tap is used for this purpose. This device is installed on the free upper input (collector).

The device is a needle valve. To release air, the tap handle is turned until a hissing sound appears and closed after the liquid has been released.
The need to bleed air can be determined by feeling the surface of the battery. If it heats up unevenly, it is time to remove the air locks.
In addition to the Mayevsky crane, automatic air vents are also produced. But they are made only of brass or nickel, without covering them with white enamel. This spoils the appearance of the entire structure, so such air vents are rarely used.
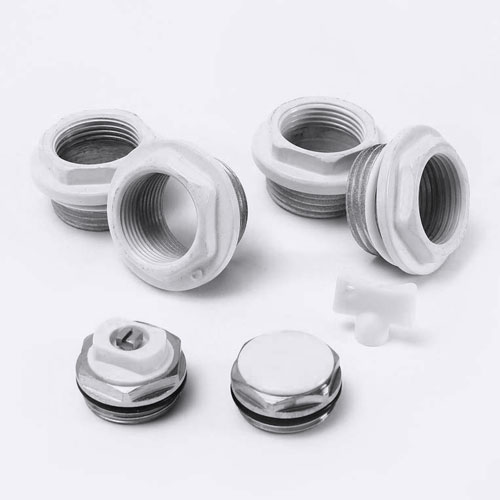
Plugs
Devices with side connection have 4 outputs. 2 of them are used for the supply and return pipelines. The third one is equipped with a Mayevsky tap. The fourth output is closed with a plug.

It is a small element with a thread (right or left). The color (usually white) and material of the product are similar to those of the radiator.
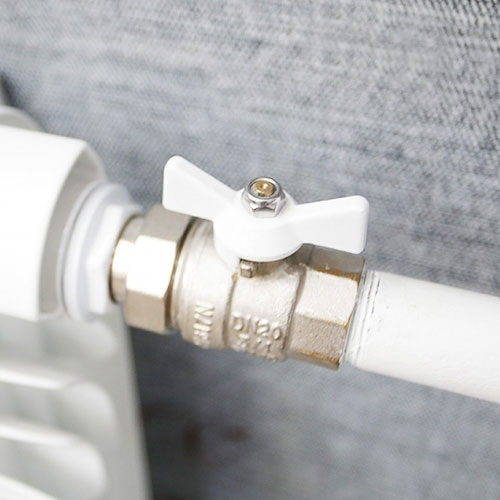
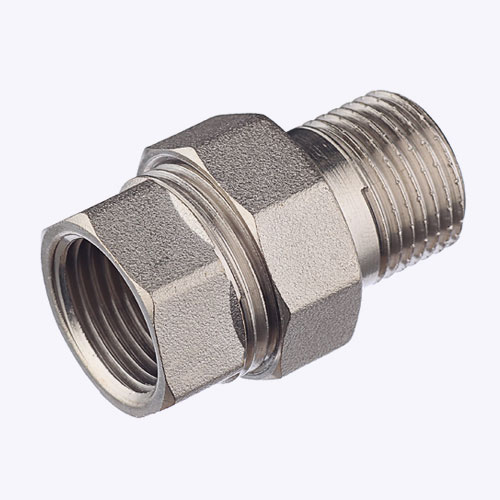
Shut-off valves
It is represented by the following taps:
Consumables
The list of other materials that will be needed is as follows:
Tools
To install the devices you will need:
Requirements for the placement of radiators
Radiators are most often placed near the wall under the window. Additionally, they can be installed in places of large heat losses, along external walls, entrance openings, in the corners of rooms, on stairwells. The total power of heating devices must be equal to the required heat output.
Installing batteries indoors
To ensure free circulation of air around the radiator, the required distances from the window and floor must be maintained.
 They are:
- from bottom to floor – 8-12 cm;
- from the top to the windowsill – 6-12 cm;
- from the wall – 2-5 cm.
In addition, the radiator should be located in the middle of the window opening. The permissible deviations are 2 cm to one side. The width of the device should be 75% of the window width.
Floor mount
It is not always possible to install a radiator on a wall. For example, heavy cast iron devices are not attached to vertical structures made of lightweight concrete. In such cases, floor brackets are used.

They are often included with the product. The legs can be fixed in height or adjustable. The device is attached to the floor using dowels.
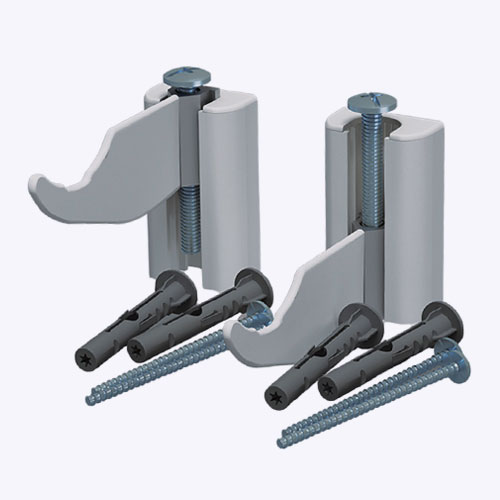
Wall mounting
This is the most common installation method. The load from the device is taken into account when selecting fasteners. Hooks are most often used. They are selected based on the type of dowel. A hole is made in the wall, a plastic element is inserted into it and the hook is screwed in. The main load falls on the upper fasteners.

Installation instructions
Before installation, it is necessary to check the availability of all materials and tools. The number of fasteners depends on the size of the battery. An aluminum sectional device is attached to 3 hooks (2 on top and 1 on the bottom) if the number of parts is less than 10, in other cases 4 or more will be needed.
Equipment assembly
If the sections are not connected to each other, you need to do it yourself using nipples. You will need a key with a special nozzle.
After connecting the sections, you need to do the following:
- Clean the side holes on the ends.
- Screw in 4 bushings from the ends, tighten them with a wrench. Pay attention to the type of thread (right and left) to screw them in from the corresponding side.
- Close the lower outlet that will not be used with a plug.
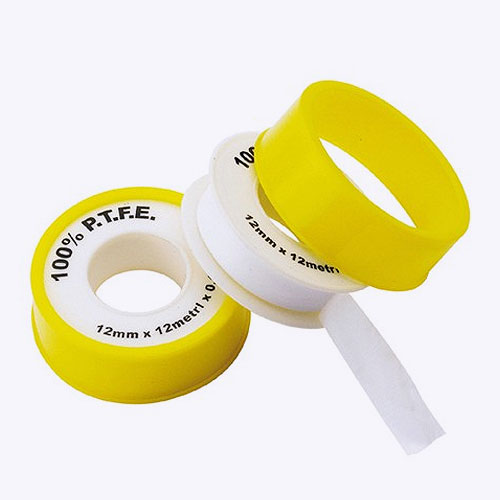
- Screw the Mayevsky tap into the upper manifold, using sealing material.
- Screw union nuts into the remaining holes.
It is better not to remove the protective film until the end of installation to avoid damage.

Marking the fastenings
To hang the radiator evenly, you need to draw guidelines for yourself. It is convenient to do this with a pencil directly on the wall.
To mark it correctly, you should do the following:
- Determine where the center of the window opening is and draw a vertical line through this point.
- Measure down 6-12 cm from the window sill and draw a horizontal line.
- Measure the distance from the center of the radiator to the mounting points. Put it aside on both sides from the center of the horizontal line drawn earlier. Draw vertical lines through the obtained points.
- Measure the distance from the top edge of the radiator to them. Put the result down along the vertical lines drawn in step 3. This will give you the top drilling points.
- Step back 50 cm down. This will be the location of the lower fasteners. The center distance is not always 50 cm. If the device is a non-standard size, this value must be verified separately.

Before marking, it is necessary to check whether the window sill is mounted evenly. If there is a curvature, it is best to hang the radiator parallel to it.
Otherwise, it will seem that the heater is hanging crookedly. For systems with natural circulation, a small slope of the device (1-1.5%) along the coolant flow is important. This is done to avoid water stagnation.
The final stage
It is a direct battery mount.
 To do this, you need to do the following:
- Drill holes in the indicated places, insert plastic dowels, screw hooks into them.
- Hang the device (at least 2.5 cm from the wall).
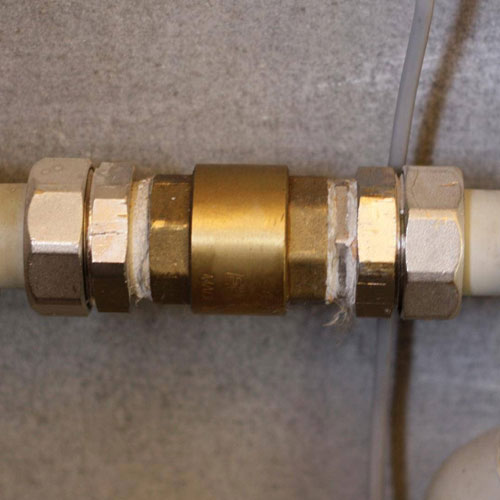
- Bring in the heating pipes and connect them to the device.
- Tighten the union nut and seal.
- Slowly fill the radiator with water, then release the air.
Heating radiator piping
This is the type of connection of the battery to the pipelines.
There are 3 options:
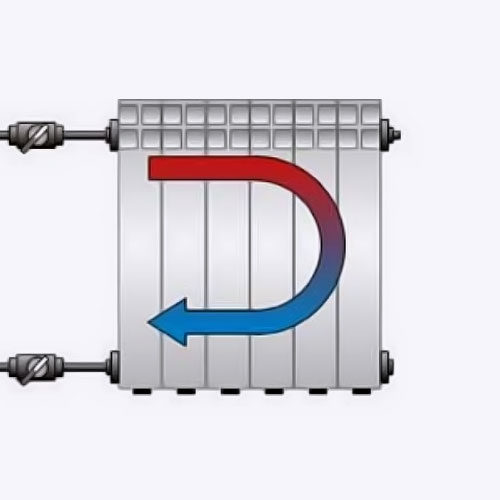
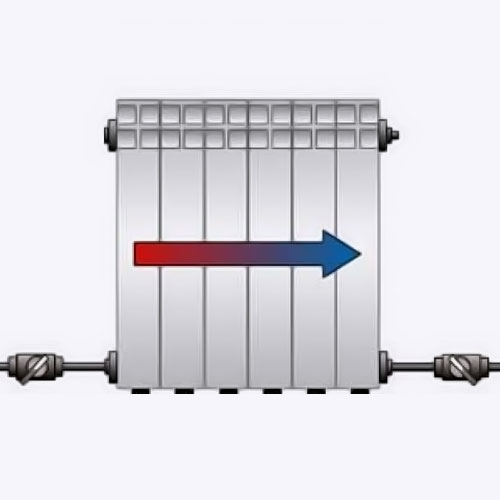
One-way connection
It is also called lateral. Direct and return connections are connected on one side. This is the most common connection method in apartments, which can be single- or double-pipe. The disadvantage of this method is that the radiator heats up unevenly, the hottest section is near the feed point. Because of this, heat loss is about 10%.
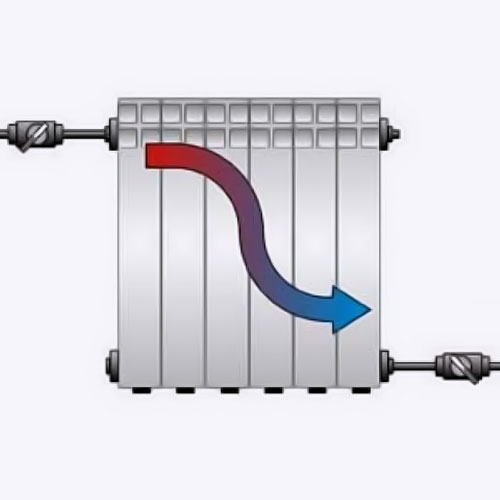
Saddle connection
It is often found when the heating system layout is located in the floor. The hot coolant moves up, then cools down and goes down. In terms of efficiency, this type of connection is in third place after one-sided and diagonal, since heat loss is 10-20%, so saddle connection is rare in multi-story buildings. But with this method, the pipes are well hidden, which has a positive effect on the interior design.

