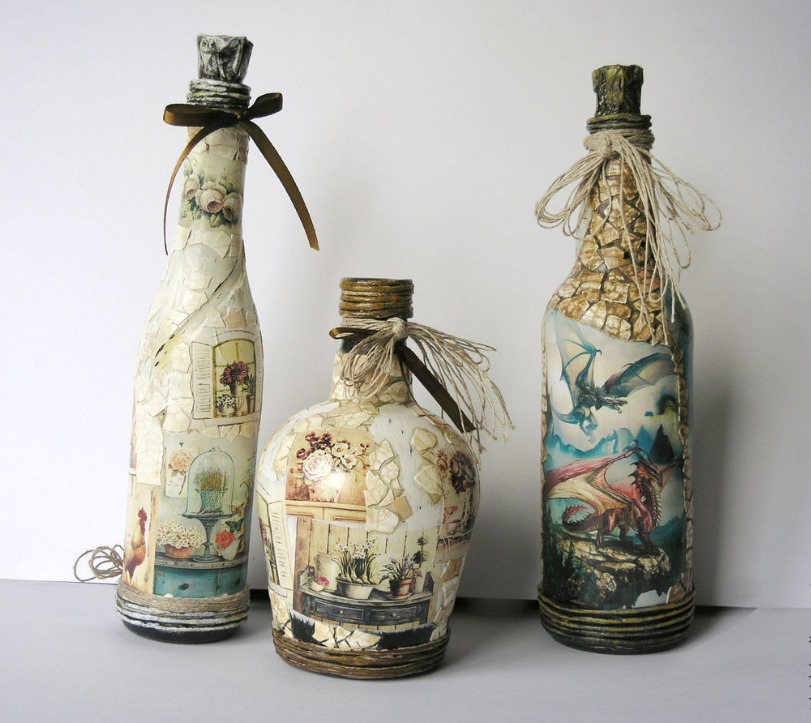
Undoubtedly, decoupage is one of the most popular and simple techniques for beautiful and unusual decoration of interior items. Decoupage does not require special knowledge and materials, any needlewoman can get acquainted with this technique at home and with minimal costs. Craftswomen from all over the world most often choose bottles of various elegant shapes and sizes for decoupage, because each of us has some unusual bottle at home that we feel sorry to throw away, but we can’t find a use for it.
Content
- Types of decoupage
- Tools and materials for work
- What kind of varnish do you need for decoupage?
- Types of varnishes for decoupage
- What kind of glue do you need for decoupage?
- How to Decoupage a Bottle with Napkins
- Preparing the glass surface
- Primer
- Cutting out the ornament
- Sticking a picture on a bottle
- Fixing the result with varnish
- Decoupage a bottle using rice paper
- Conclusion
- VIDEO: DIY bottle decoupage.
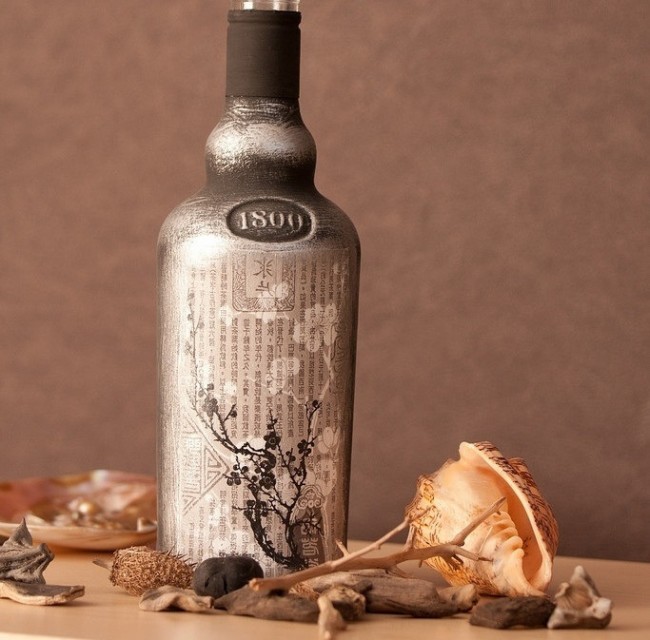
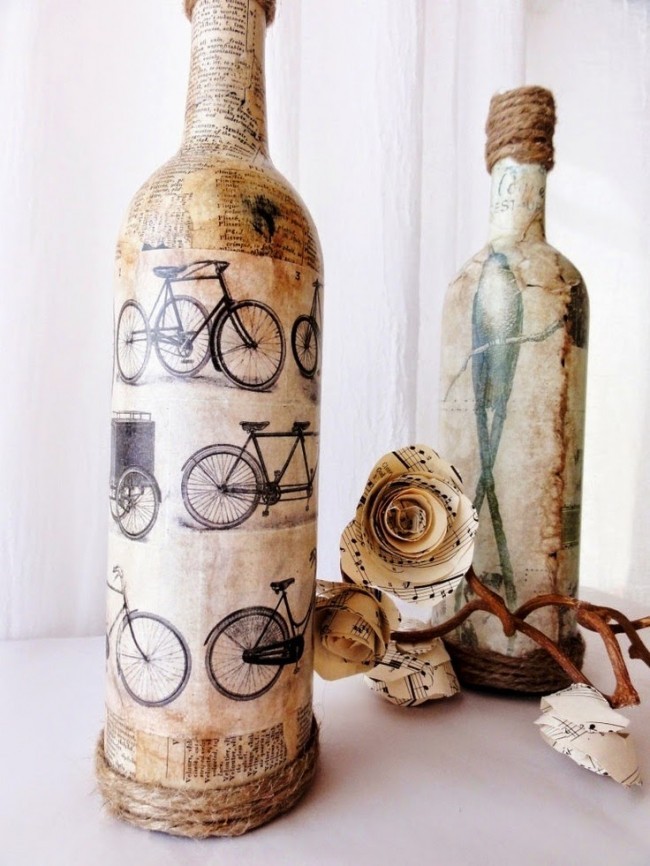
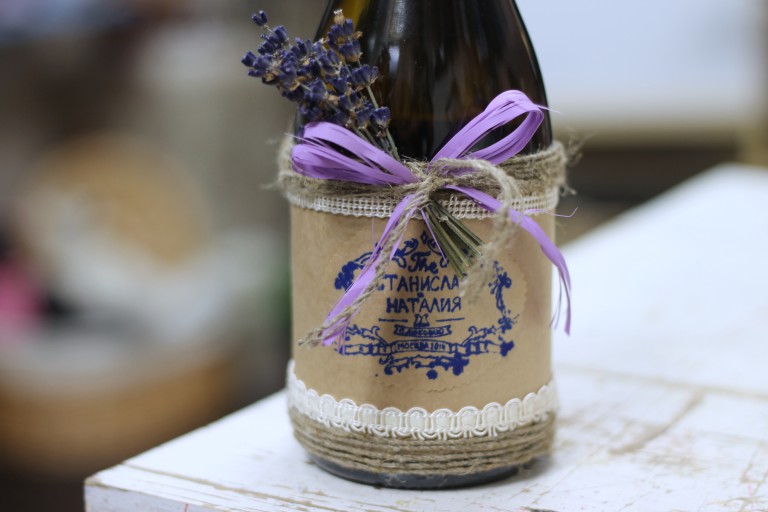
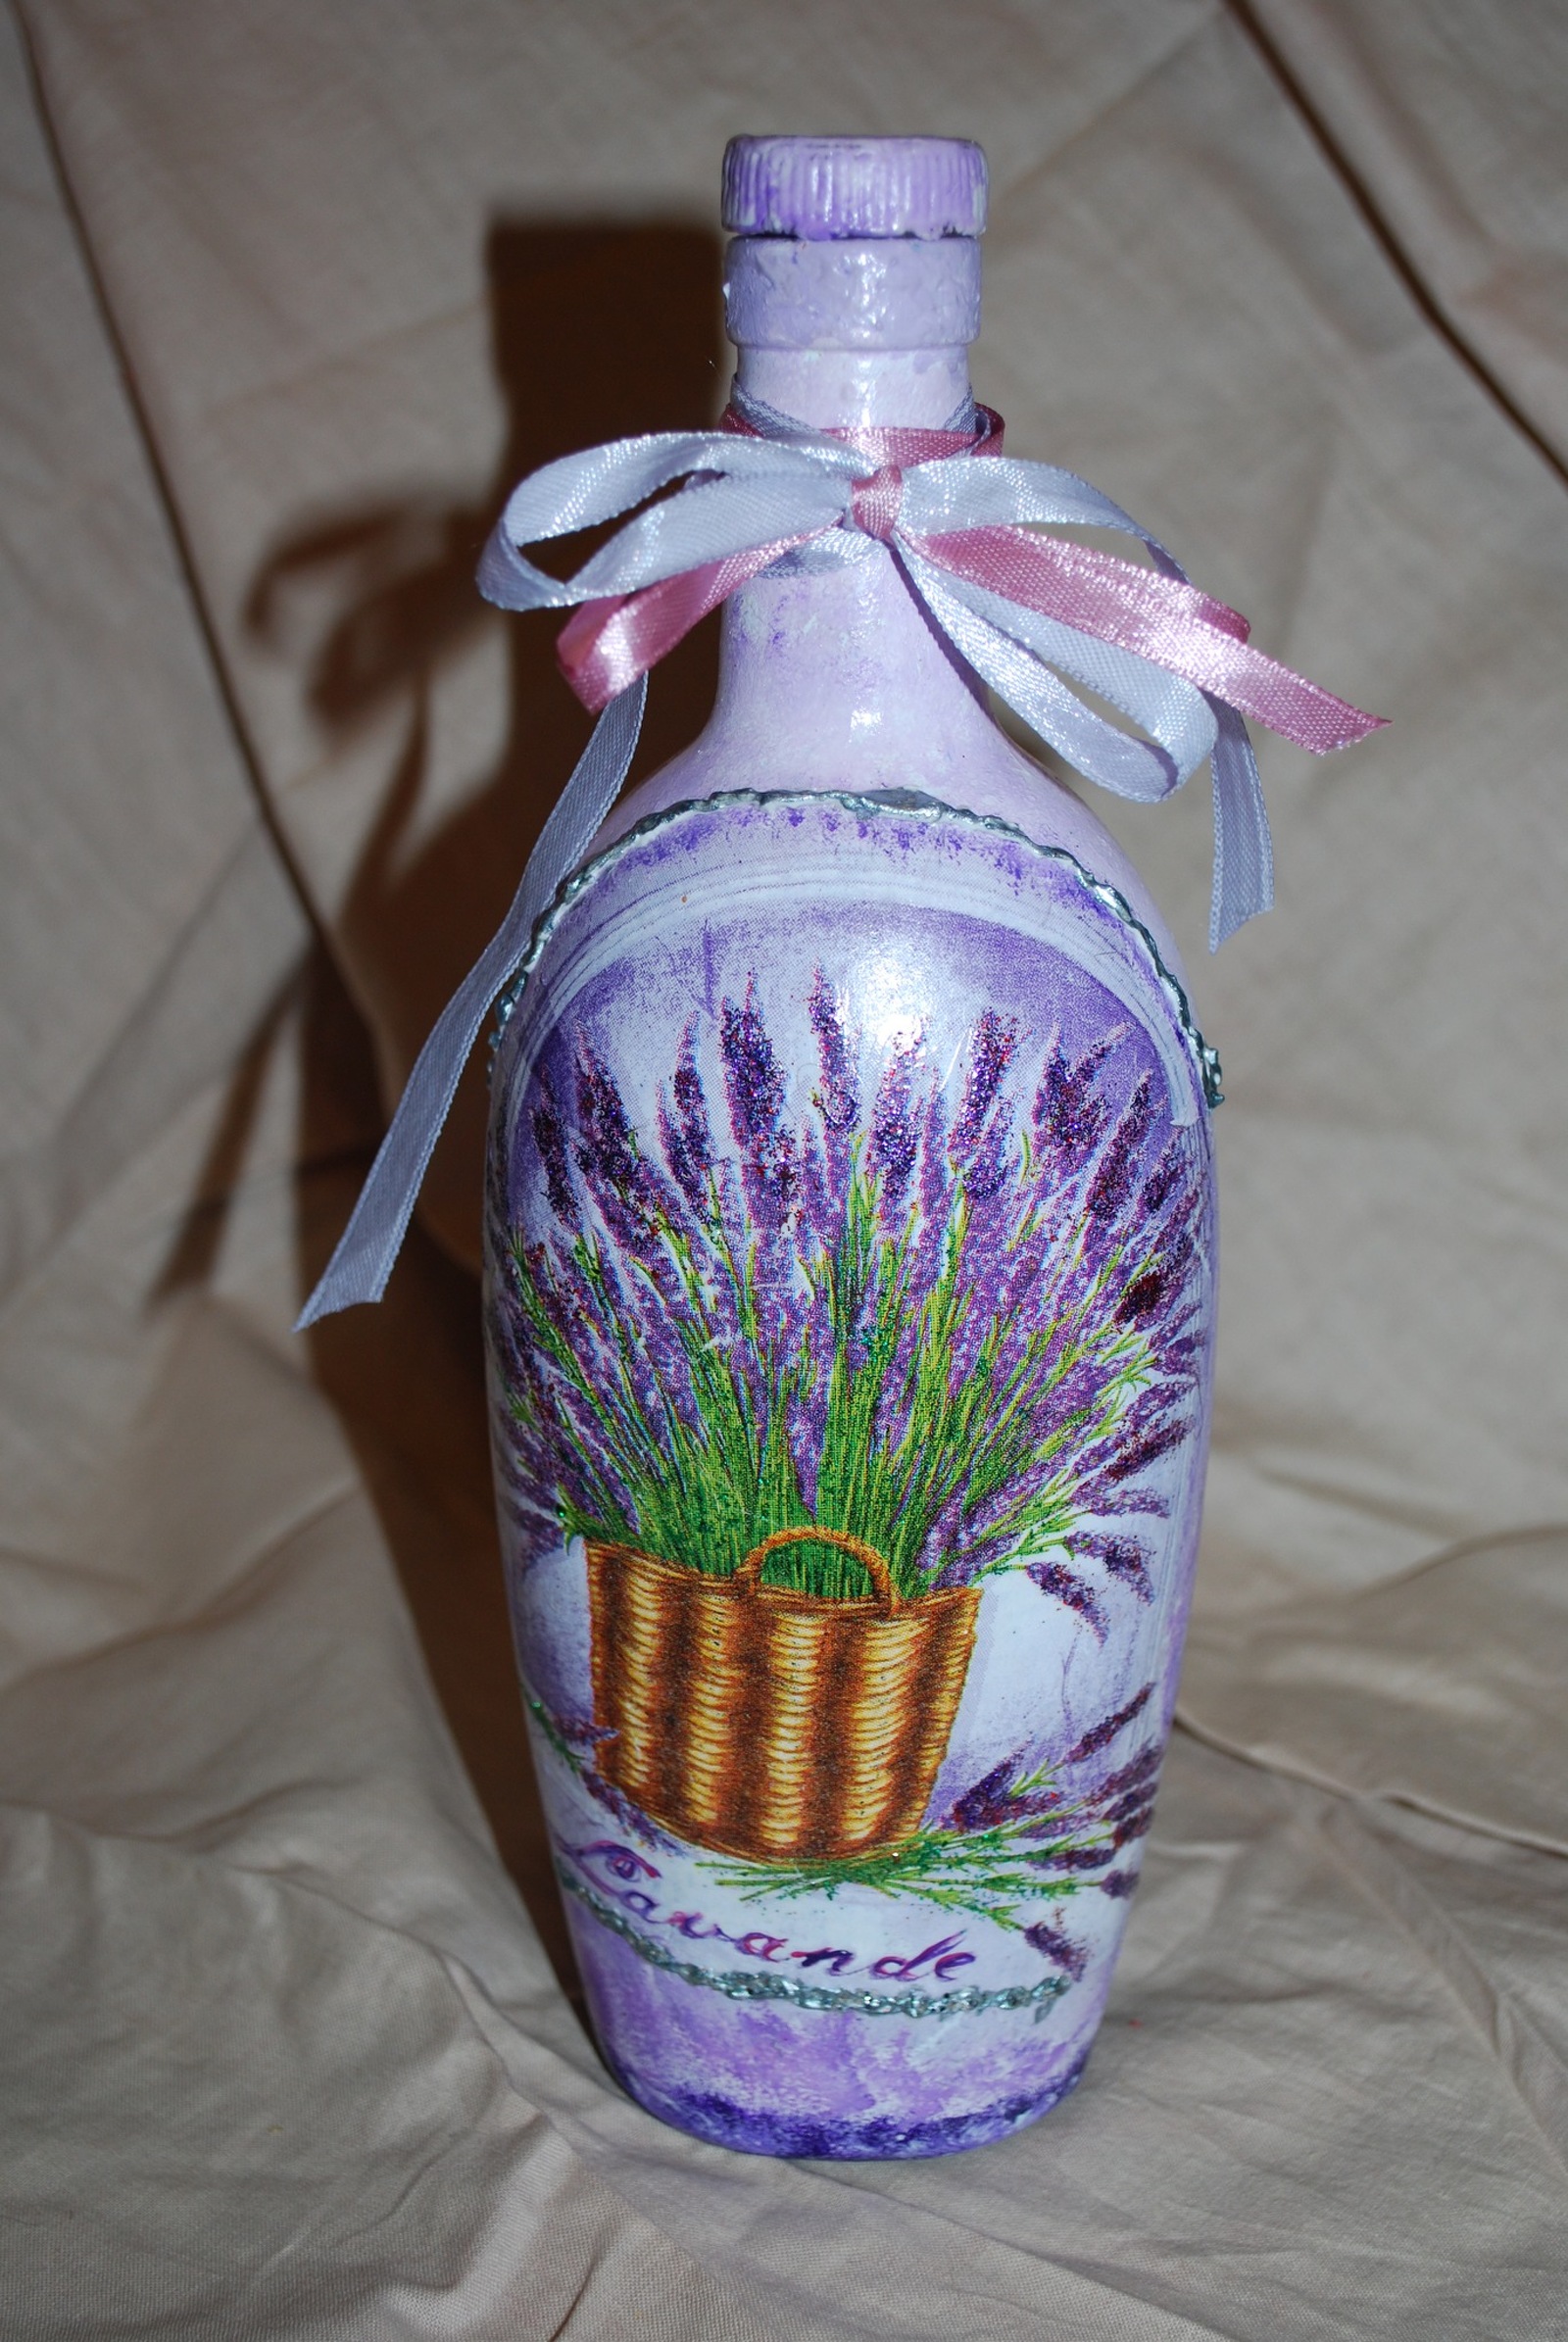
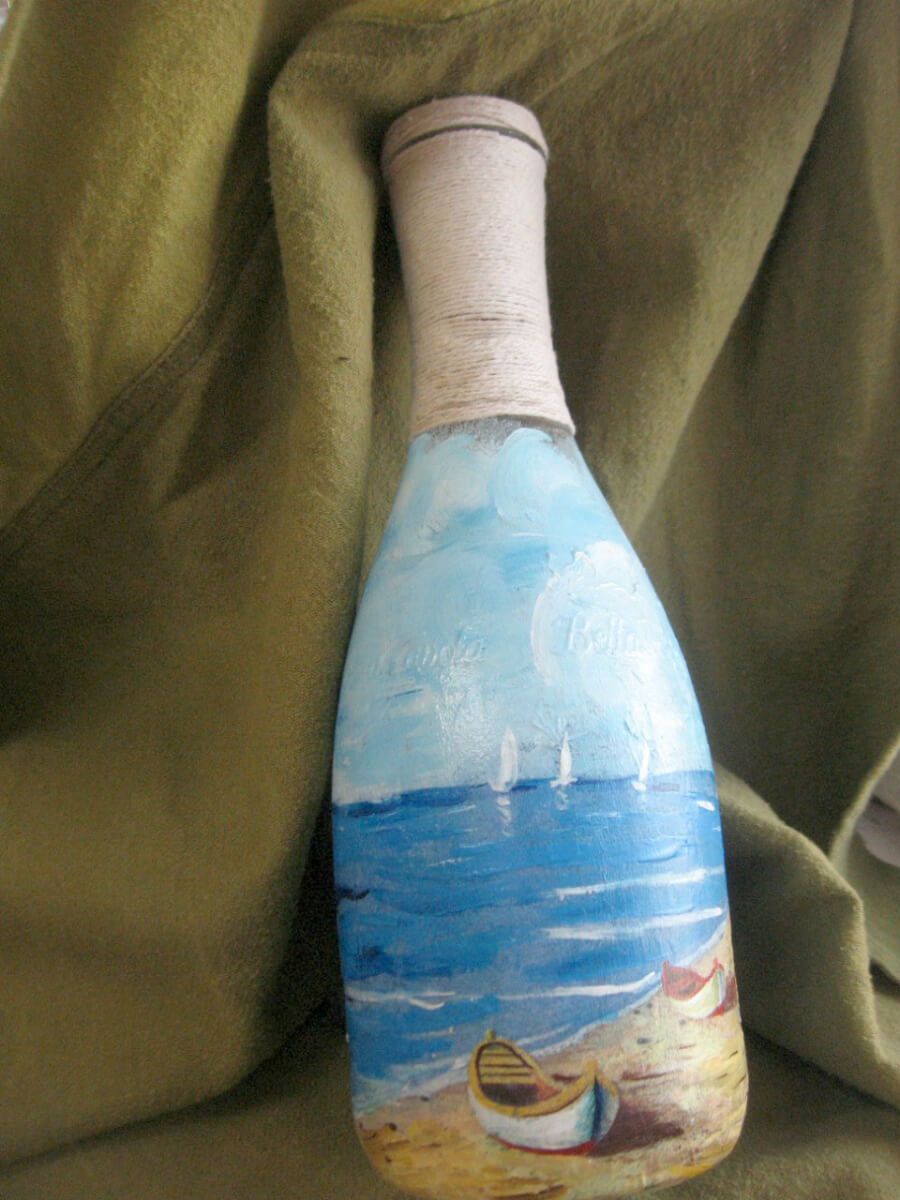
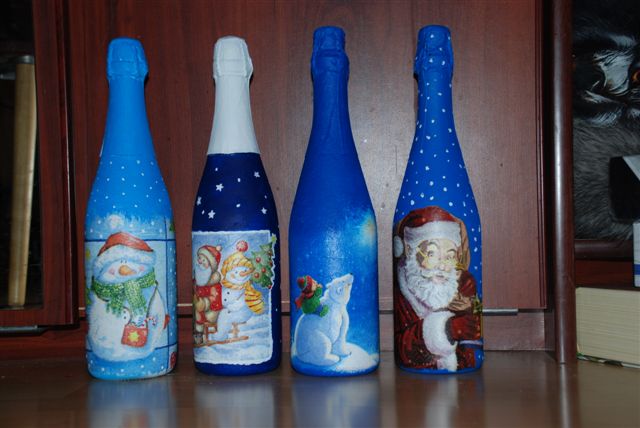
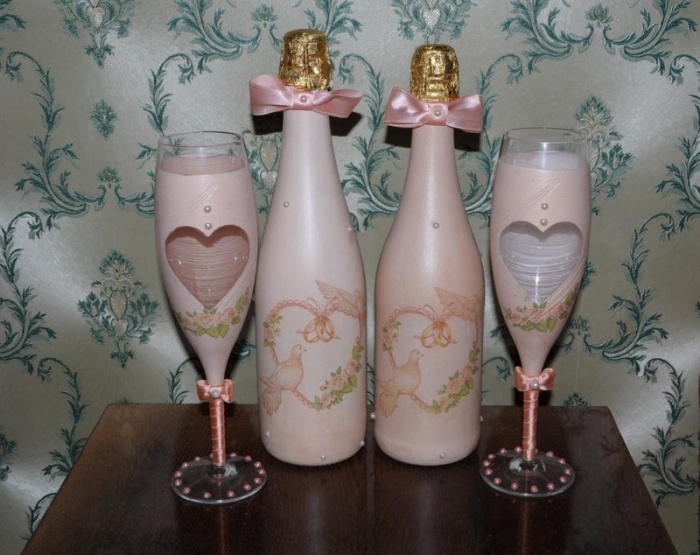
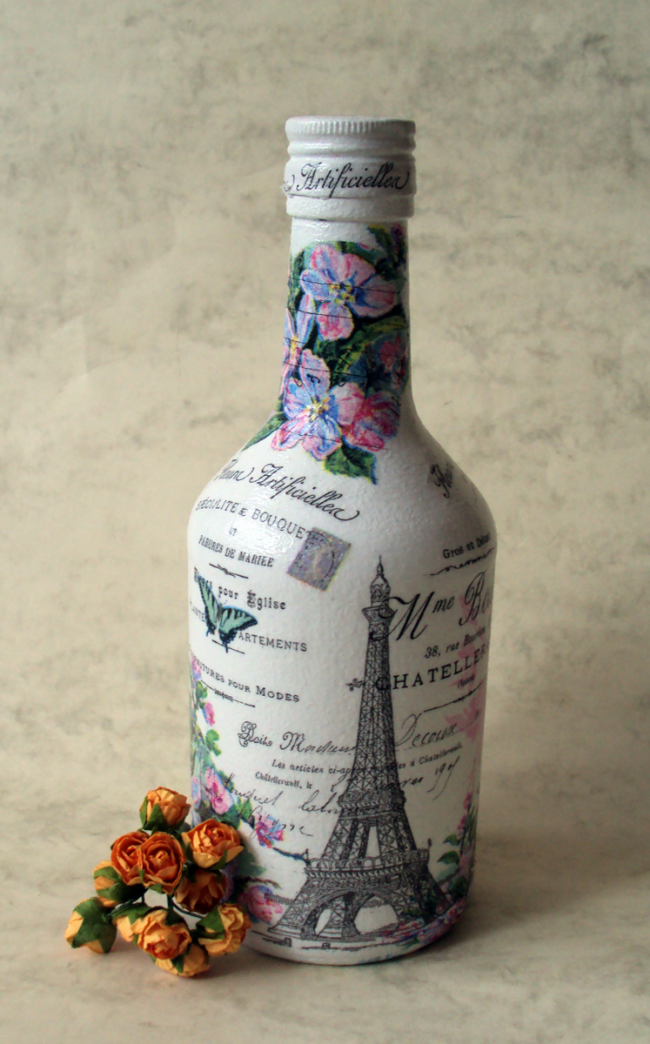
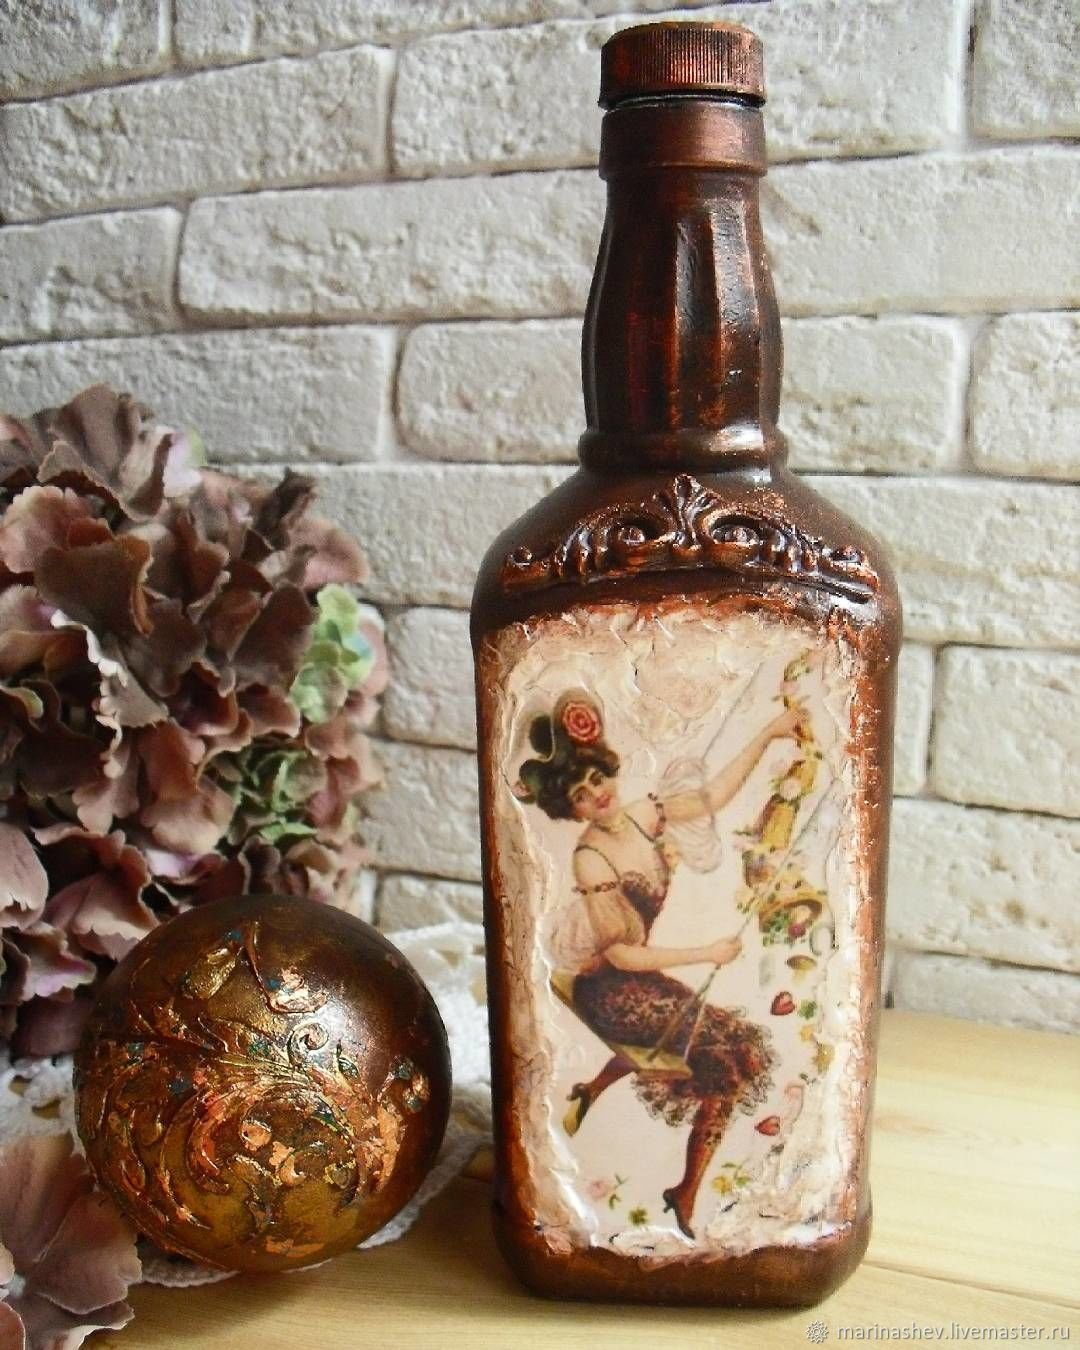
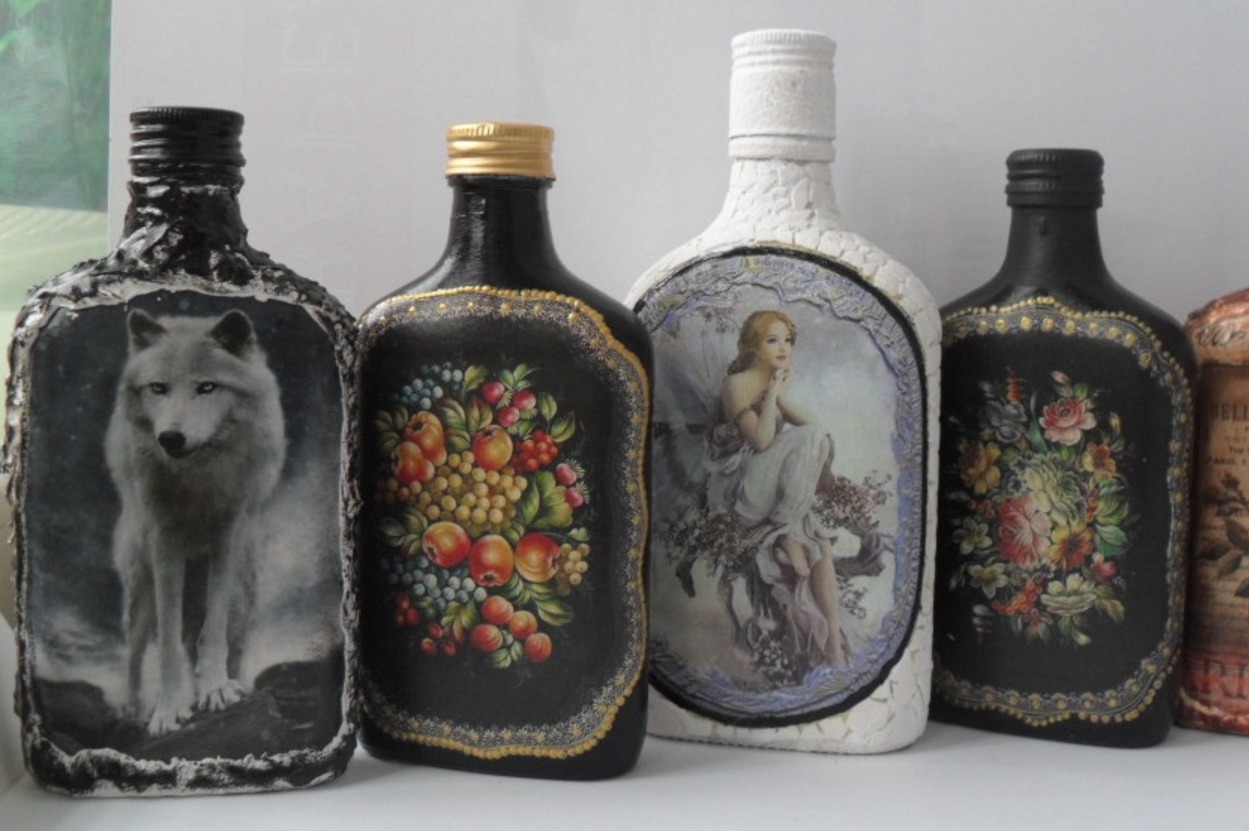
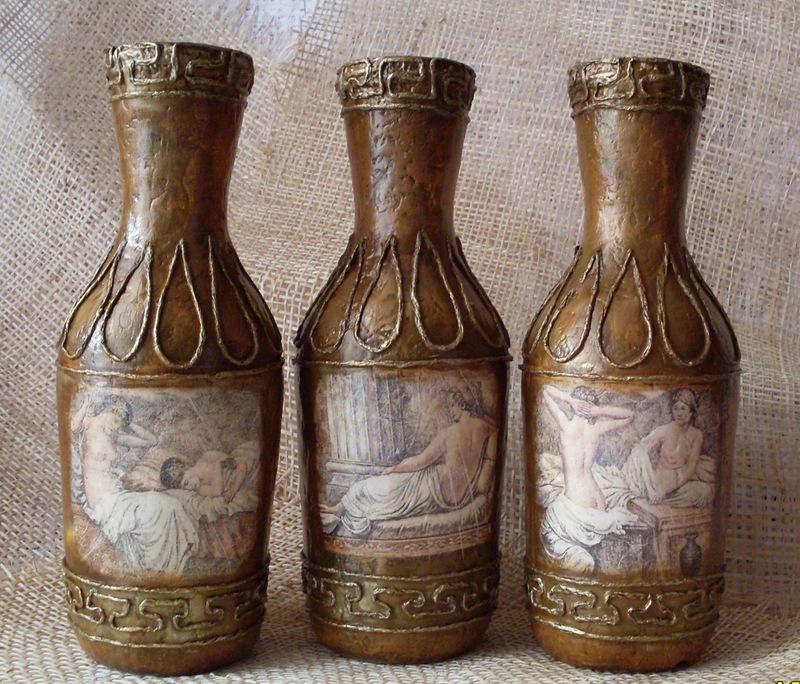
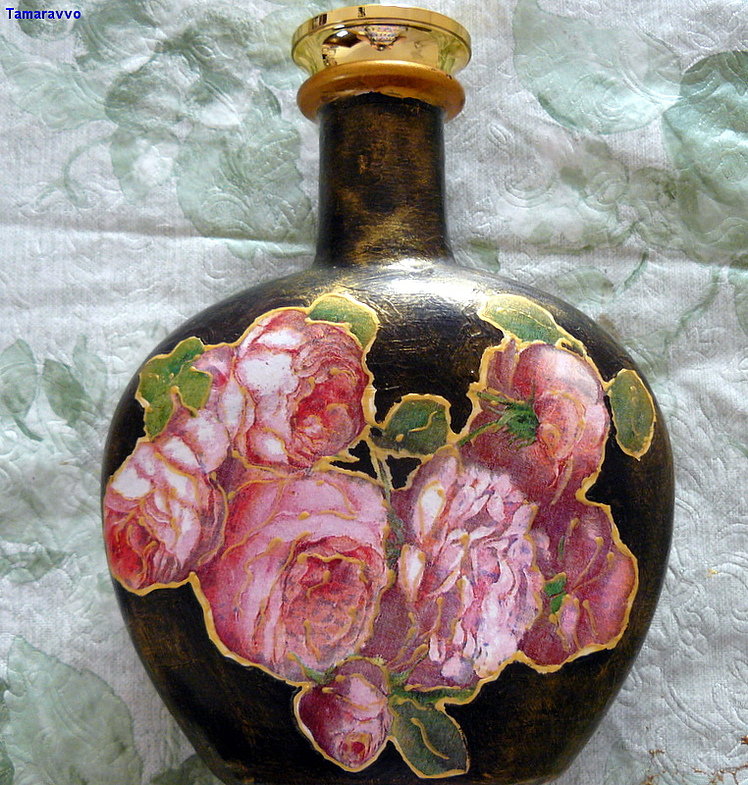
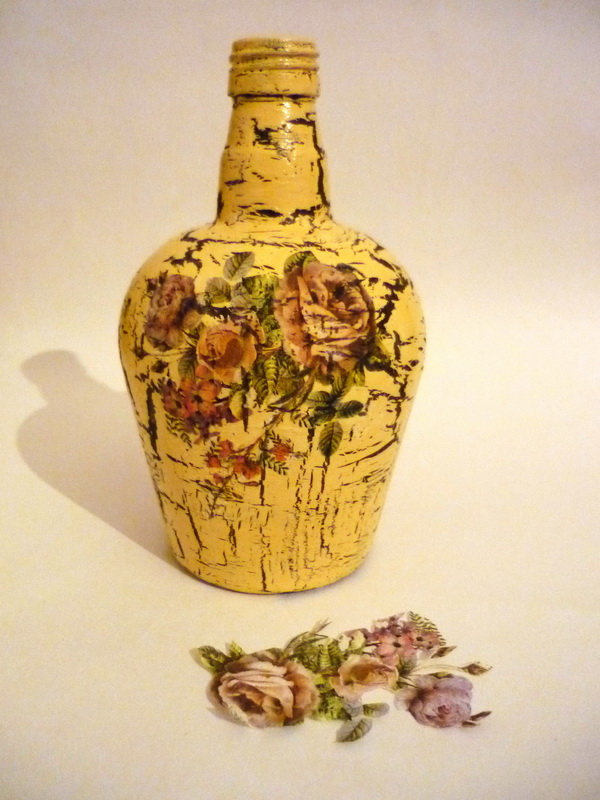
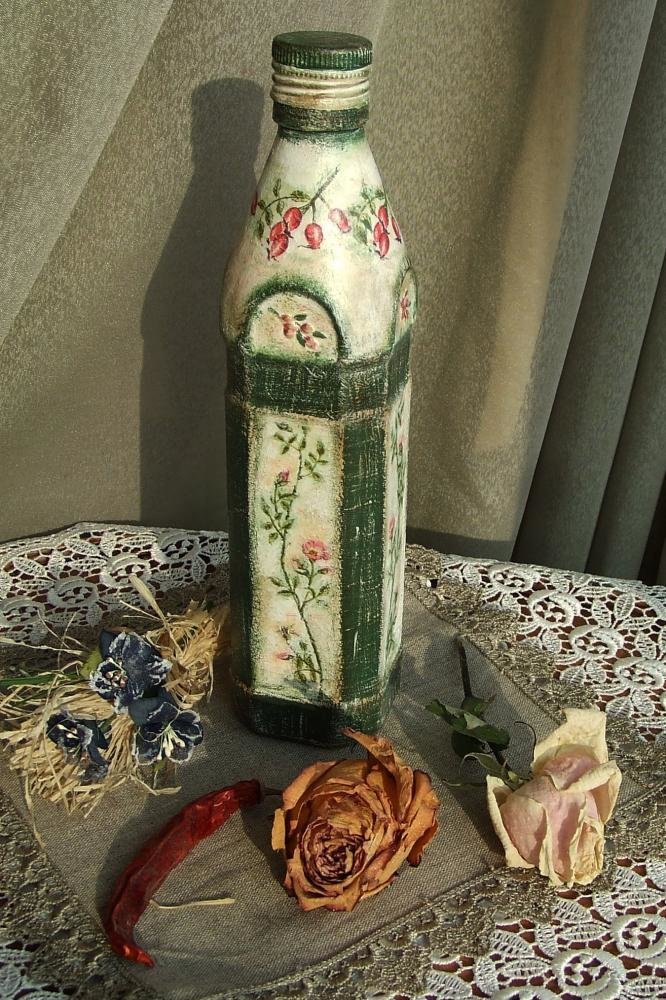
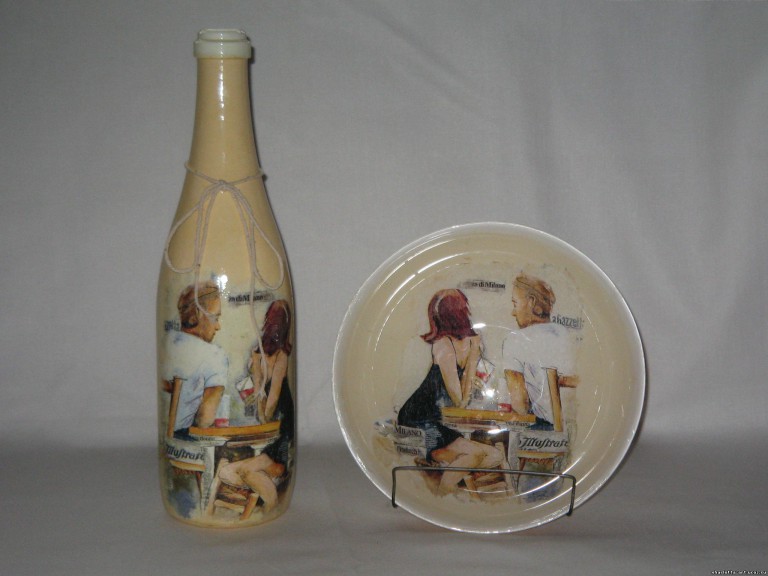
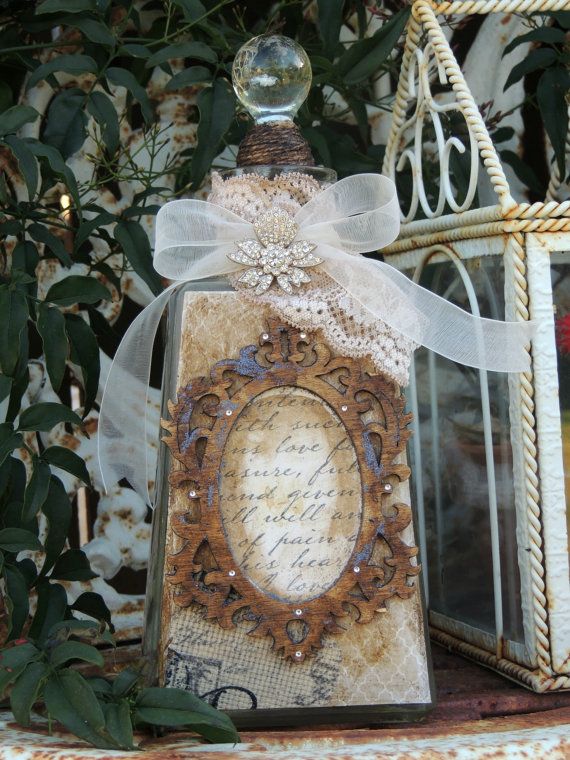
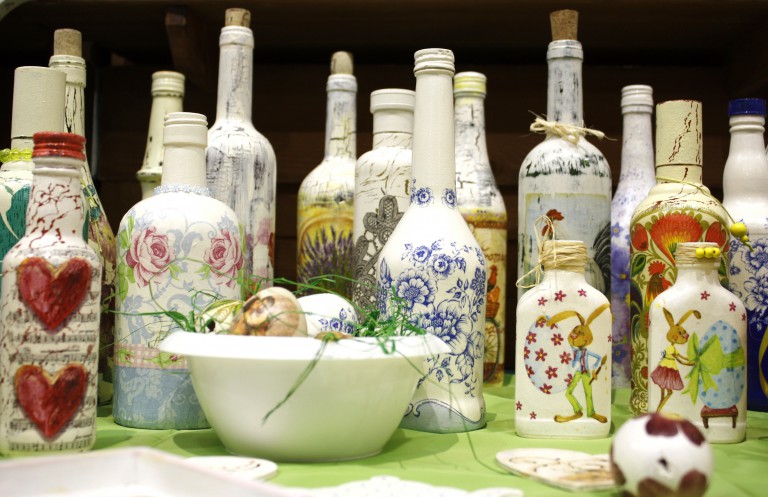
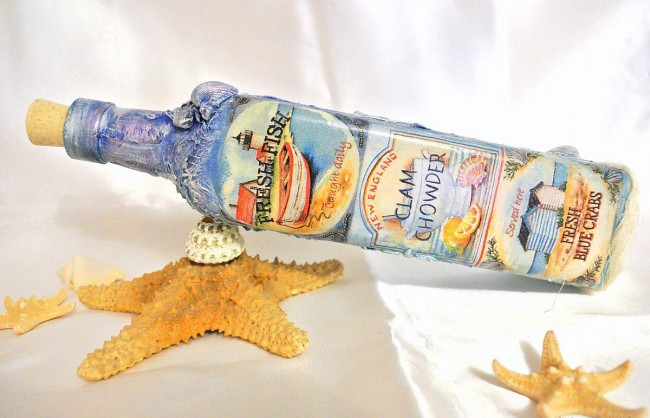
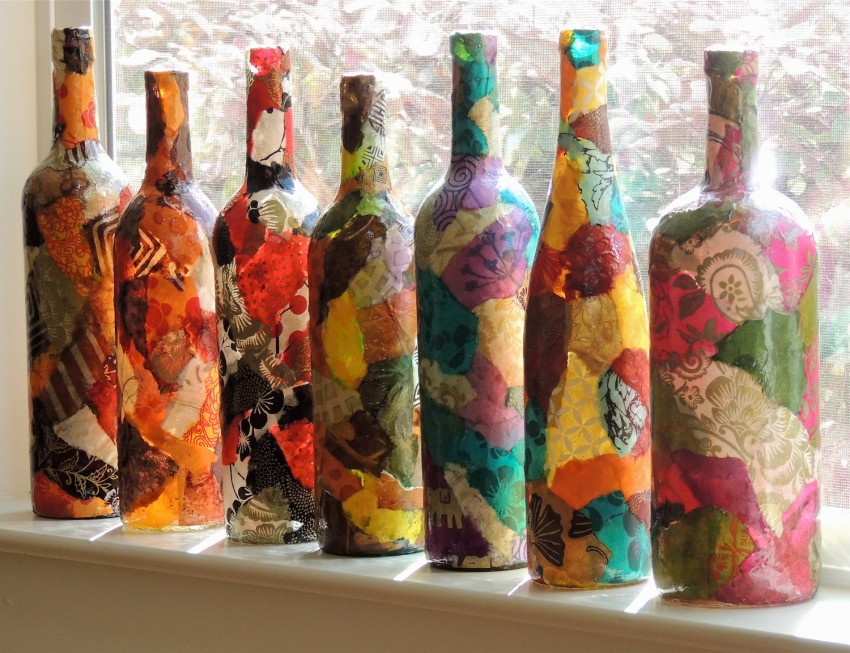
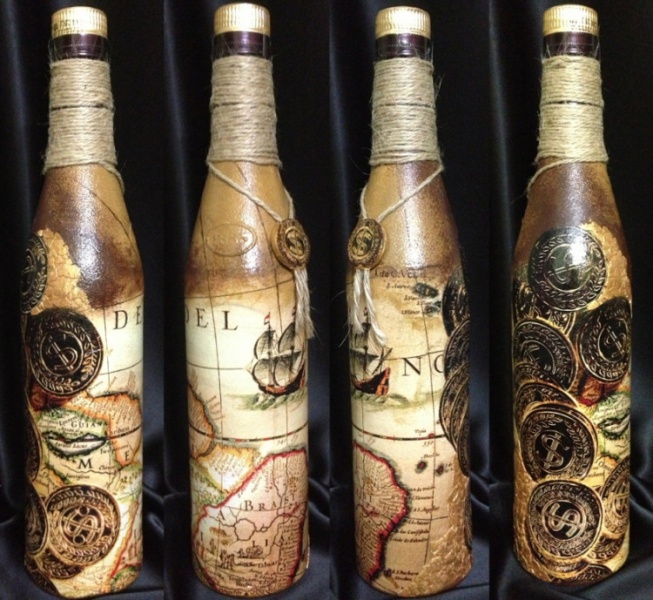
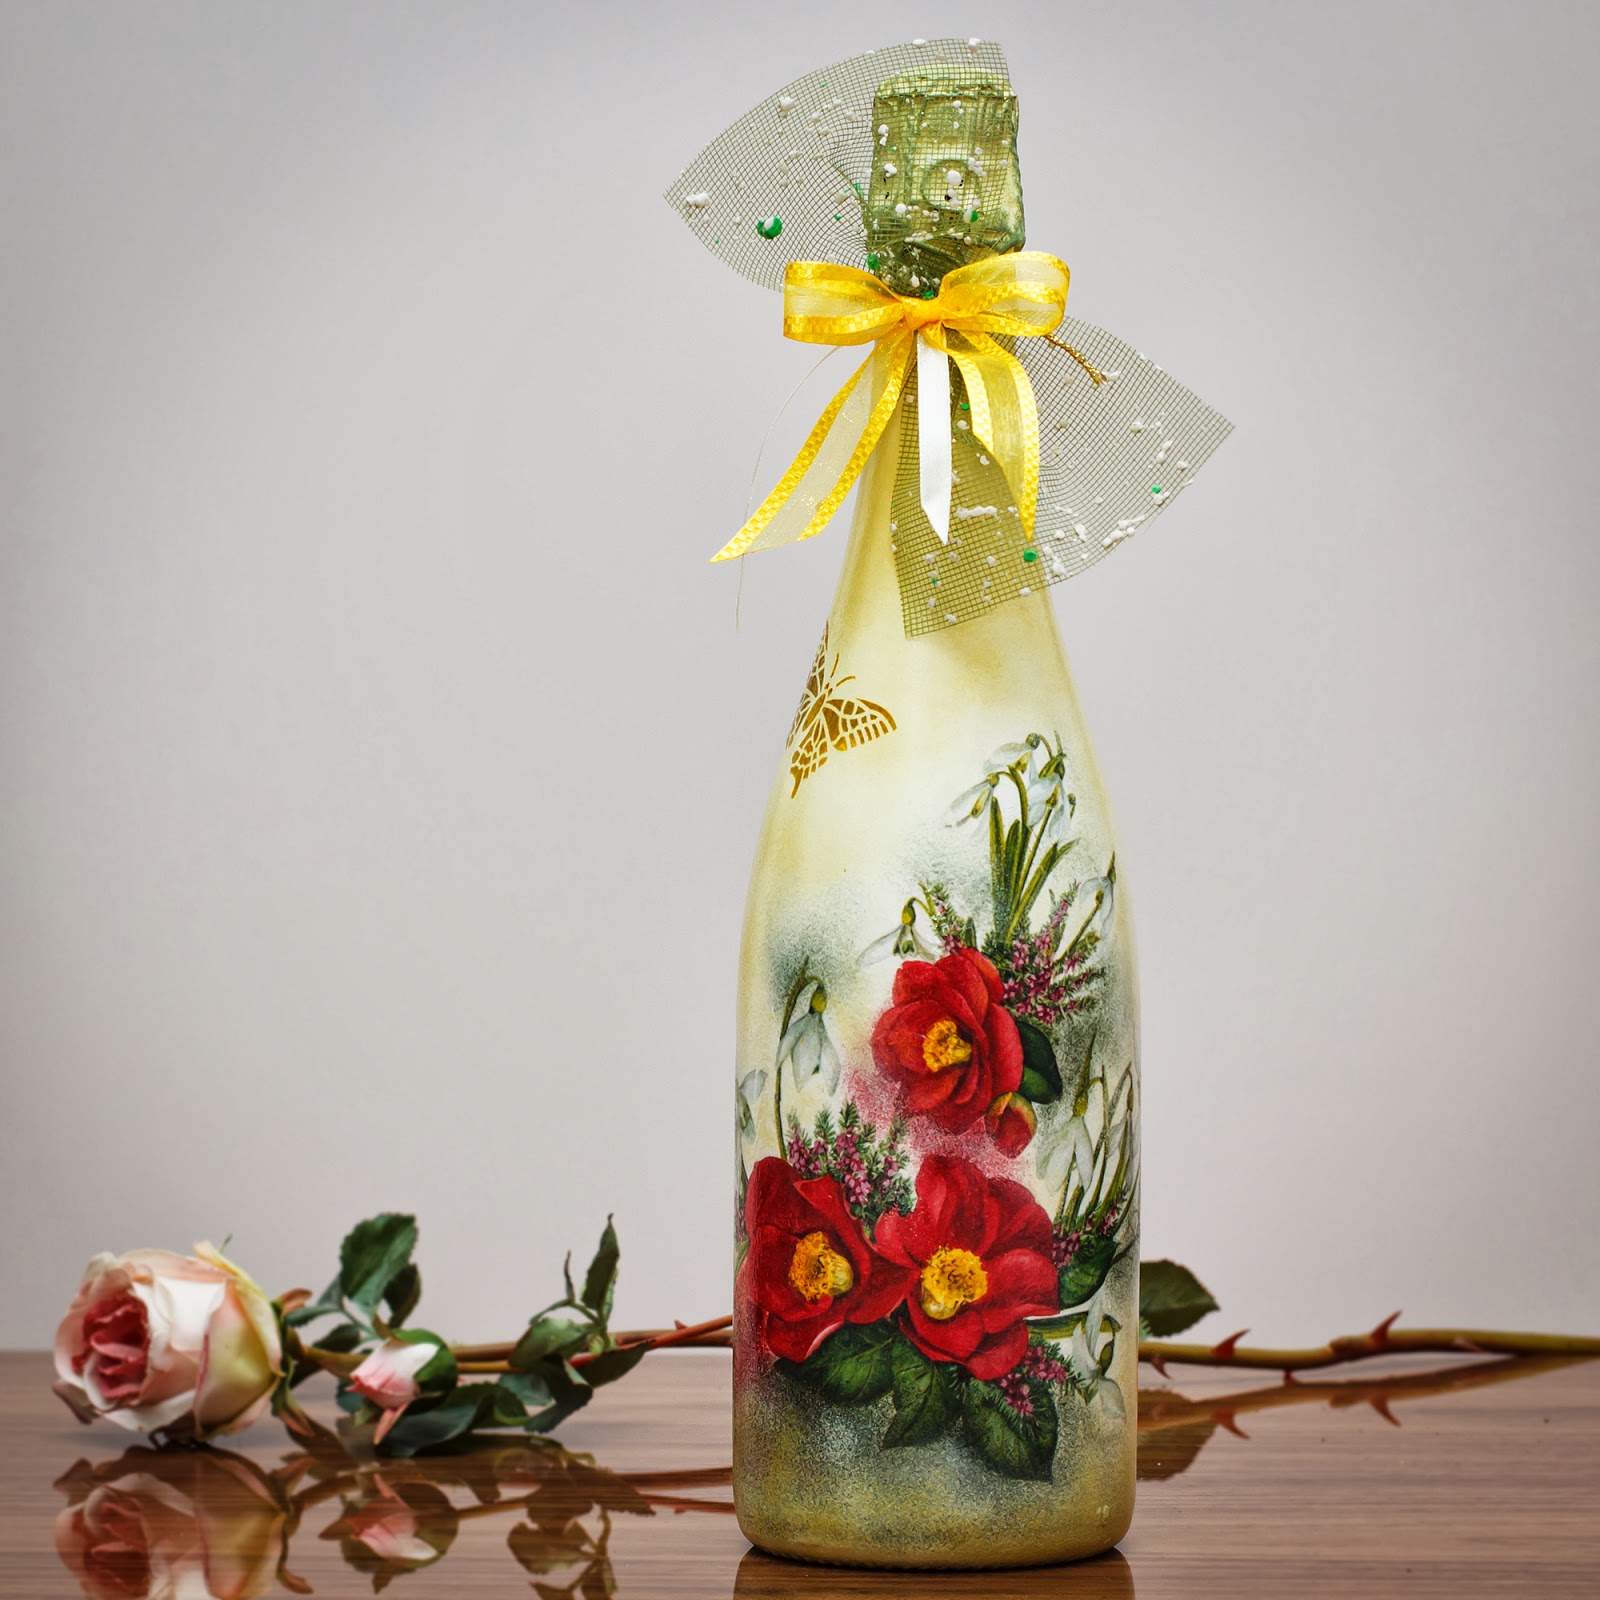
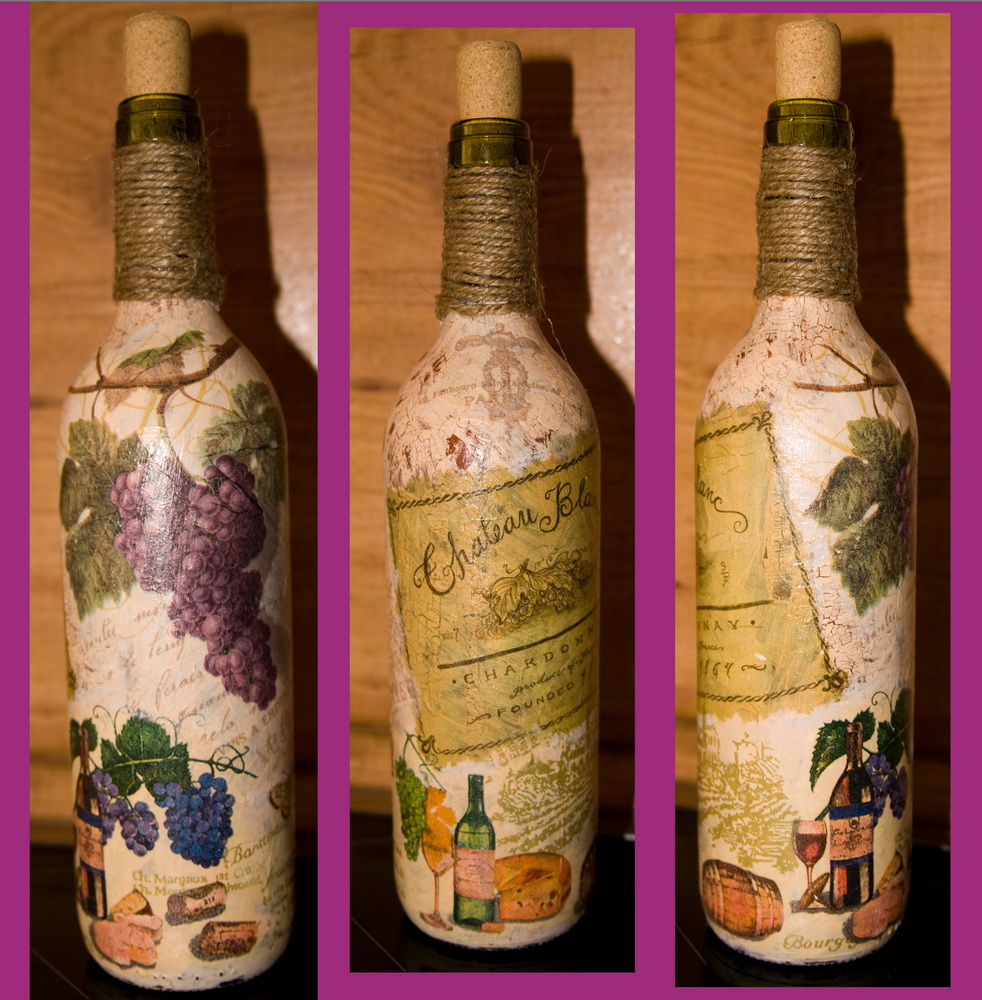
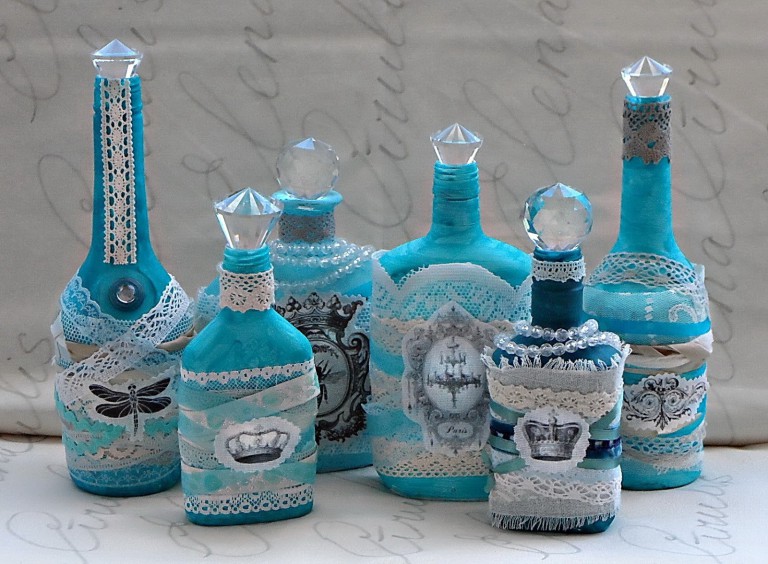
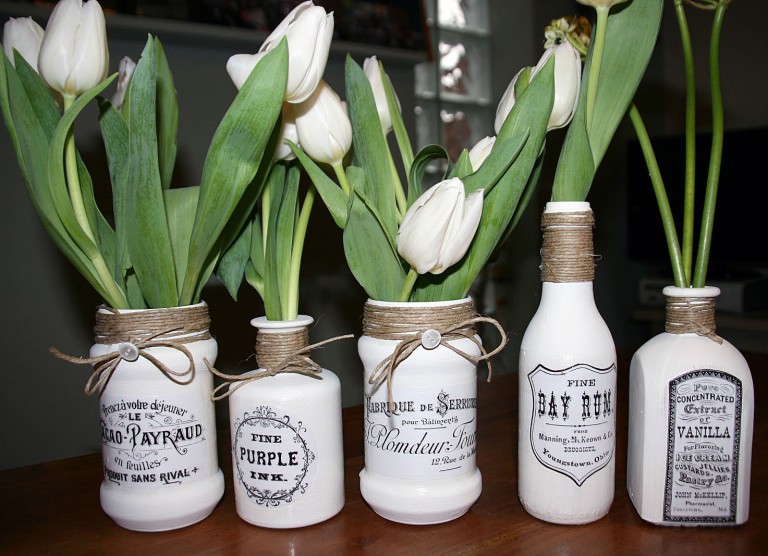
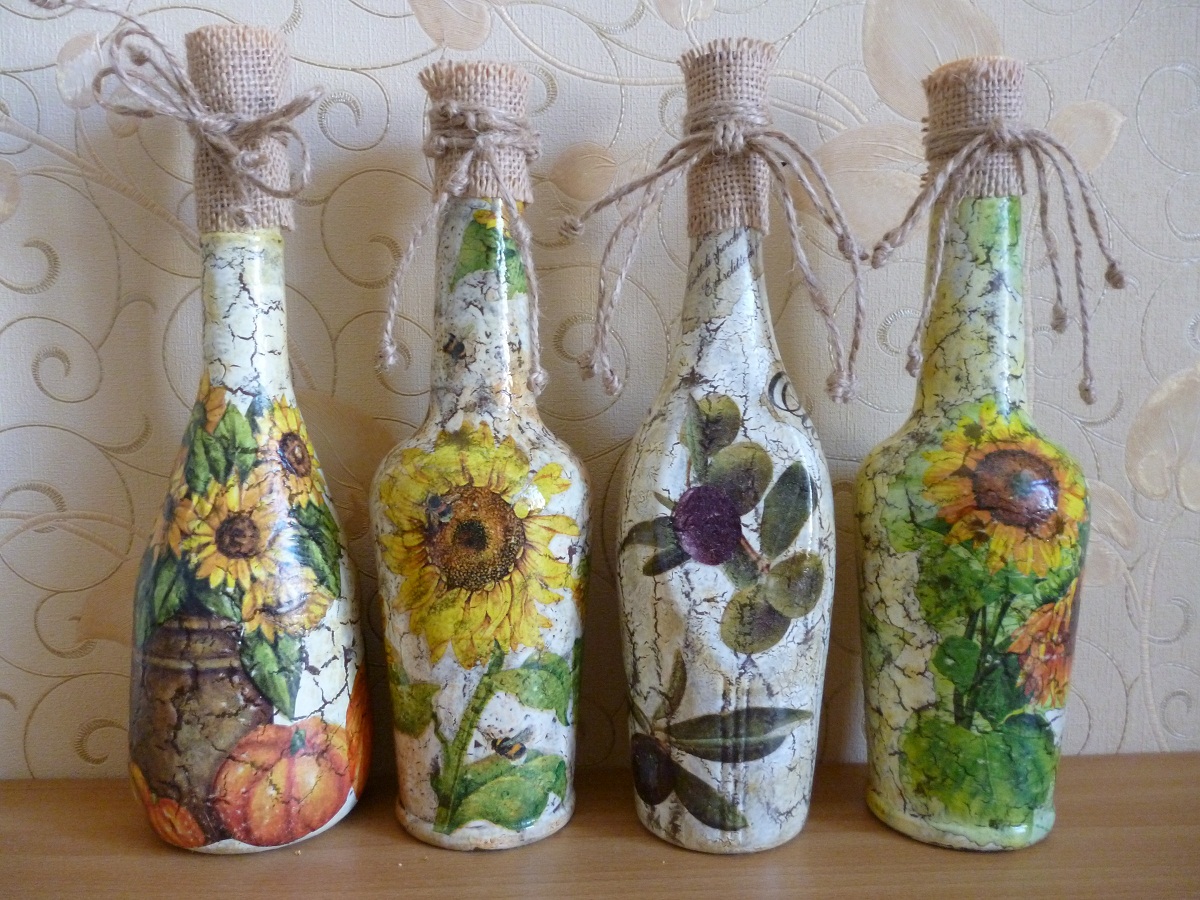
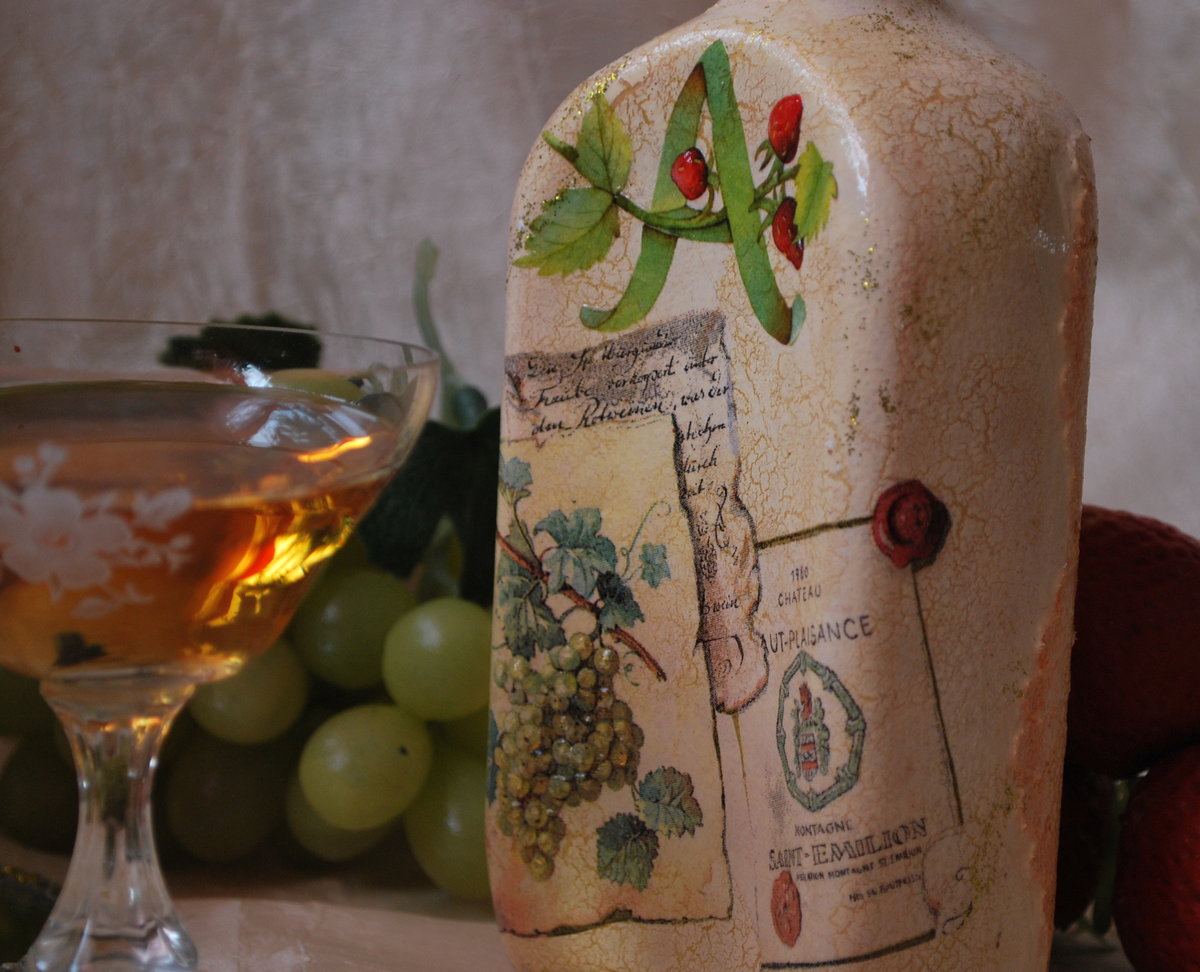
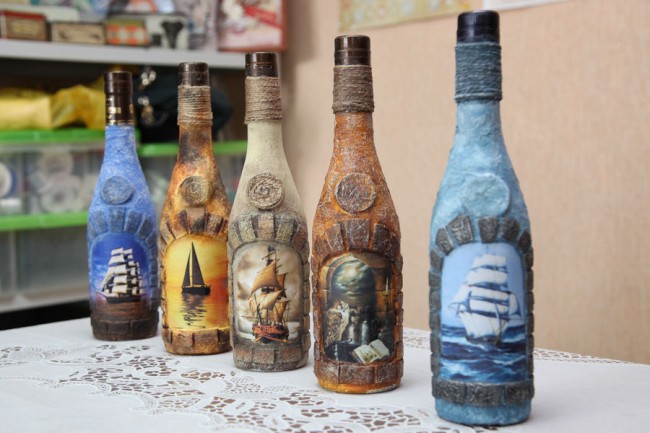
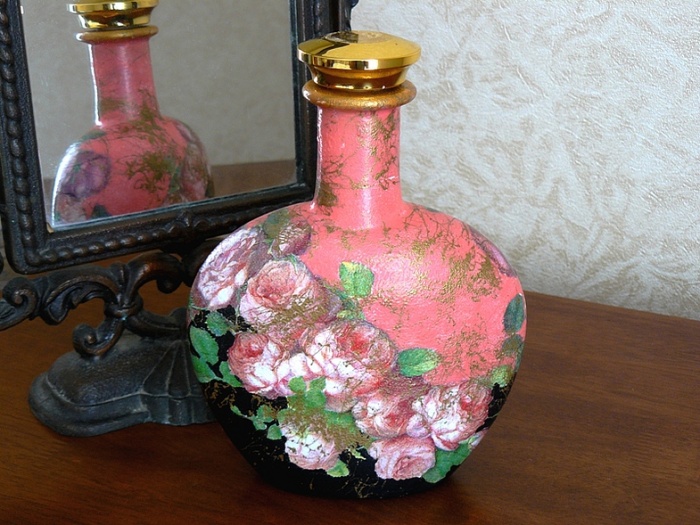
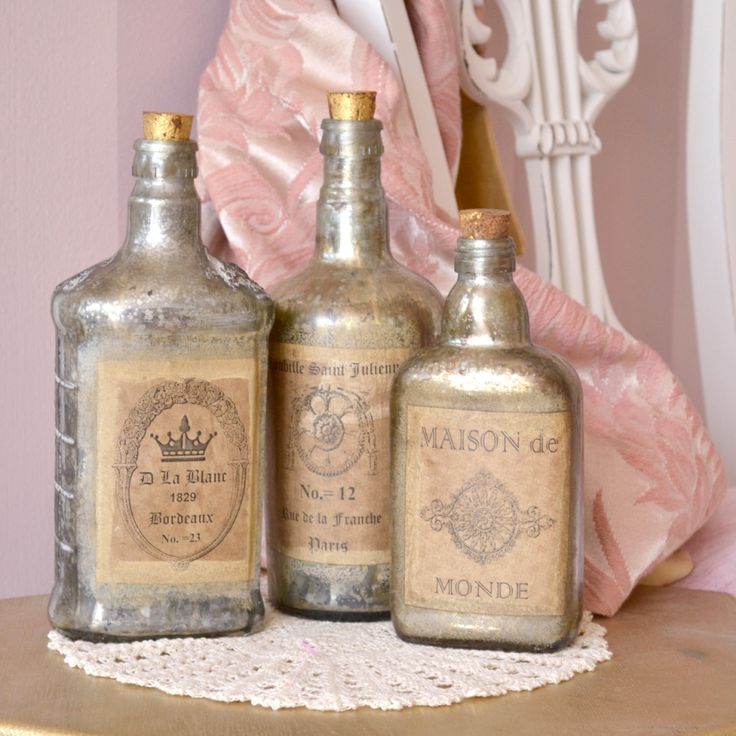
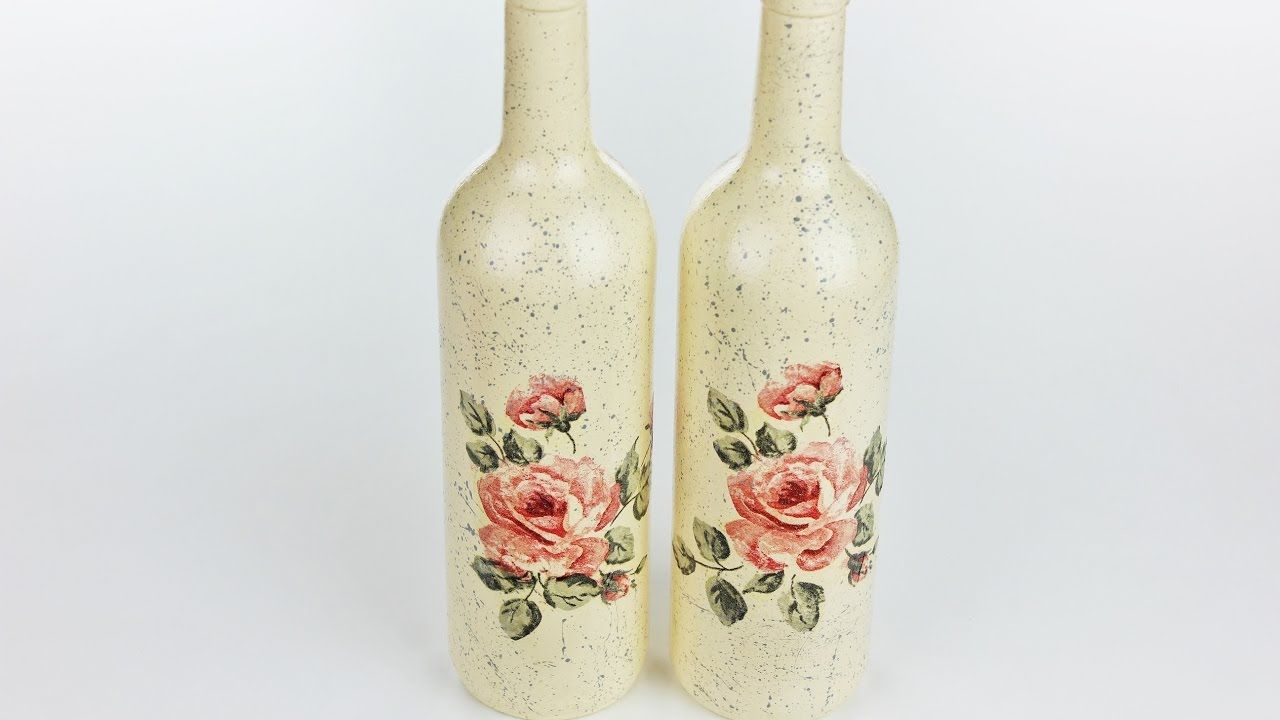
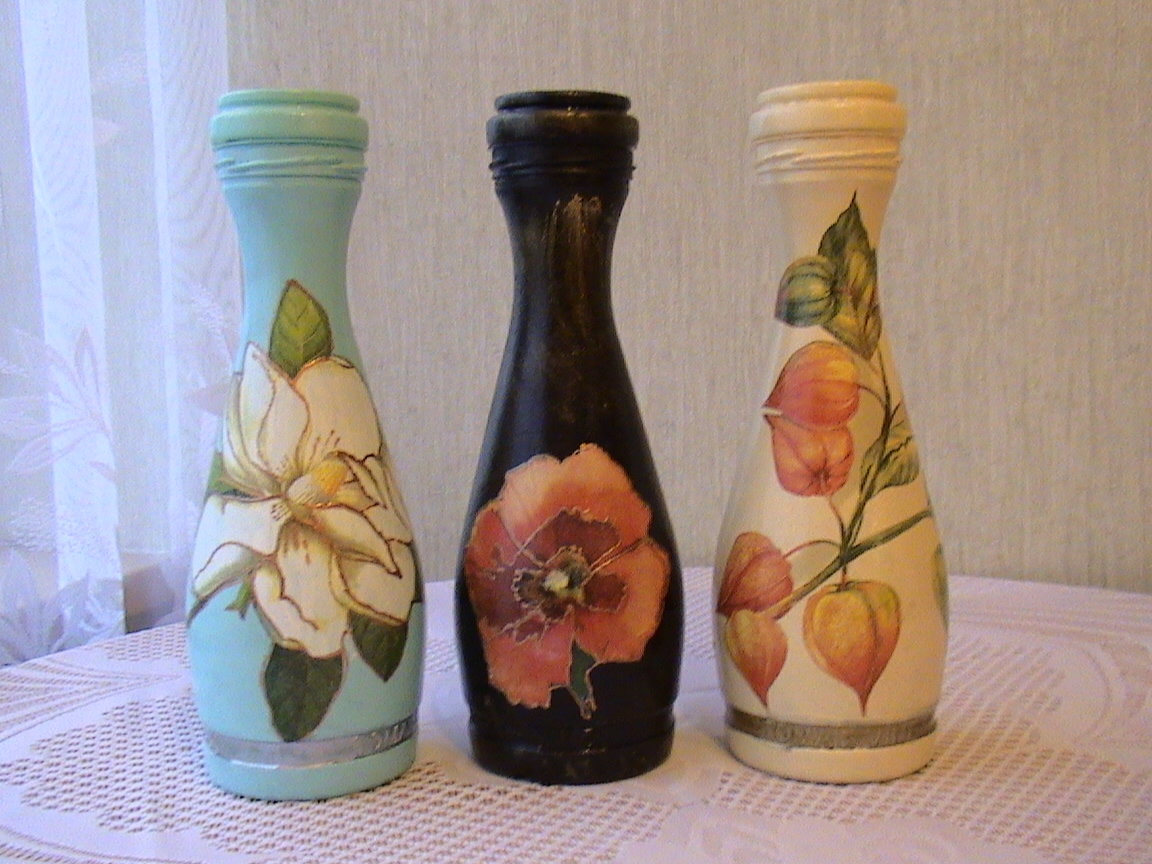
- 50 DIY Wine Bottle Decoupage Options:
Types of decoupage
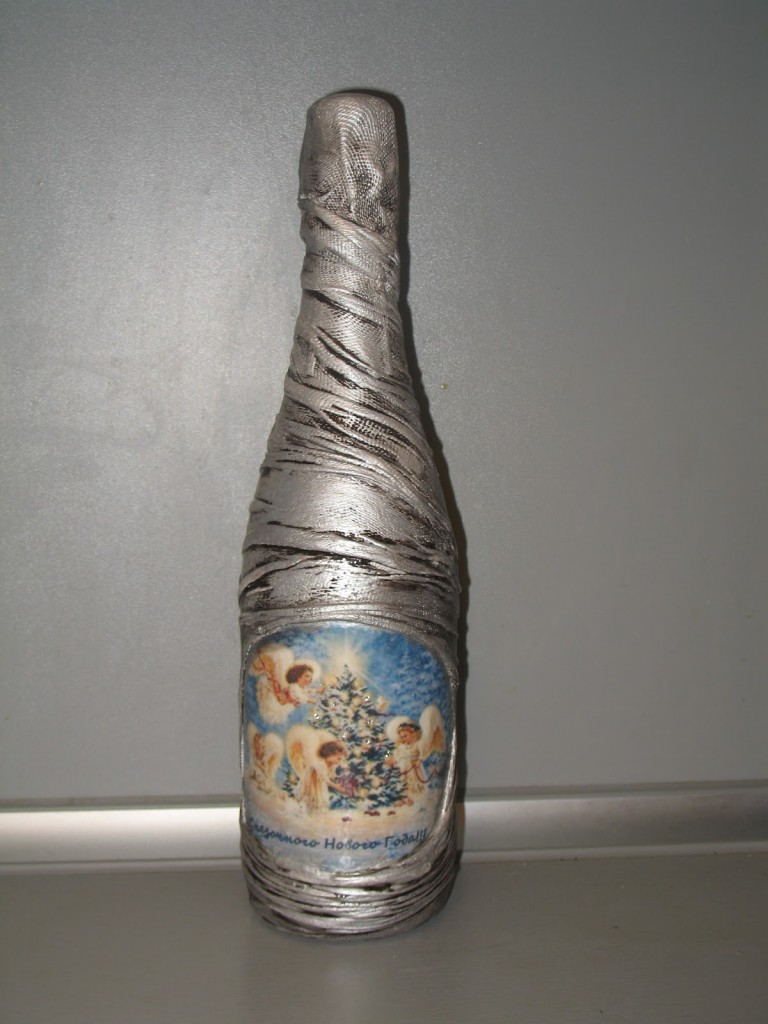
This technique has its roots in ancient China, where artisans decorated screens, ceramic vases and even the facades of some buildings with drawings! But after the Great Silk Road was laid in the Middle Ages, the decoupage technique migrated to Europe and French craftsmen began to decorate furniture, dishes, and tapestries with paper ornaments. Despite the fact that decoupage is a type of decorative and applied art in China, it has a French name, and in translation means "to cut out". This is all about cutting out paper and gluing it to a surface. But modern craftswomen do not limit themselves to this, they tie unusual scarves and ribbons on the decorated bottles, glue rhinestones, beads. And they also apply a layer of paint on top of the decorations!
It is not surprising that decoupage has undergone many changes and acquired many types throughout its centuries-long existence. Of these, five main ones can be distinguished.
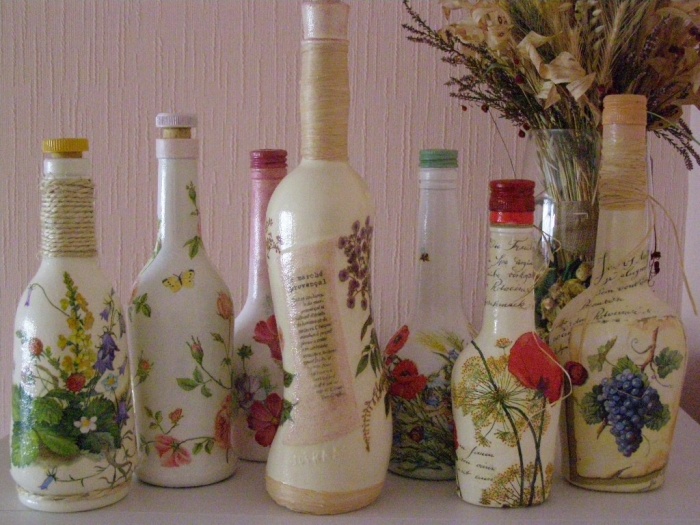
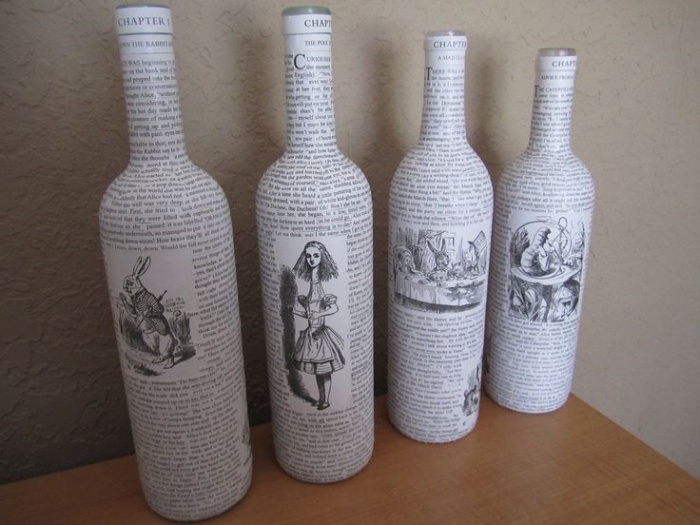
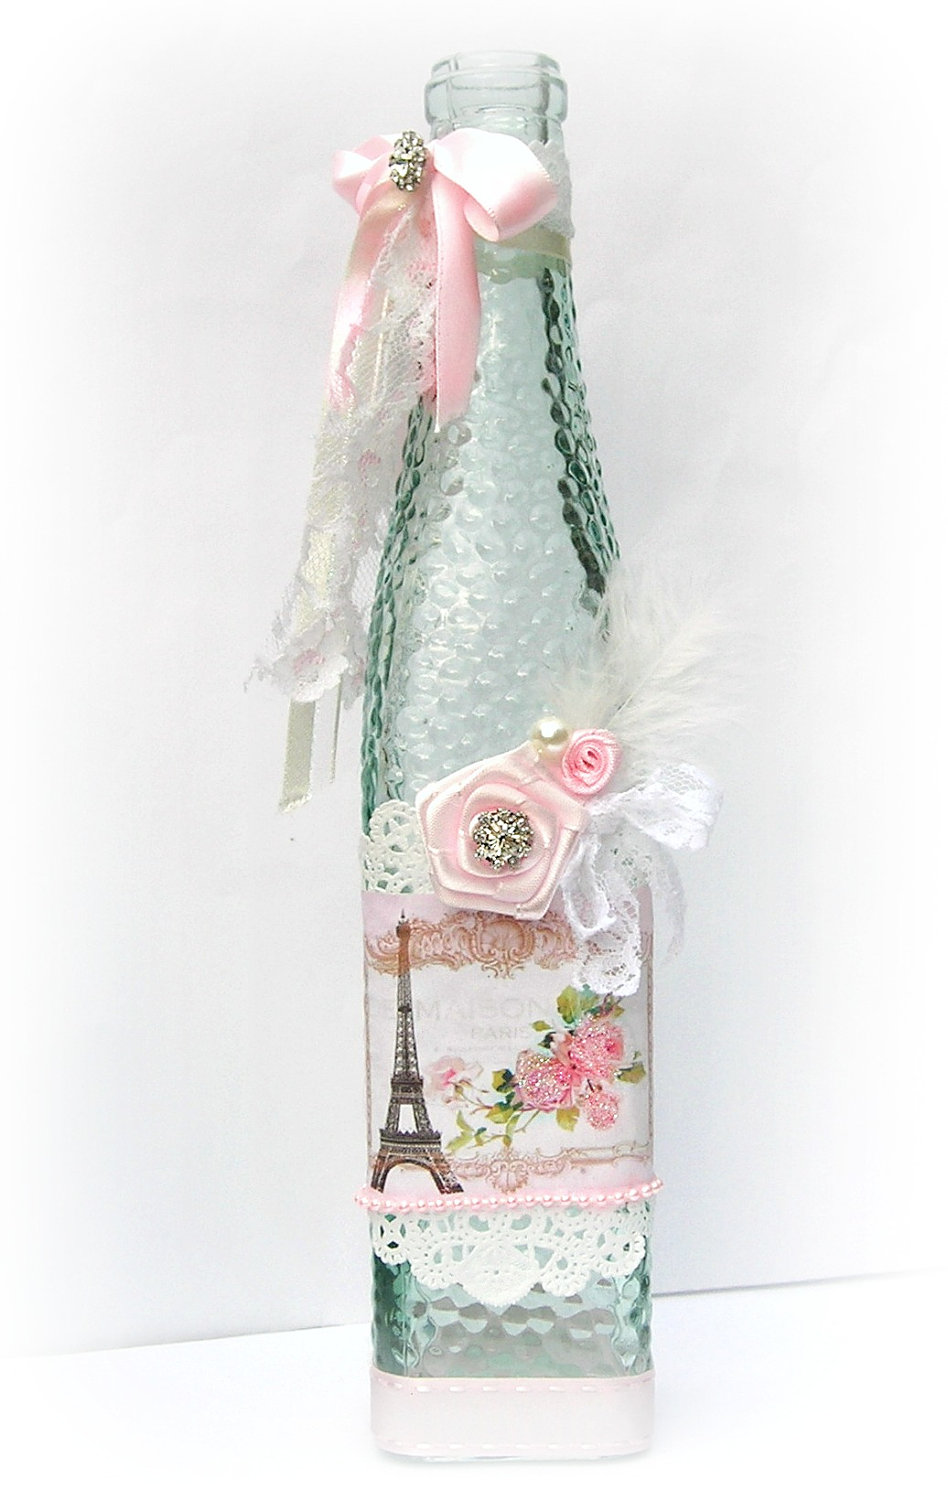
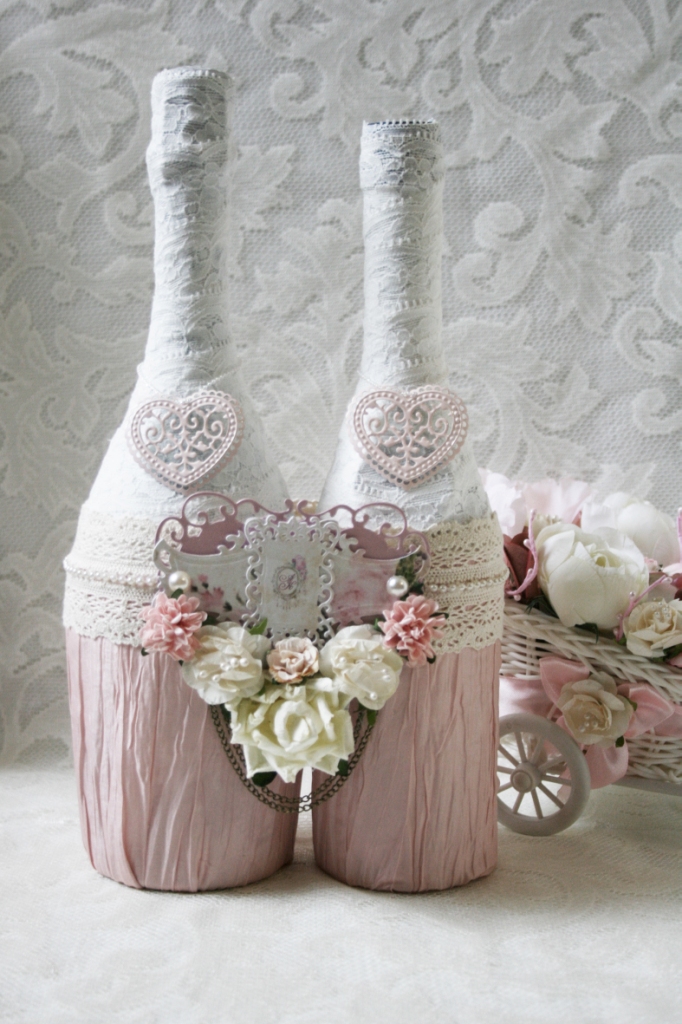
- Deco patch. This method of decorating a product resembles sewing a patchwork quilt. Indeed, the decor is created from individual pieces of paper or napkins. They can be combined with each other thanks to a common theme, colors and texture, or they can be completely opposite to each other. There are even special deco patch kits on the market that are combined by style, meaning and colors, they will help a novice craftsman in making a bottle that will please the eye, but no one will forbid you to make such kits yourself!
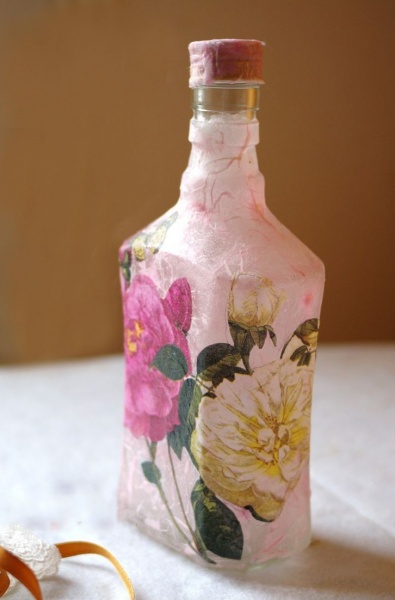
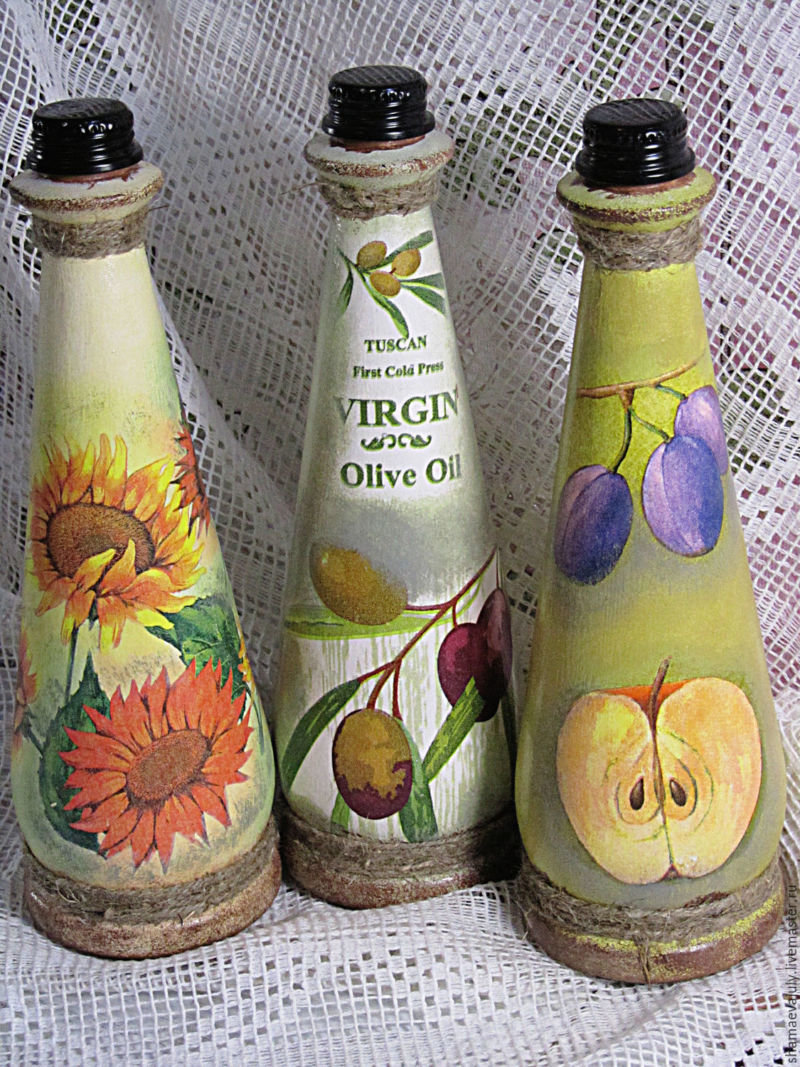
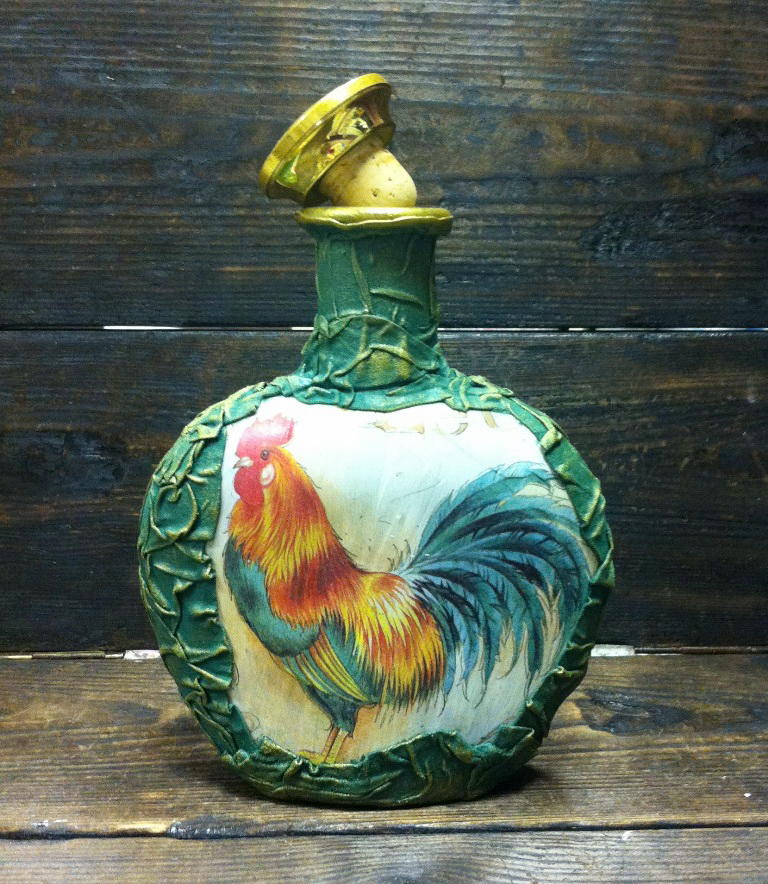
- Direct or classic decoupage. This type of decoupage is suitable for those who are just trying themselves in a new form of creativity. The technology of making the work is very simple and will be understandable to every master, even a child can handle it. The image applied to napkins, photo paper or rice paper is carefully cut out and glued to a pre-prepared surface. You need to work very carefully so that the finished work is not damaged by folds, bubbles and tears. There are many ways to glue the picture, but three main ones can be distinguished: using a file, a fan-shaped brush, an iron.
- Reverse decoupage is the opposite of classic decoupage. It is suitable for decorating items made of transparent thin glass. In this case, the design is applied to the inside of the item and all the steps for applying it are performed in reverse order.
- Artistic or, as it is also called, smoky decoupage. This type of decoupage is suitable for those needlewomen who want to create the effect of painting or fresco on the decorated product. This effect can be achieved due to the fact that the drawing seems to dissolve into the general background, smoothly passes into it, creating a smooth flow of one part of the picture into another, without sharp transitions that hurt the eye.
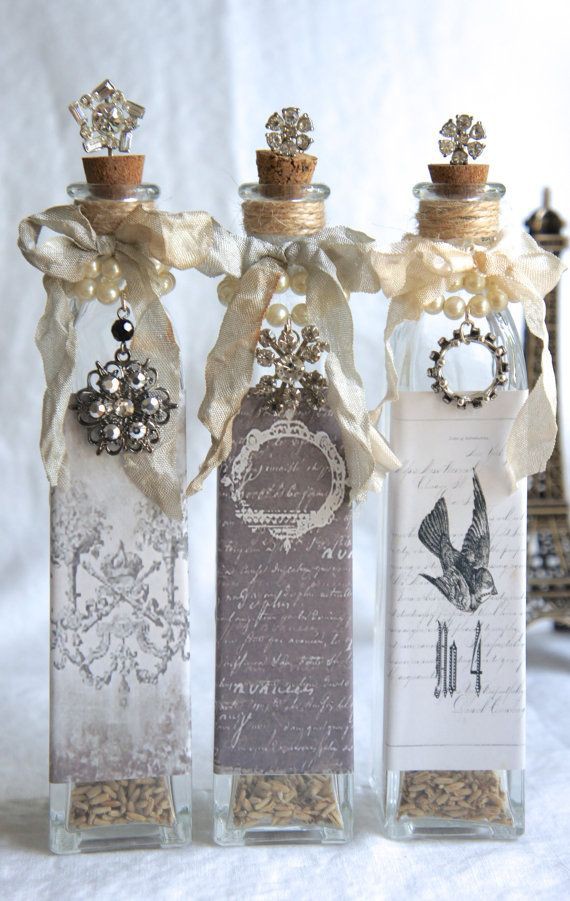
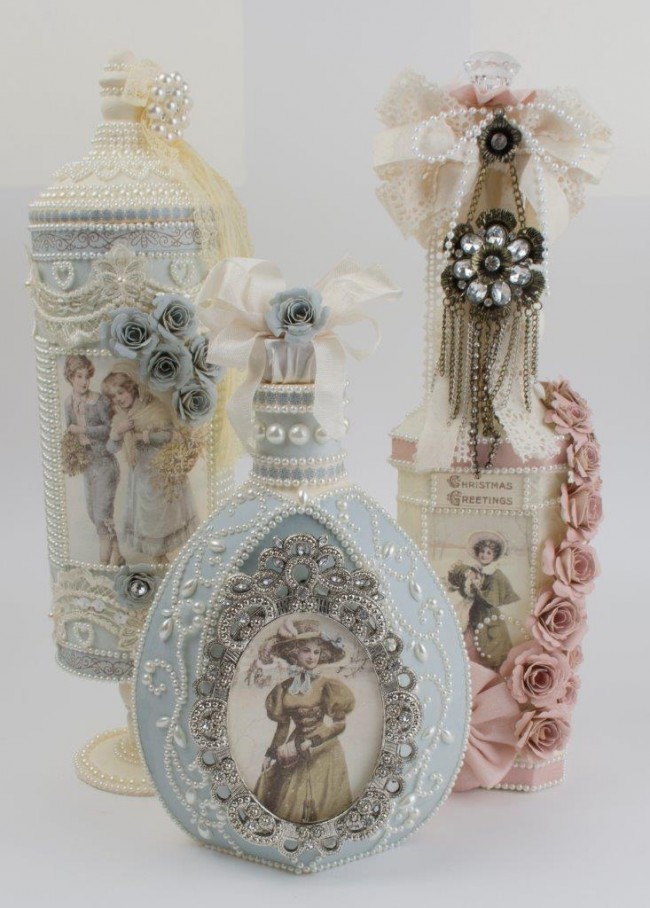
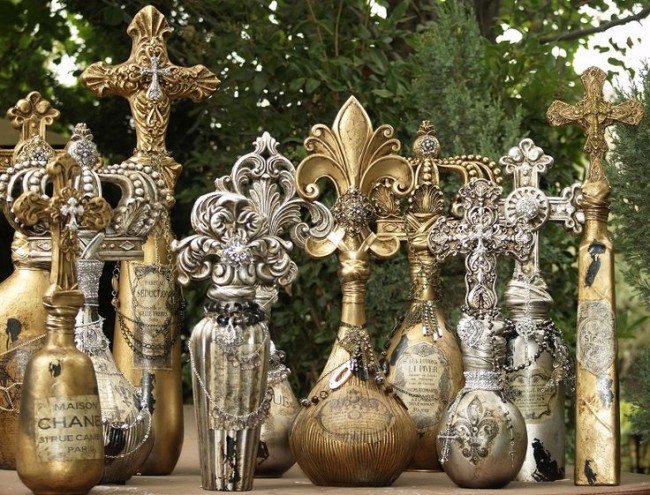
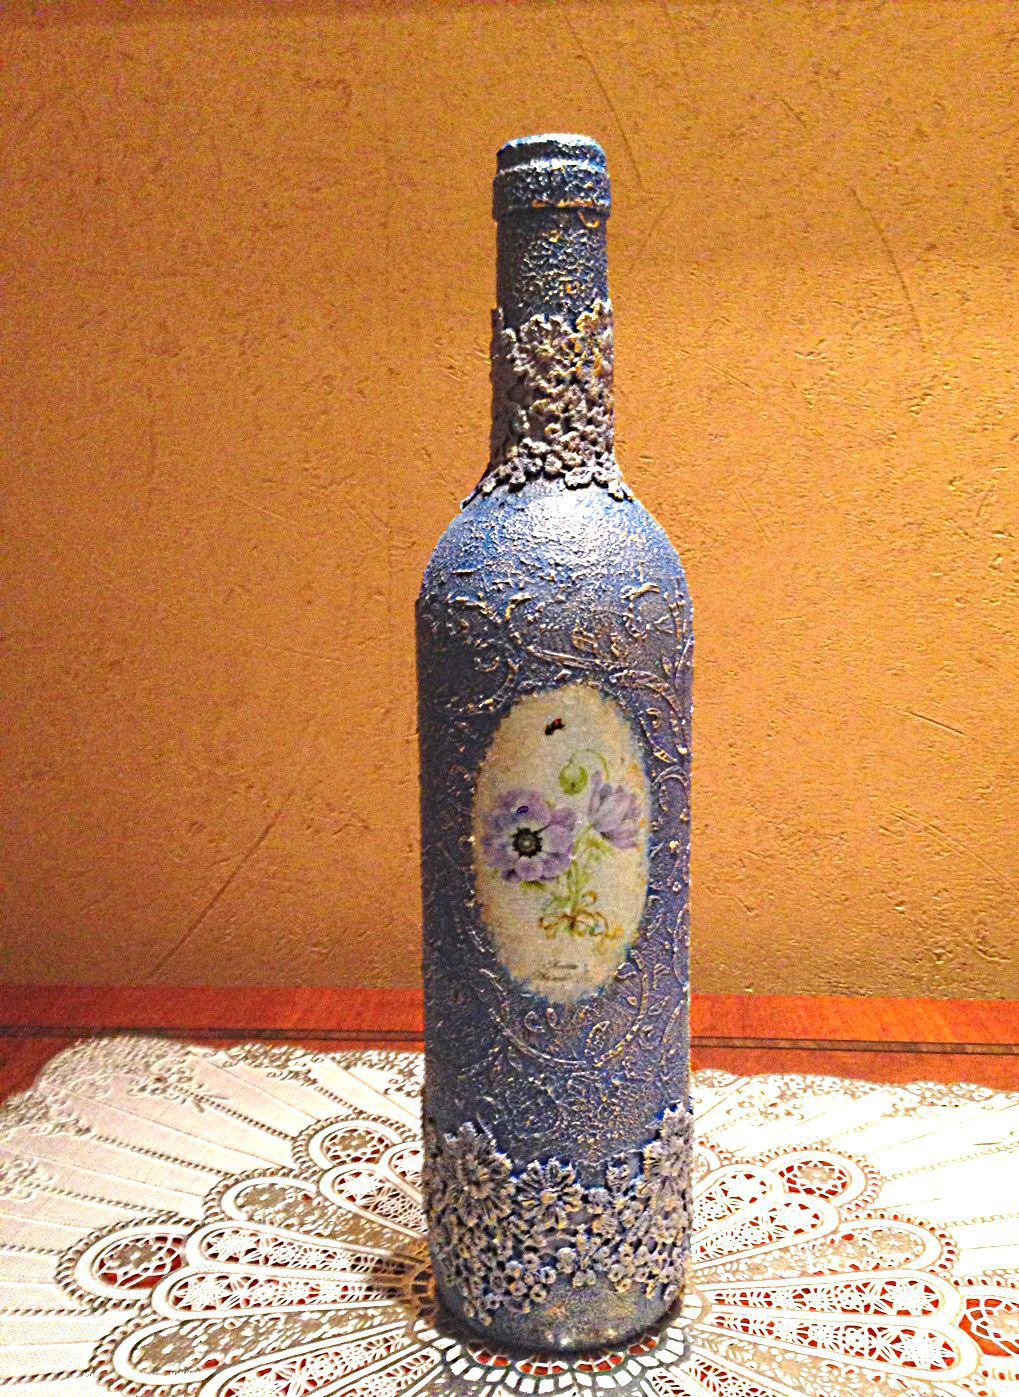
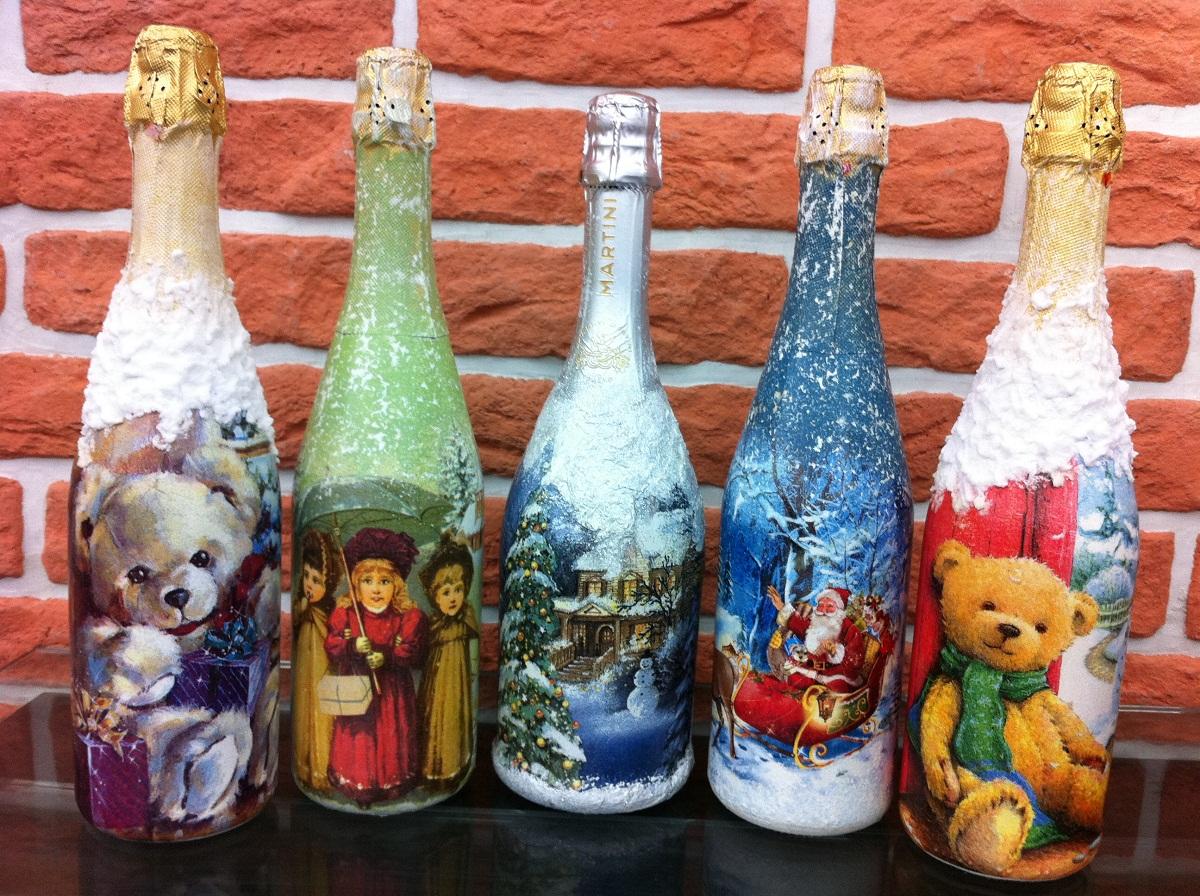
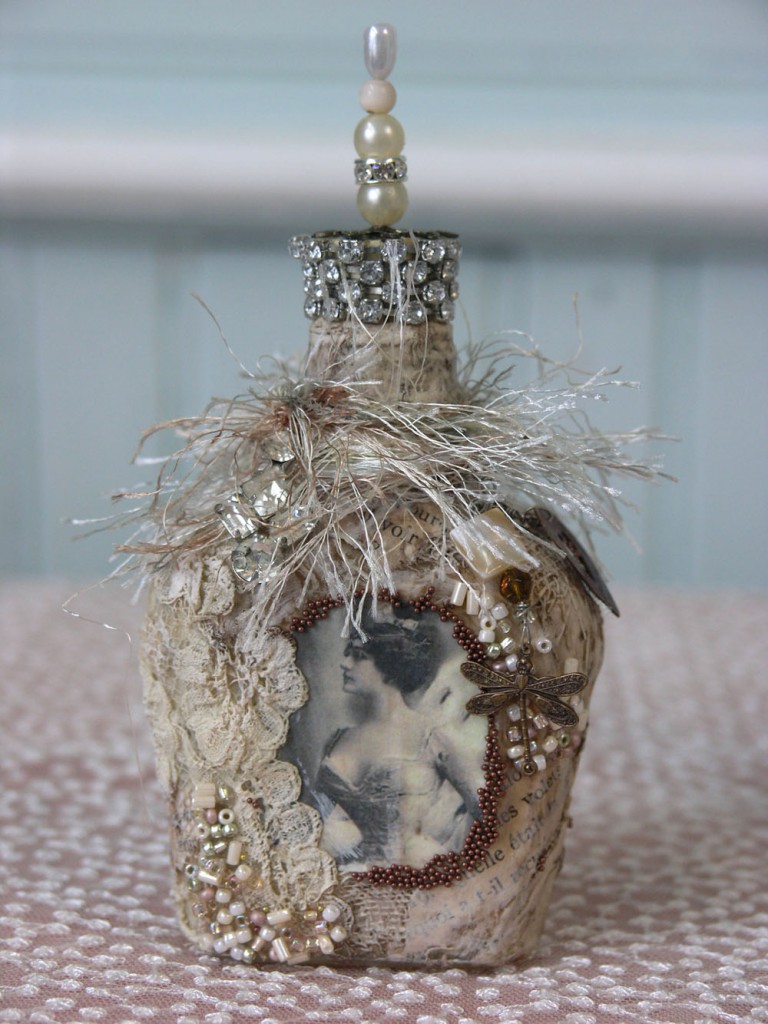
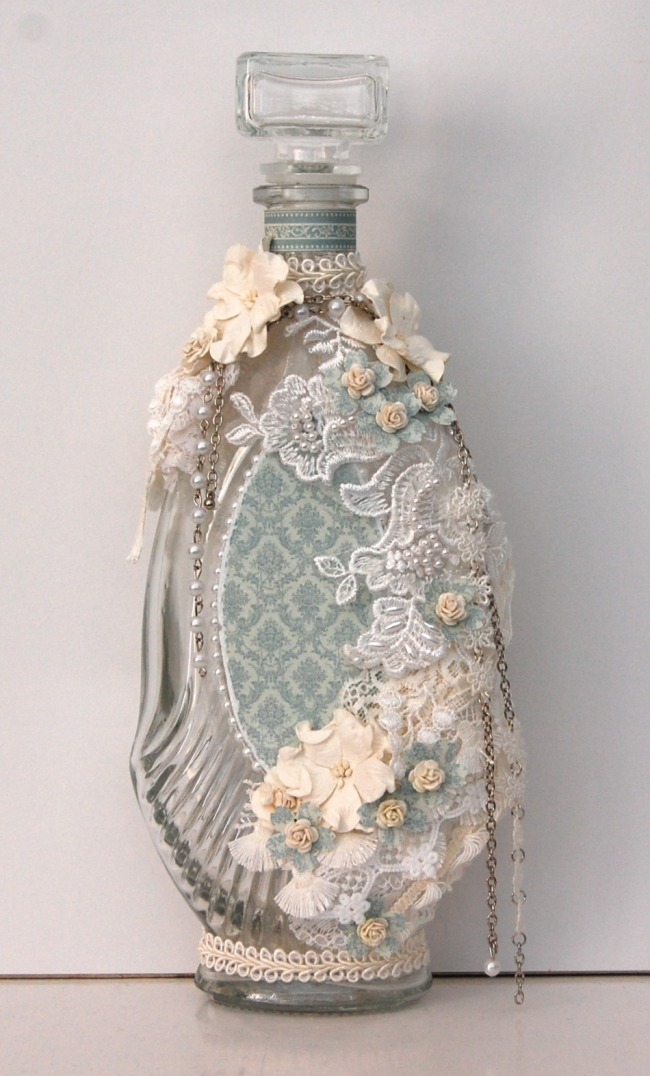
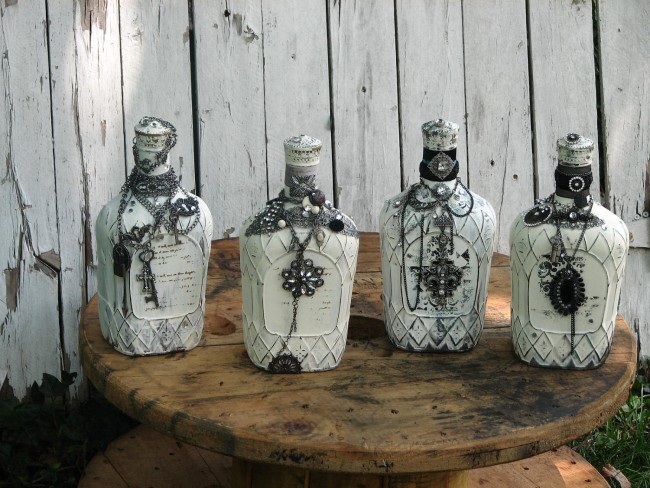
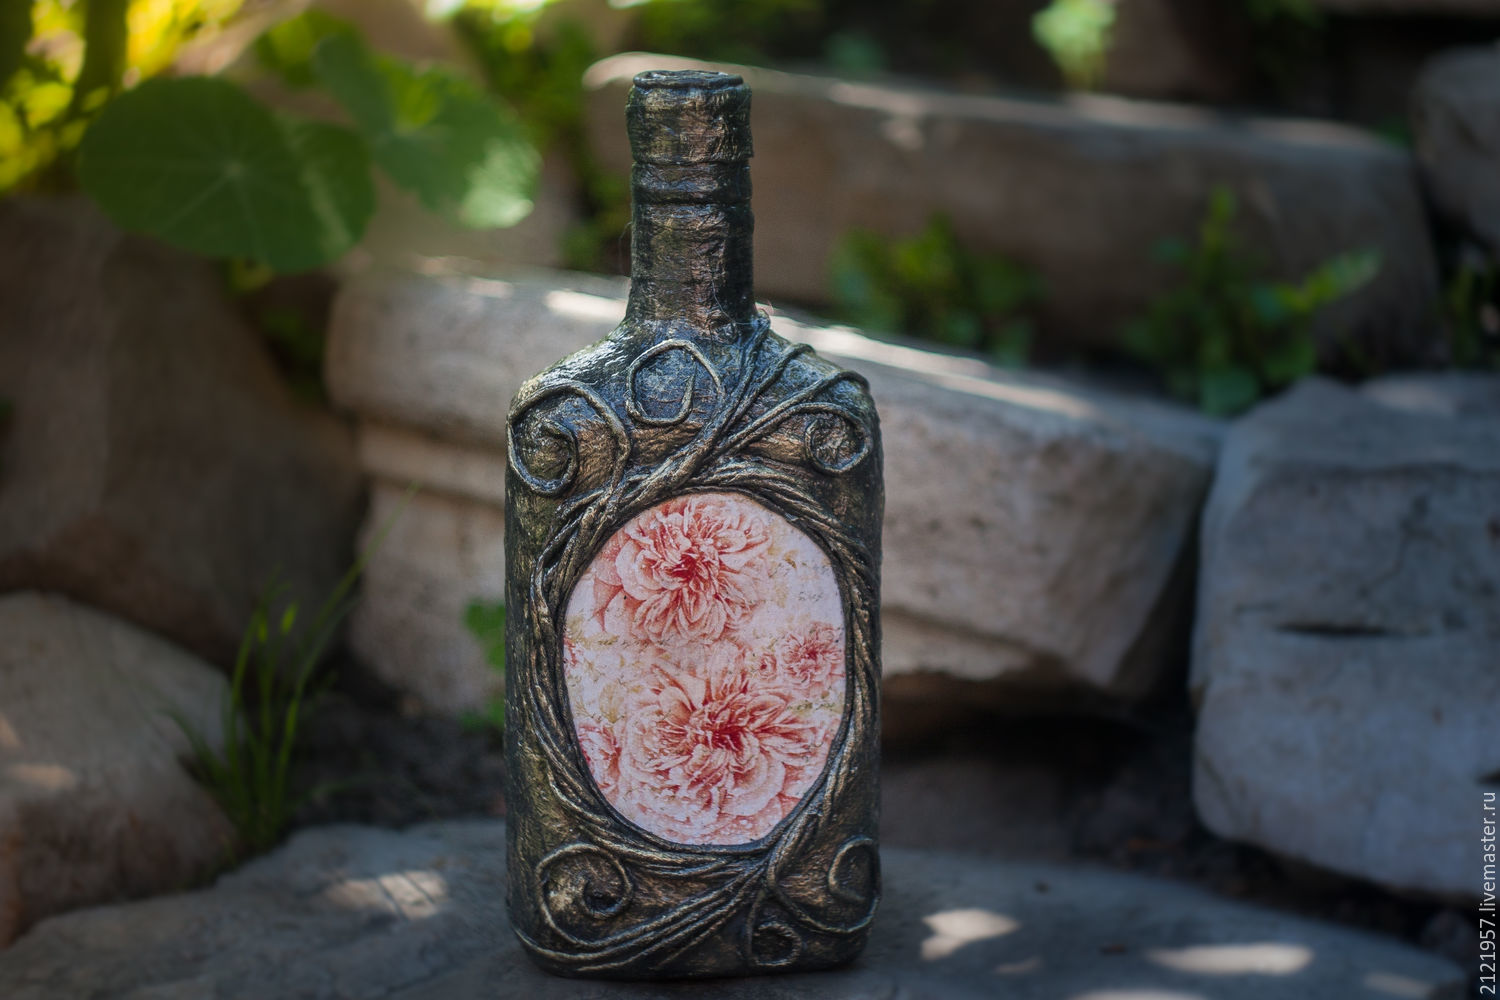
- Volumetric decoupage appeared in the creative world relatively recently and quickly gained unprecedented popularity. Many of you have probably seen bottles decorated with fabric, semolina, shells, glass, dried flowers. This is volumetric decoupage. Advanced craftsmen use a special structuring paste to create volume, which they buy in specialized stores for creativity.
As you may have understood from this section, there are no strict rules in decoupage. You can use not only standard paper or napkins for decoration, but also anything your heart desires. The main thing is not to be afraid to try something new and to involve your imagination in the creative process!
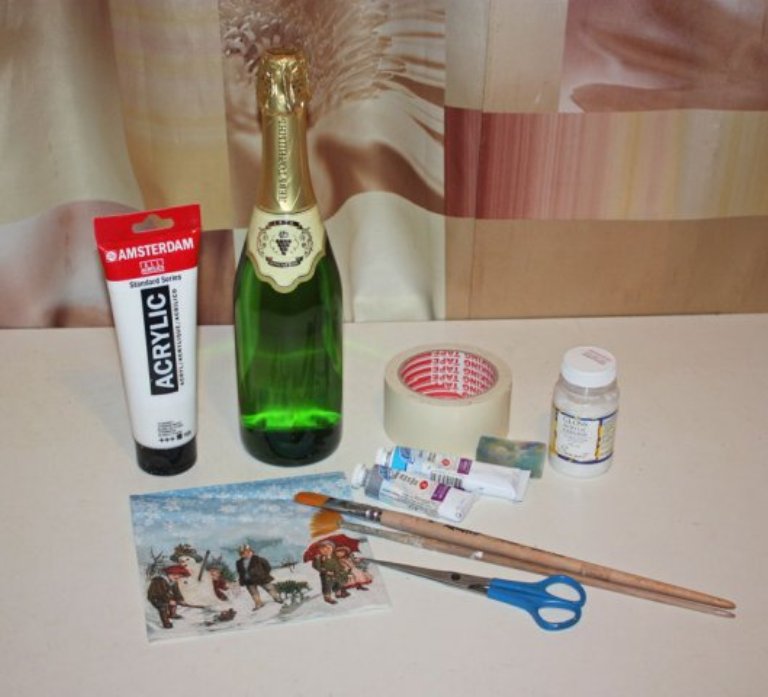
Tools and materials for work
The main thing you need to do before starting work is to properly prepare your workspace. Decoupage, although a simple technique, takes quite a lot of time. Work in a well-ventilated and lit room, decoupage varnish has a rather strong smell, which can cause headaches and dizziness. Also, make sure you have a comfortable chair and table, you don’t want your back to hurt, do you?
To do decoupage with napkins, you will need the following materials, most of which you already have at home.
- Glass or bottle with a smooth surface without cracks or chips.
- Special cards for decoupage, magazine cutouts, three-layer napkins
- A degreasing agent such as acetone or alcohol.
- Acrylic paints, watercolors and pastels for drawing small details or creating additional effects.
- PVA glue or special glue for decoupage
- Brushes of different sizes. If you plan to work with small details, you will need small flat brushes with thin synthetic bristles. For applying acrylic paint or primer, a regular dishwashing sponge may be useful, but it is worth considering that it creates a rough texture, which is not necessary for every job. To create a smooth surface, a large synthetic brush is needed. Thin brushes made of synthetic bristles are suitable for drawing small details on the finished work.
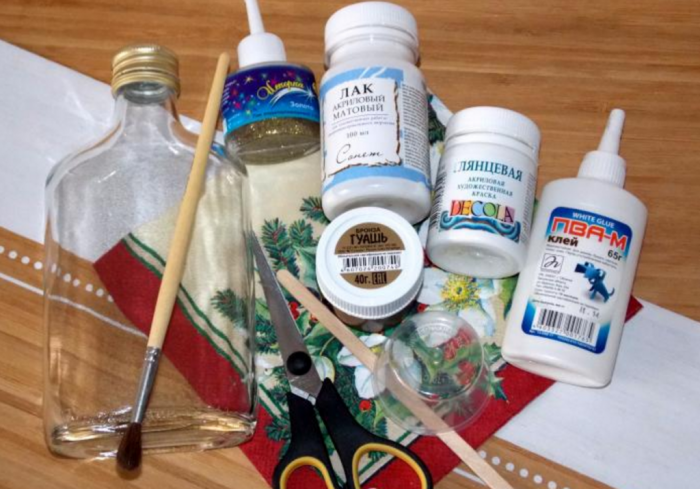
- Acrylic or crackle varnish
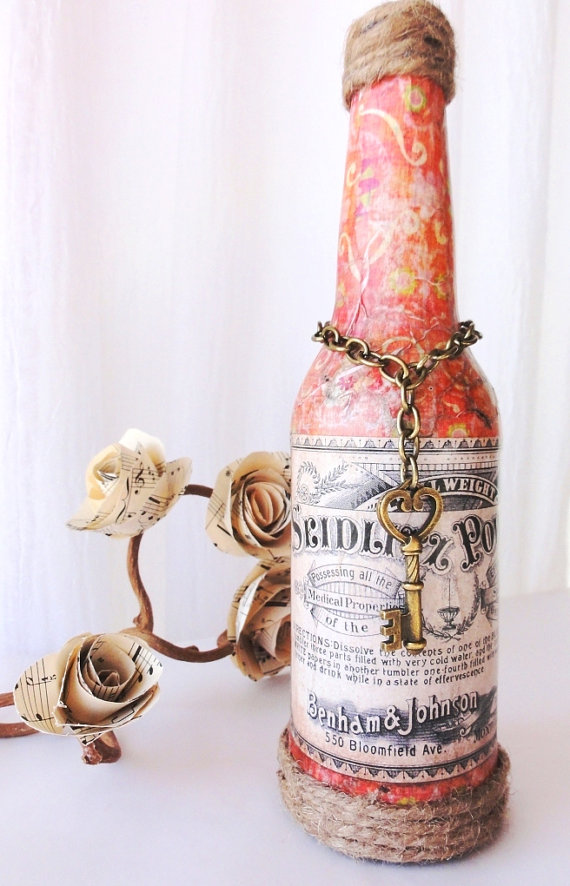
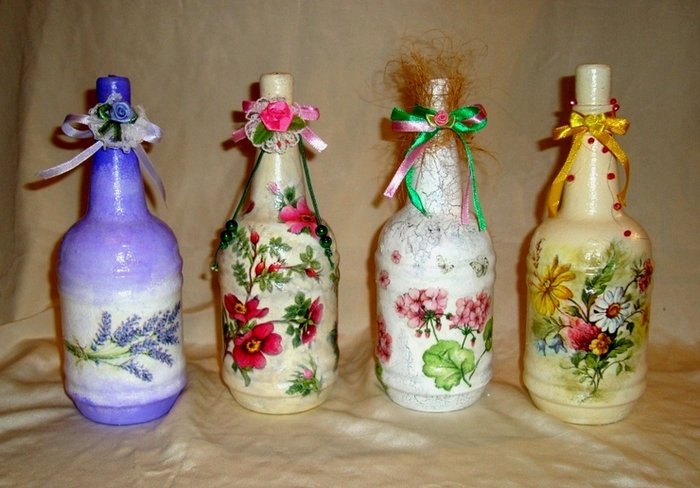
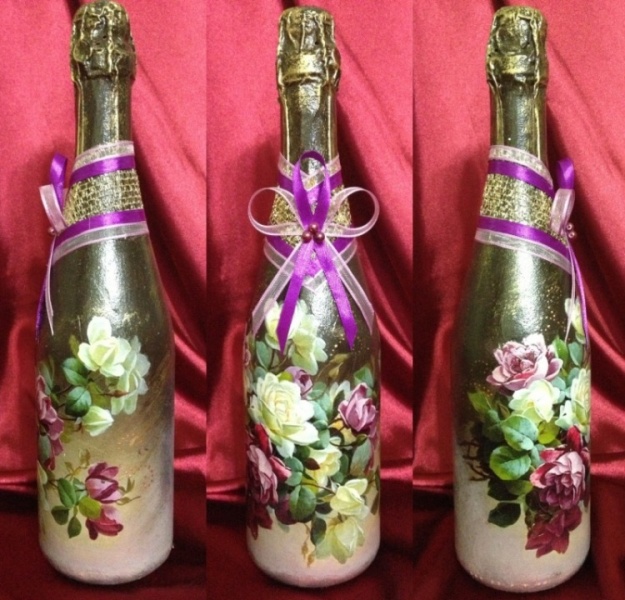
- Additional decorative elements. Ribbons, fabric, beads
- Manicure scissors for cutting out small details. A stationery knife or cutter is also suitable for these purposes.
- Masking tape;
- A piece of sponge. Needed for applying primer.
- Sandpaper. For sanding the surface during preparatory work or to correct minor errors. Choose paper with fine and medium grain in several gradations.
- Primer. Serves to improve adhesion between layers of glue and napkins.
What kind of varnish do you need for decoupage?
Varnishing is a very important process in decoupage. But today in stores you can find so many different types of varnish that it is sometimes difficult for a beginner to decide on its choice. Due to the fact that the final appearance of the work will depend on the quality of the varnish, its choice should be approached more than responsibly.
First, you need to understand what functions varnish performs in decoupage of bottles with napkins.
- Protective function. By covering the work with varnish, you are guaranteed to protect it from moisture, scratches, dust and dirt.
- If you apply several layers of finishing varnish, you will get rid of the step between the background and the ornament, which will help bring the work closer to perfection.
- If you are planning a large-scale work with drawing a large number of small details, then each new layer should be covered with varnish. This will help to correct and prevent errors.
- If you wet the ornament with varnish, it will be easier to stick it to the work.
Types of varnishes for decoupage
- Acrylic varnishes. Most often used for decoupage. Compared to others, they dry quickly, forming a strong film. They are easy to wash off brushes, just rinse them thoroughly with soap and dry them with the bristles down.
- Polyurethane. They are often used in baths and saunas, so you can safely cover those items that will often come into contact with water.
- Alkyd varnishes. They provide a very durable coating, as they are used for their intended purpose for floor coverings.
- Decorative varnishes. Can be purchased in specialized stores to create various effects. For example, aging or scuffs.
As you can see, there are many different types of varnish on the market. There are water-based and glue-based ones, with different effects (antique, glitter, cracks) and finishes (matte, glossy, semi-matte, semi-gloss). Choose water-based acrylic varnish, as it is more versatile, but the effect and finish should be chosen based on the desired result. Both regular construction varnish and special decoupage varnish are suitable for the job, but this is a more expensive option for advanced craftsmen.
What kind of glue do you need for decoupage?
A lot also depends on the decoupage glue. Good and high-quality glue will not cause peeling, will not make the paper turn yellow under the influence of sunlight and will even prevent the development of fungus and mold on the finished work.
Properties that decoupage glue should have.
- Colorlessness after complete drying of the adhesive layer
- Medium consistency of adhesive composition
- Average setting time. The glue should set gradually, giving the craftsman time to smooth out folds and correct possible errors.
- Over time, the glue should not turn yellow or darken.
Craft stores sell jars of special glue for decoupage, but again, beginners who just want to try themselves in a new technique don't need it. PVA glue from the middle price category (don't take the simplest children's glue) diluted with water in equal proportions will do.
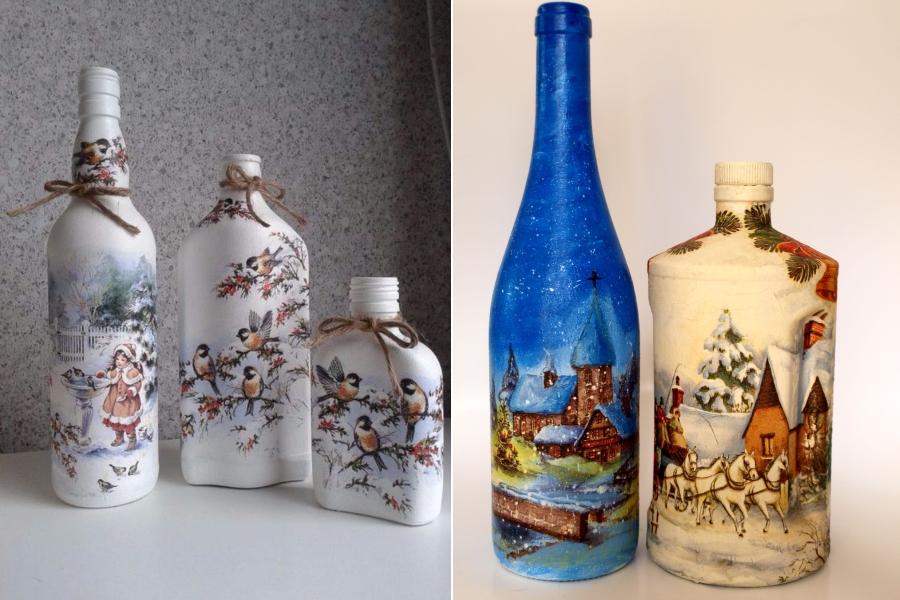
How to Decoupage a Bottle with Napkins
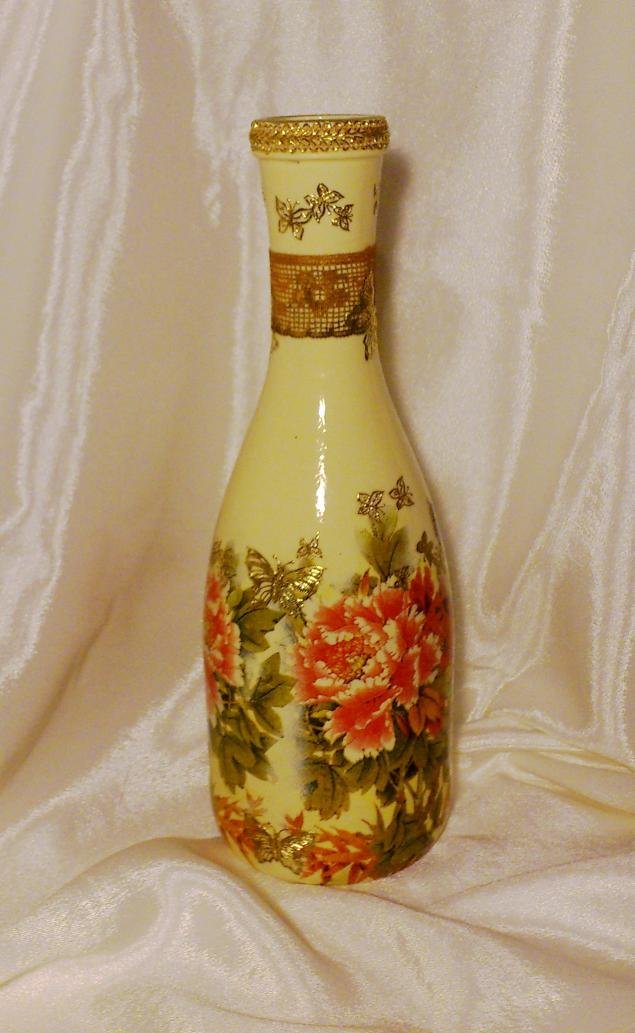
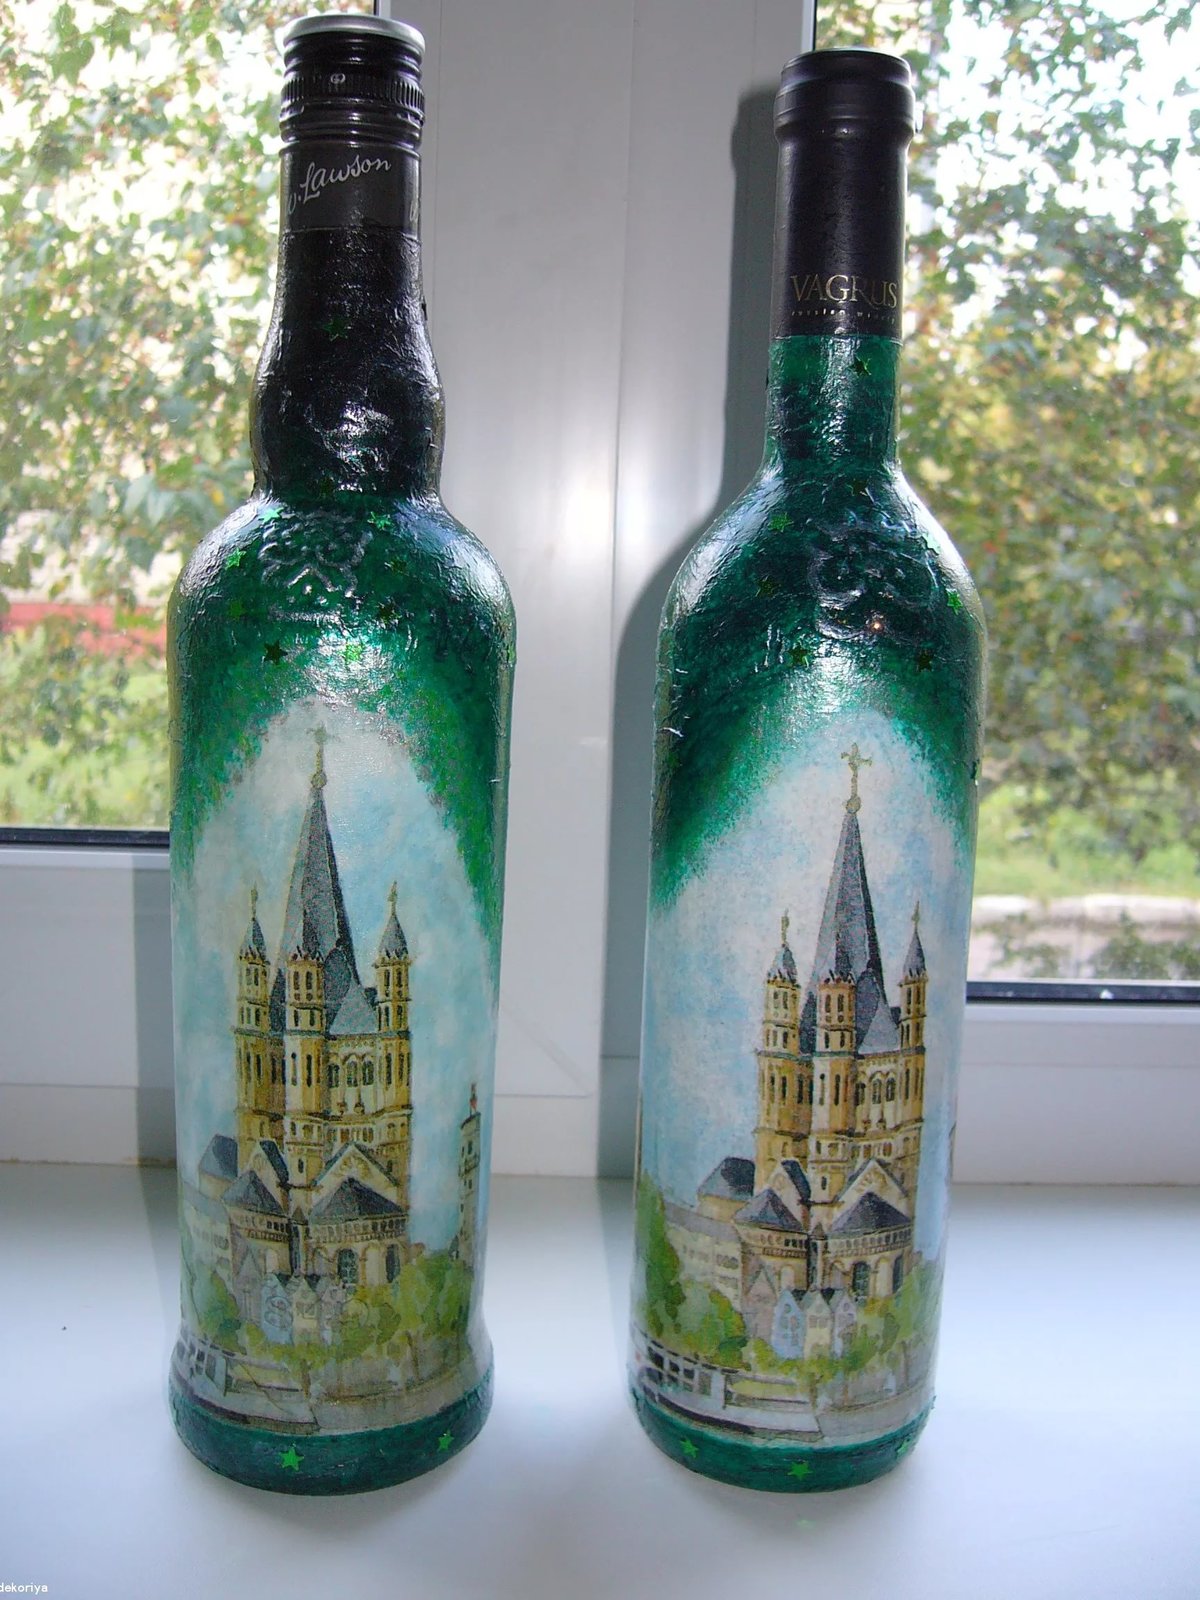
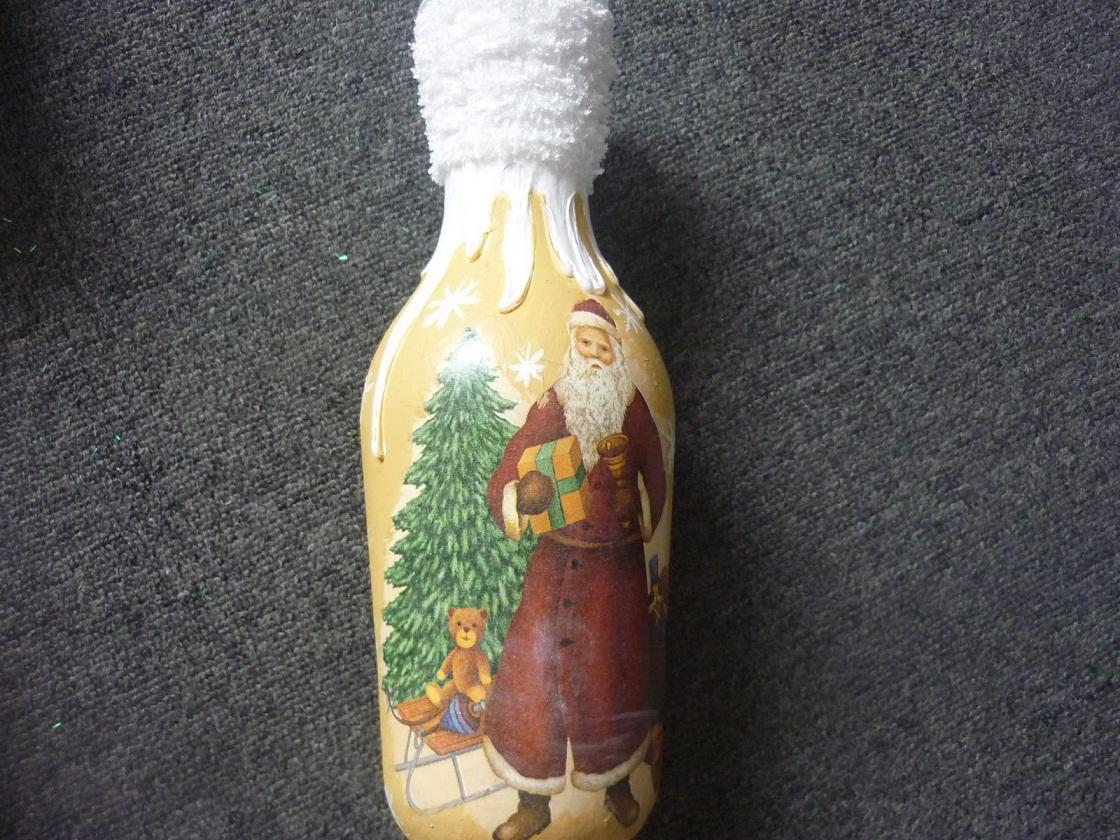
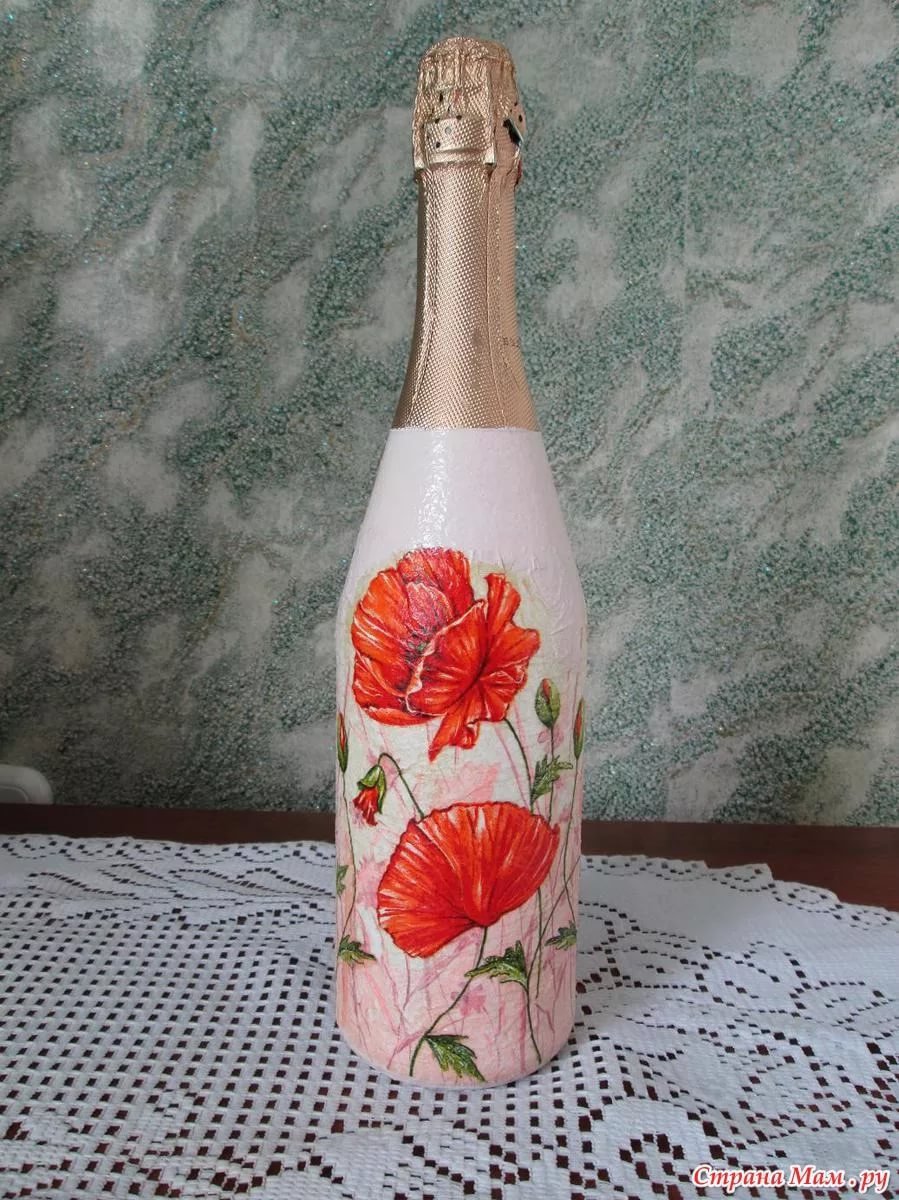
Do you have glass bottles left at home after the holidays? Don't rush to throw them in the trash, because with the help of improvised means you can turn them into a real work of art, for example, into a vessel for storing alcoholic beverages or cereals, as well as a vase with a unique design. Moreover, the decoupage technique does not require special and expensive materials, even a child can handle it! The main thing is to have a large supply of inspiration, a little free time and a supply of patience! In this section, we will analyze in detail how to do decoupage for beginners on a bottle.
Preparing the glass surface
Nowadays, each bottle from the store has various labels with information about the manufacturer, place of manufacture, composition and expiration date. But this will interfere with the performance of high-quality decoupage, so you need to get rid of the stickers. To do this, you will have to put in a little effort, but the result is worth it. Leave the bottle for a few hours in a solution of water and dishwashing liquid, then easily remove the paper. Using medium-grit sandpaper, remove the remains of glue and paper. Go over the entire surface of the glass with a degreaser, sand the glass again.
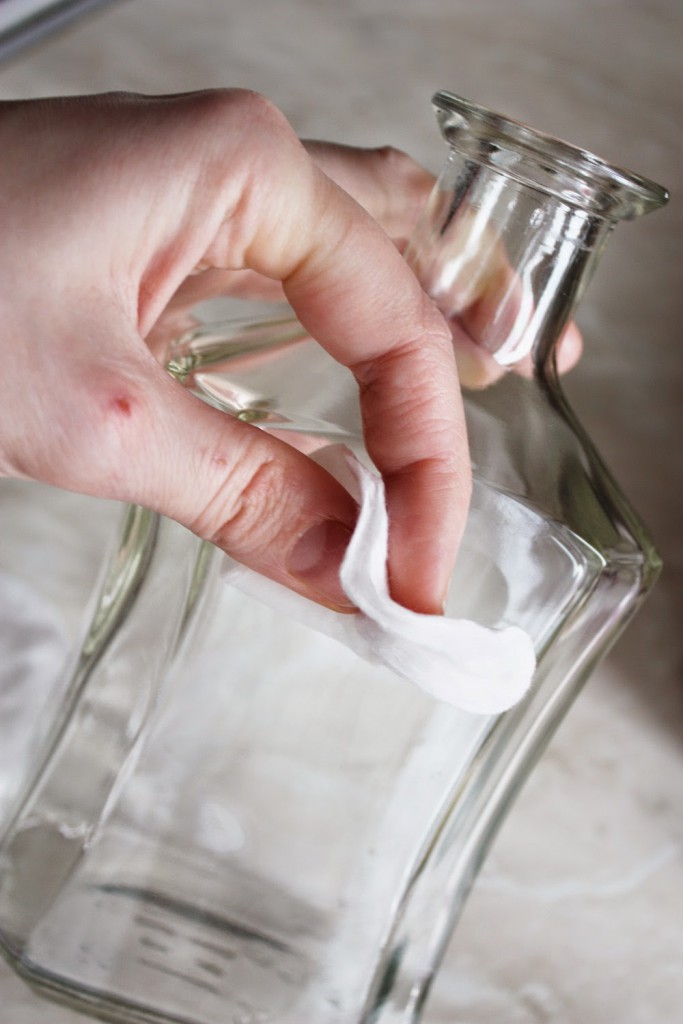
Important! The final result will depend on how carefully you perform the preparatory work.
Primer
This step is necessary to make the drawing brighter and much easier to stick to the glass base. The bottle is covered with a layer of acrylic primer for paintings or simple acrylic paint (usually white) using a sponge or a wide, large brush.
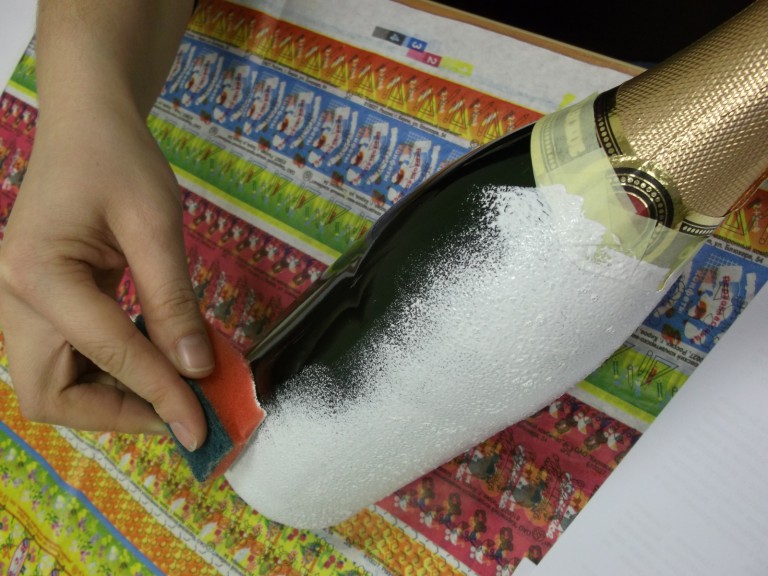
If you think the design looks bright enough without primer, you can skip this step.
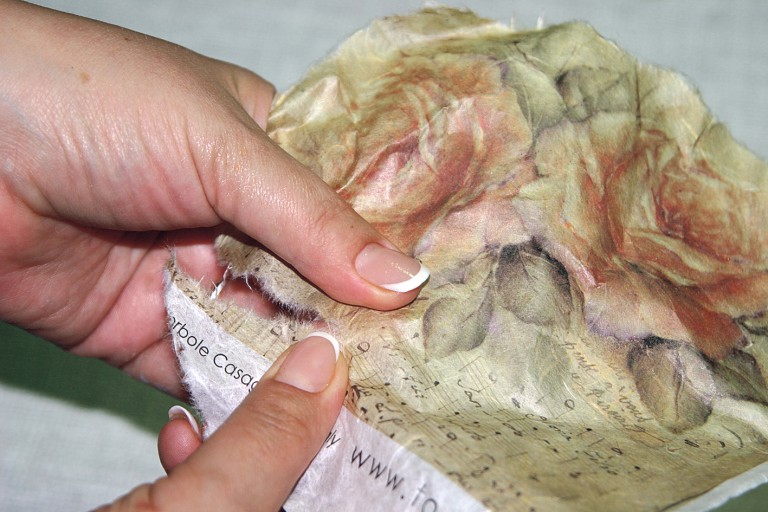
Cutting out the ornament
If you are decoupaging a bottle with napkins, then only the top napkin layer is used for the work. Carefully cut out the picture you like and attach it to the bottle, outlining the composition of the work. If you decide to use magazine cutouts for decoupage, then you need to remove the glossy layer from them. To do this, cover the cutout with several layers of varnish, dry it completely, and then put it to soak in warm water for 20-30 minutes.
Sticking a picture on a bottle
The most interesting part of the work is gluing the ornament to the bottle. The glass should be dry, degreased and carefully primed. Grease the surface on which you plan to glue the drawing with the glue you have chosen in advance, then glue a dry napkin, a magazine cutout or a decoupage card. Coat it generously with glue using a brush, trying to get out all the small bubbles and smooth out the unevenness. Work very carefully!
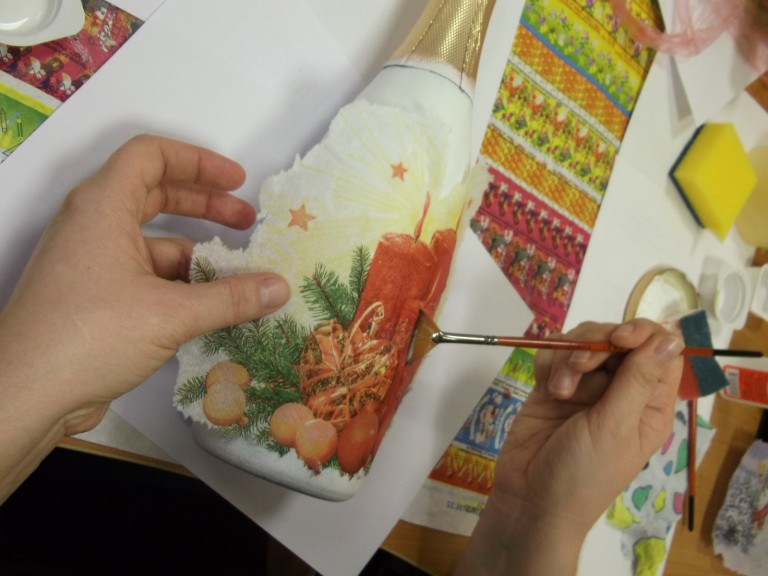
Please note! Before applying to the bottle, decoupage cards should be soaked briefly in warm water and then dried on a soft towel.
Fixing the result with varnish
To protect the result of your painstaking work from external influences, such as dust, water (this is very important for a bottle), scratches, air, you should cover the work with a varnish layer. Before this, dry the product well from glue and moisture.
Decoupage a bottle using rice paper
Decoupage made using rice paper is no less interesting.
Rice paper is a loose, easily absorbed paper that is used in baking and handicrafts.
Before you begin, prepare rice paper and a floral design.
Degrease the entire surface of the bottle thoroughly.
It is more advantageous not to cut rice paper, but to tear it into pieces to get uneven edges, which give a beautiful effect.
There are two ways to glue this paper to the bottle.
The first involves applying glue and gluing rice paper onto it. The second method involves applying wet paper to the glass and drying it with a hair dryer.
Conclusion
What can you think of better than a gift made with your own hands? A gift in which you have invested warmth, affection, love and the most precious resource – time? Having become better acquainted with such an exciting and simple technique as decoupage, you will no longer have any questions about how to surprise your friends, relatives or colleagues with an unusual gift.
VIDEO: DIY bottle decoupage.
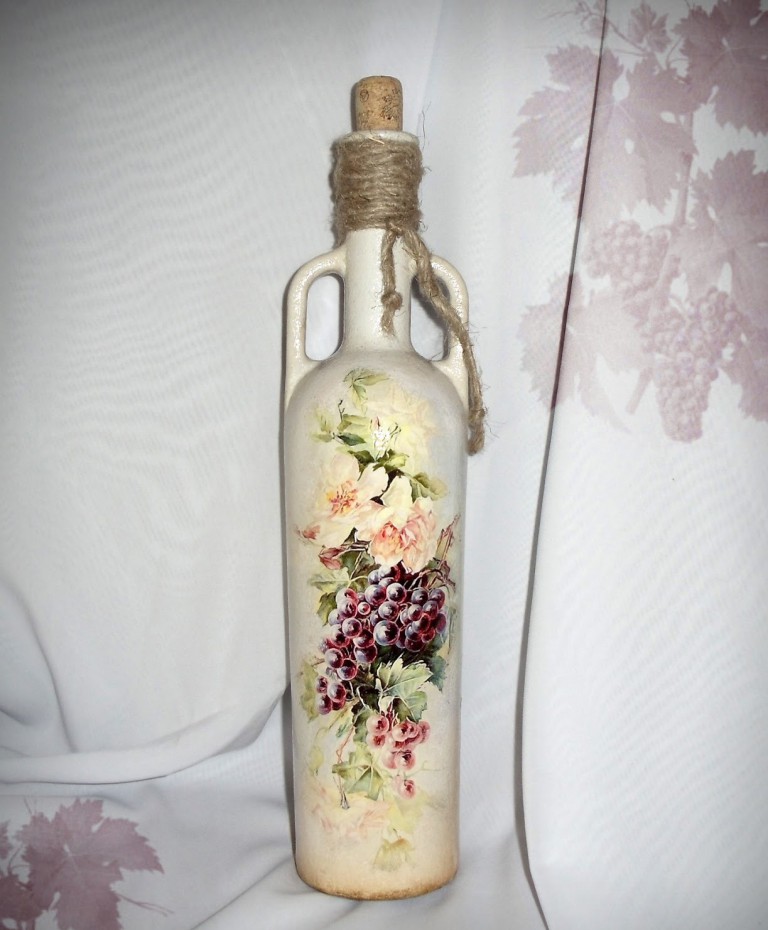
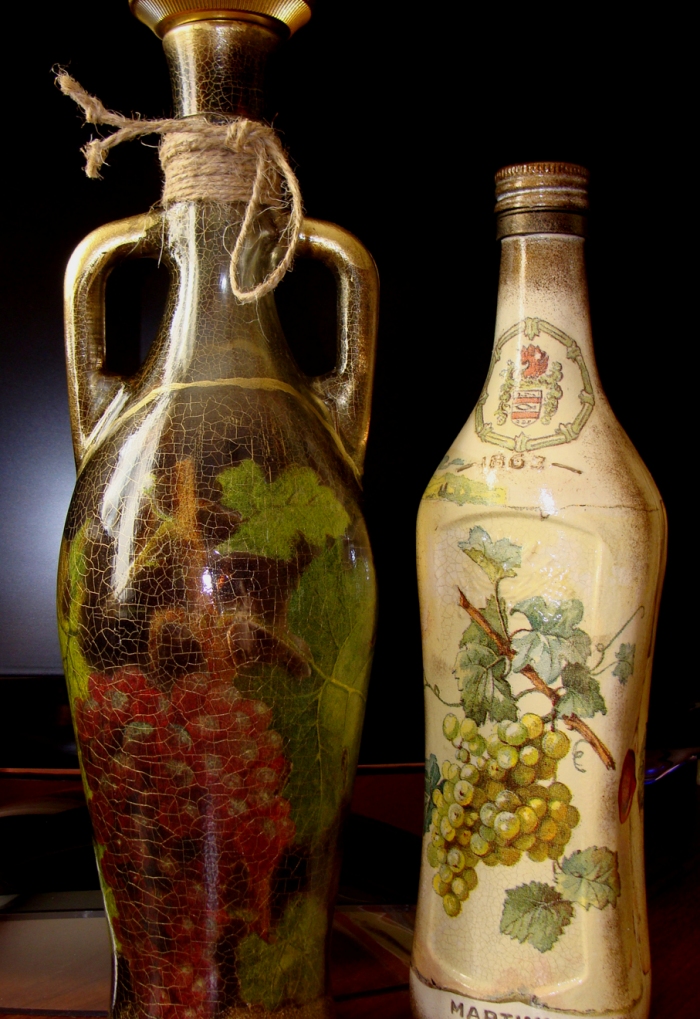
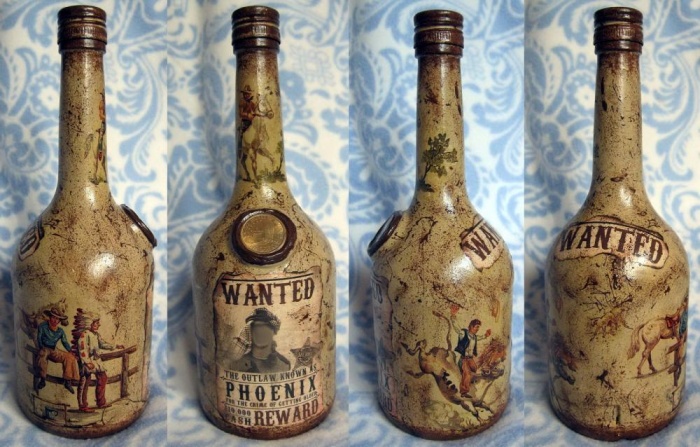
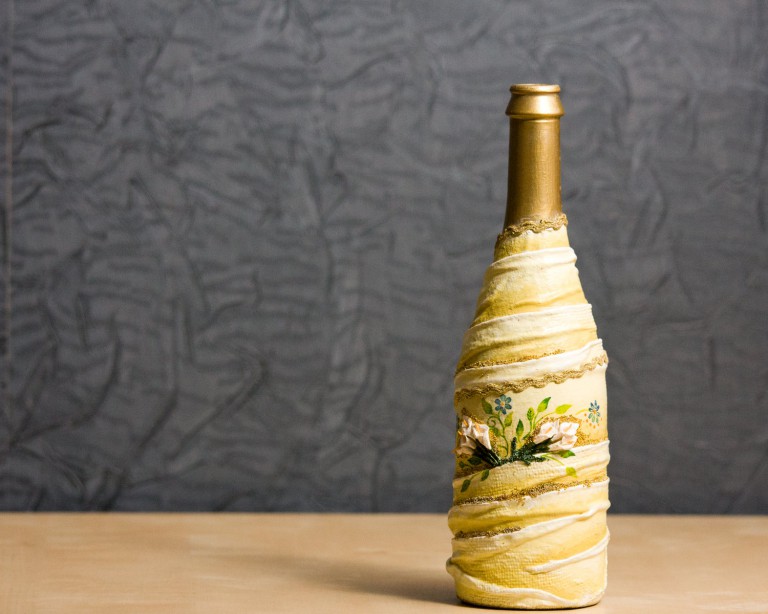
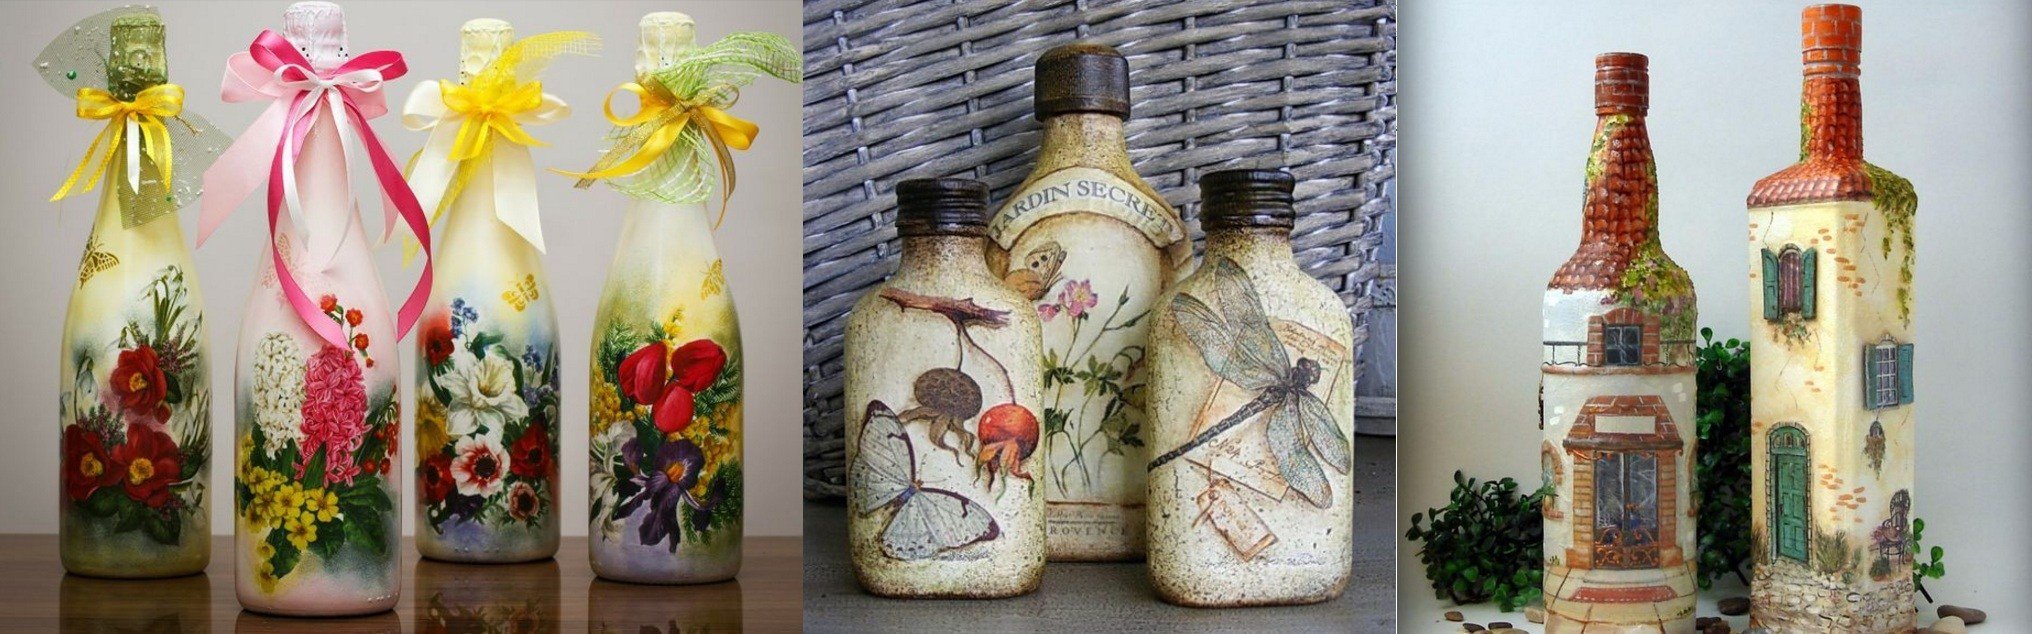
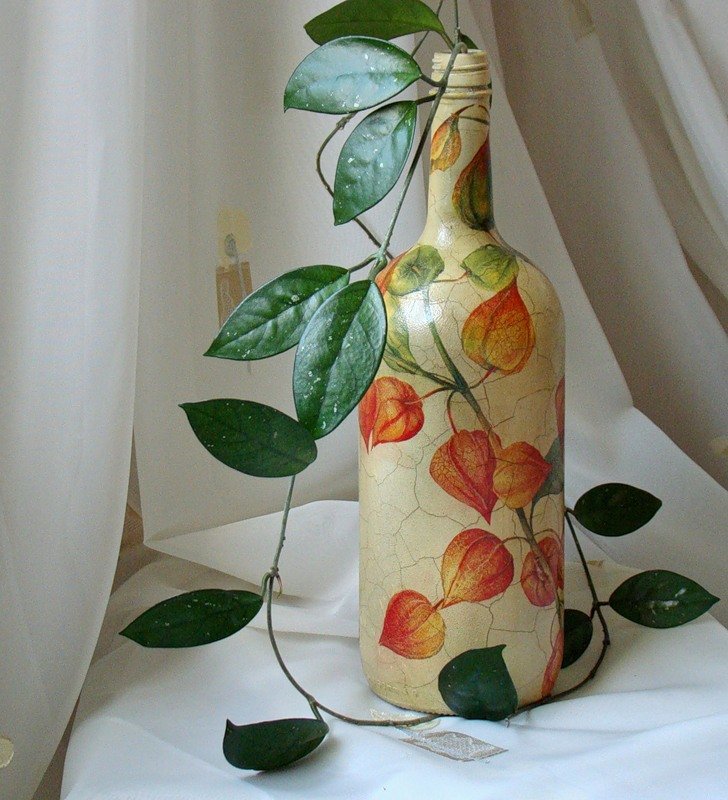
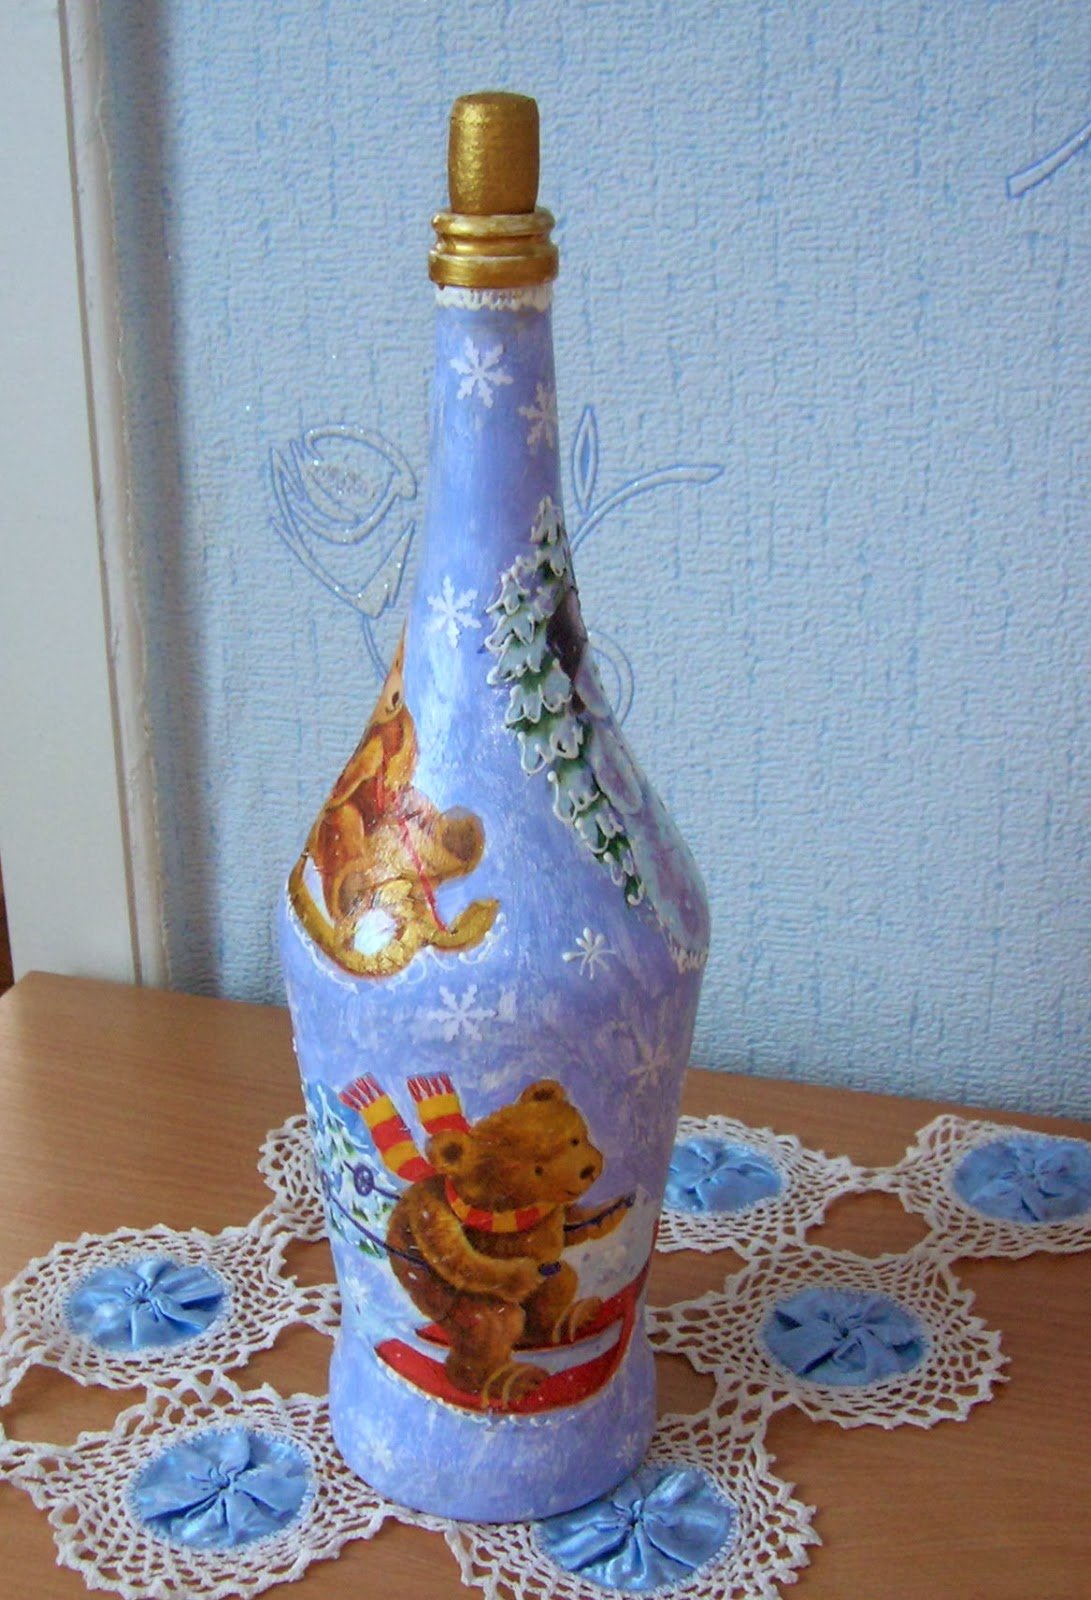
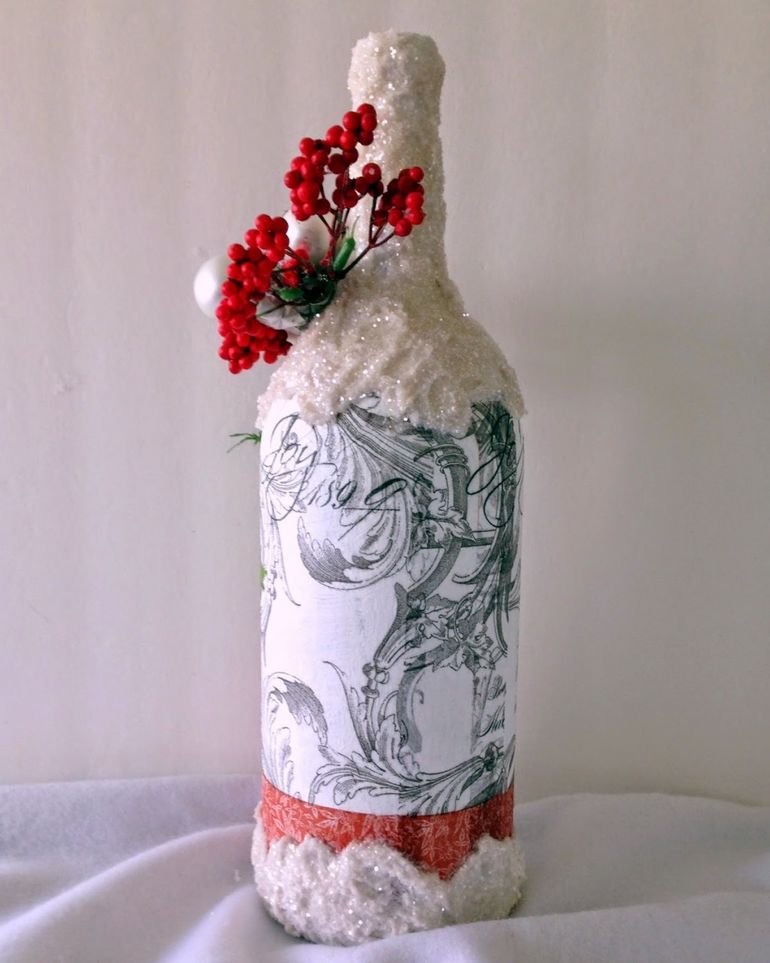
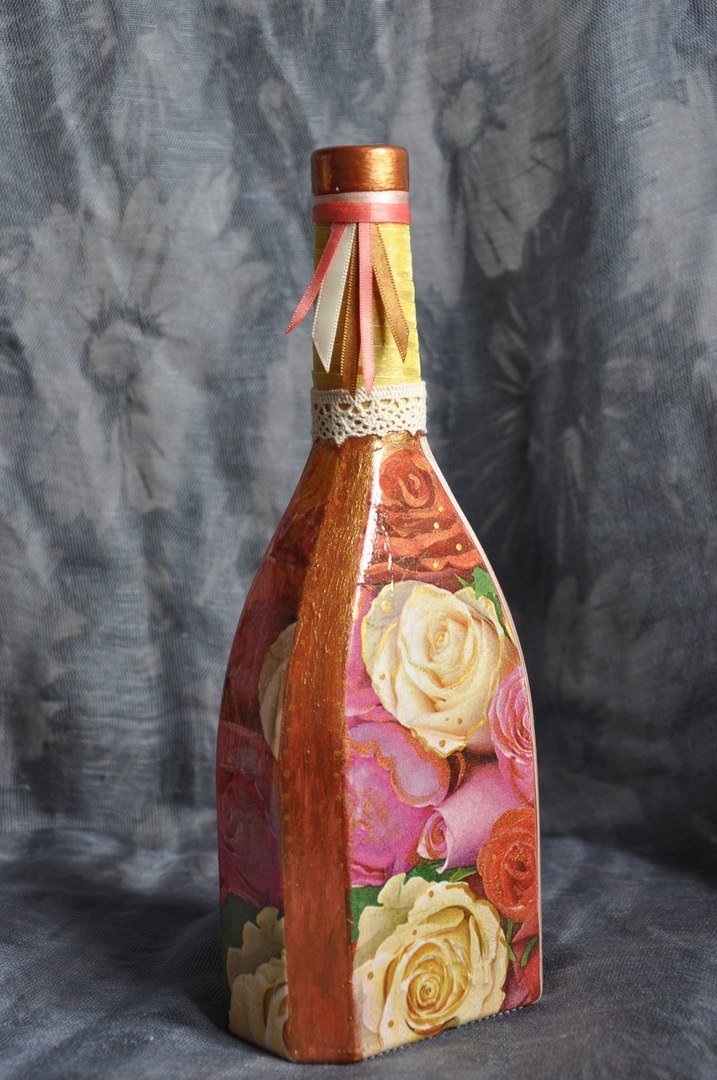
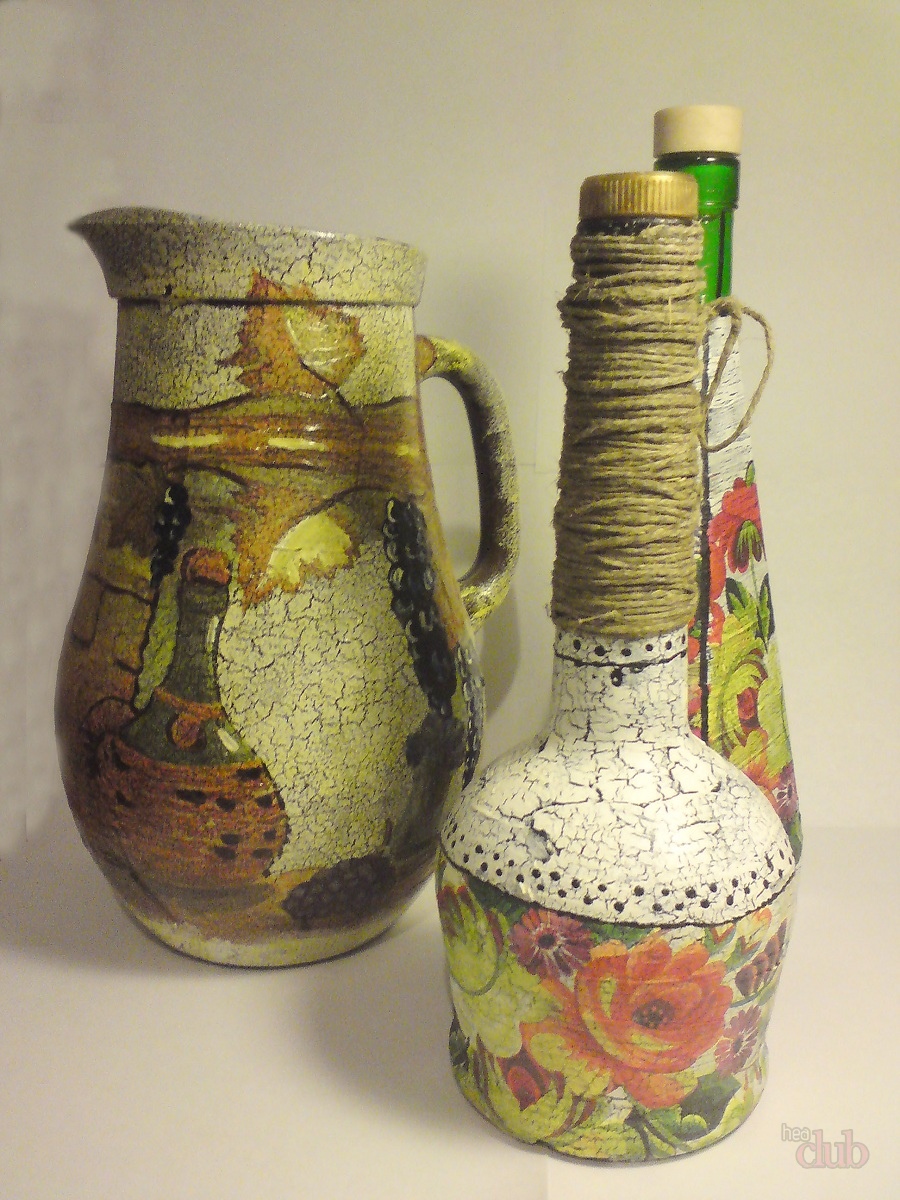
50 DIY Wine Bottle Decoupage Options: