Every year the number of kitchen appliances grows. Some save time, taking on some of our responsibilities, others make life more comfortable - they clean the air, remove steam, unpleasant odors, soot and fat. Such devices include kitchen hoods.
This equipment is necessary for those who are tired of constantly airing the room, washing kitchen facades, walls from the fat that settles on them. If you are one of these people, then you cannot do without a hood. Numerous home appliance stores will help you, where you can easily choose a model that suits the dimensions, power and price.
These are far from all the criteria that you need to rely on when making your choice. An important role is played by the features of use, types, their shape, practicality and performance, as well as external design.
Content
- Types of hoods and their design features
- Dimensions of the built-in hood
- Installation of a built-in hood. Necessary materials and tools
- Working with the bottom shelf of the cabinet
- Transformation of the middle part of the cabinet
- We build the hood into the cabinet and install the air duct
- Video: Installing a built-in hood
Types of hoods and their design features
Before purchasing the equipment, you should decide on the place where the stove will be located, since the hood is installed above it. The design features of the model depend on the location of the stove. According to the type of location of the kitchen area, hoods are divided into several types.
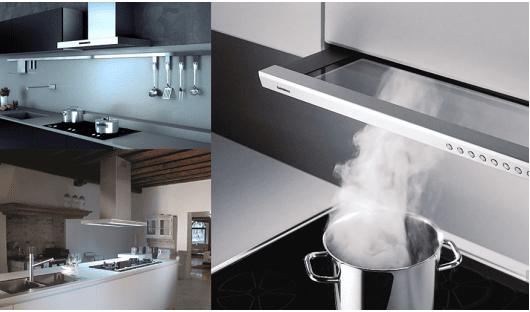
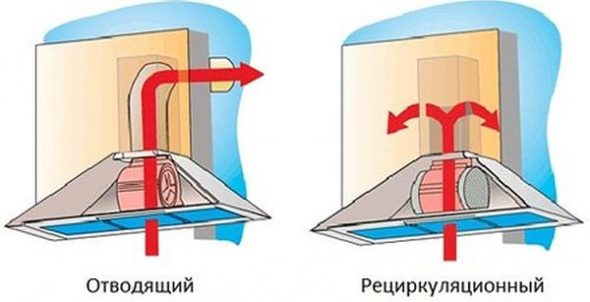
- Flat. It has a small size and does not require installation of an air duct. It has built-in filters through which polluted air passes. The inconvenience is that they need to be changed periodically. The service life of the filter directly depends on the intensity of use of the stove and hood.

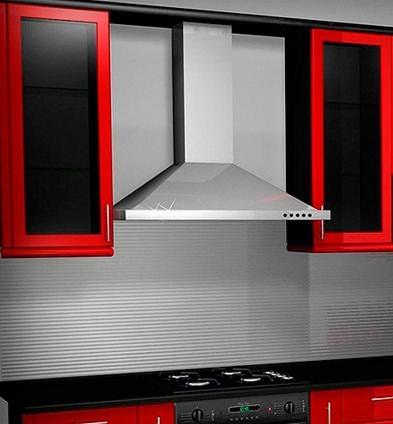
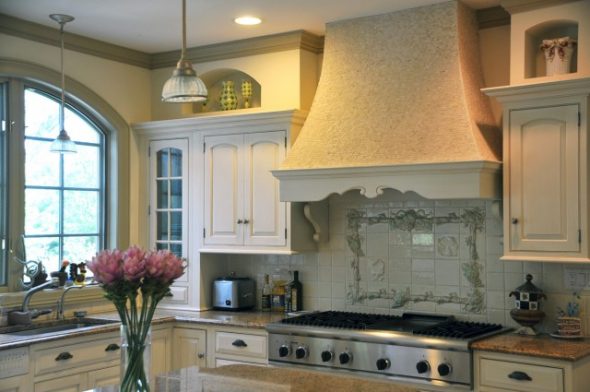
A flat hood is an inexpensive option with built-in filters that takes up little space. - Dome. The equipment of this group is connected to the ventilation and has high performance. The more impressive size of the case allows installing larger fans than in flat ones. Therefore, they are used in spacious rooms where there is a need to filter a large air flow from the kitchen. They clean the smell in the far corners of the room.

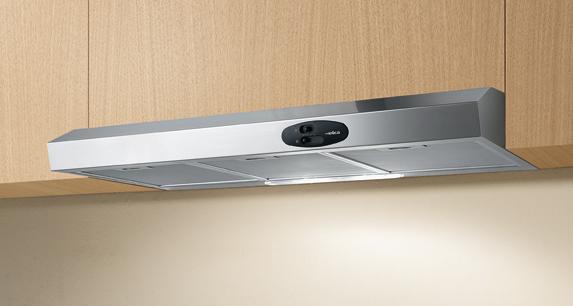
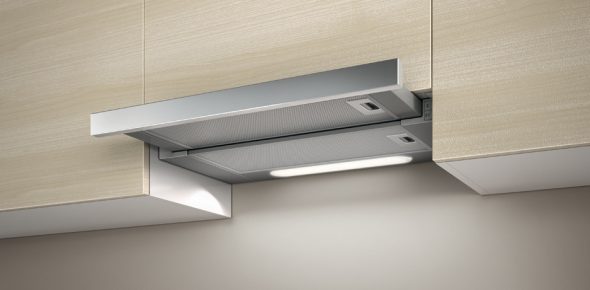
A dome or fireplace hood has good aerodynamics, works almost silently, but is more expensive - Built-in. The most widely used type. The main advantage is that it hides in kitchen furniture or a countertop and does not spoil the overall style of the interior. Another advantage is that installing a built-in hood in a kitchen cabinet is easy to do on your own and there is no need to call a paid technician.

Built-in hood is the most optimal solution for small spaces
The type of hood to use depends on the size of your kitchen. If the kitchen is small, then the power of a flat hood will be quite sufficient. Built-in models are good in typical Khrushchev-era apartments. They save space, since the air duct and the frame itself fit neatly into the cabinet. In the kitchen, where space allows, there is a free-standing island, where a fireplace or dome hood will fit perfectly.
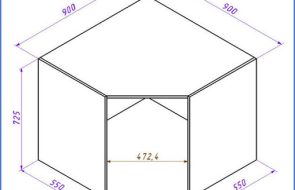
Dimensions of the built-in hood
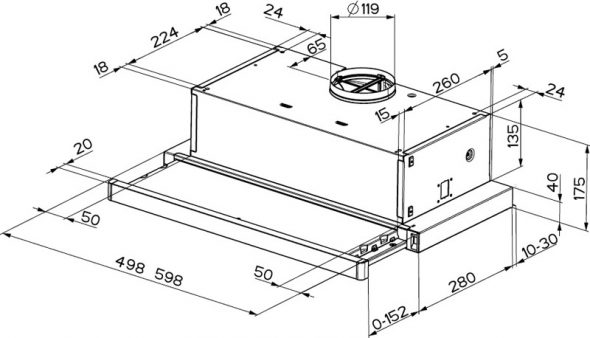
In order to correctly install a built-in hood, measurements are taken of the stove and the existing cabinet in which the equipment will be built in. If you do not pay attention to this, it may turn out that the size of the device will exceed the dimensions of the cabinet.
Then you will need to perform additional manipulations with it - change the walls of the adjacent cabinets or make a new box to fit the dimensions of the hood. Having correctly selected a model for the kitchen that fits inside, you can handle the installation yourself, without the help of specialists.
The body of most built-in hoods has a rectangular shape, which significantly simplifies installation. The width of the devices varies. There are compact options, from 45 to 50 cm, which fit into standard kitchen units.
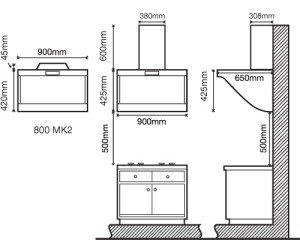
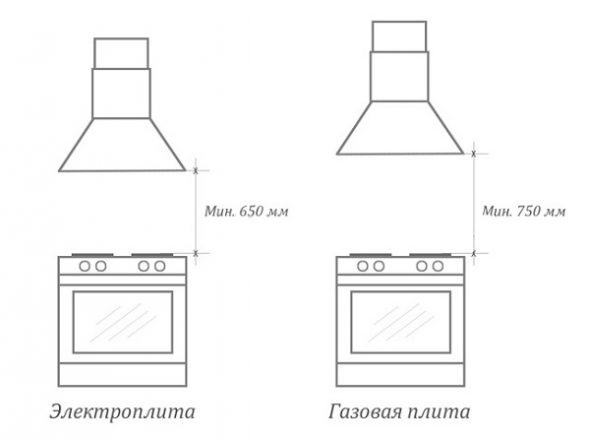
Another important point to consider: the distance from the stove to the hood. It should be such that the parts of the device are at a safe distance from the heat of the stove. Placing it high from the hob is inappropriate, as it will significantly reduce productivity. Steam with the smell of cooked food is poorly drawn in by the device, and the required efficiency will not be achieved.
In the device instructions you will always find the recommended centimeters, the average values for all devices are as follows:
- for an electric stove – from 65 cm to 70 cm will be optimal;
- for gas – from 70 cm to 80 cm, since there is an open fire.
The size of the hob also matters. The width of the equipment should ideally be the same or 1-2 cm wider than the hob. This will ensure maximum efficiency of the installation, and if it is smaller than the hob, some air will not be captured, which will reduce productivity.
Installation of a built-in hood. Necessary materials and tools
Let's consider the option when you decide that you don't need to make a new box, all that's left is to re-equip the existing wall cabinet. Before you start installing, you need to decide on the material from which the ventilation duct will be made, prepare the necessary tool so that everything is at hand.
Types of materials from which air ducts are most often formed.
- Plastic. Rectangular or round, different sizes and diameters. A rectangular duct takes up less space and this is its advantage. This type of air duct has smooth walls, due to which the air flow is higher, then dirt particles settle less on the smooth surface. The downside is that additional elbows are required for installation. The joint should be sealed with a sealant.

Plastic air duct for connection to the hood - Corrugated. Easily takes the desired angle of inclination. Additional elbows are not required. To avoid excessive noise, the corrugation must be well stretched. In order for the air flow not to decrease, the bending angle should not be more than 90 degrees. Excessive bending leads to a decrease in the performance of the hood. If necessary, make a rectangular shape from a round one, then this is easy to do by pressing with your fingers.

Corrugated exhaust duct hidden behind the panel
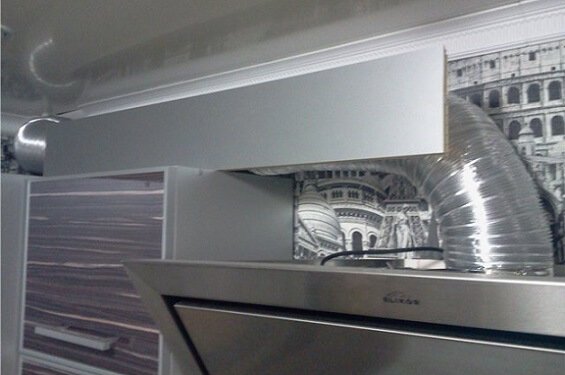
Both types have a number of pros and cons. You decide what to choose based on the parameters of the equipment, the capacity of the cabinet, and your preferences.
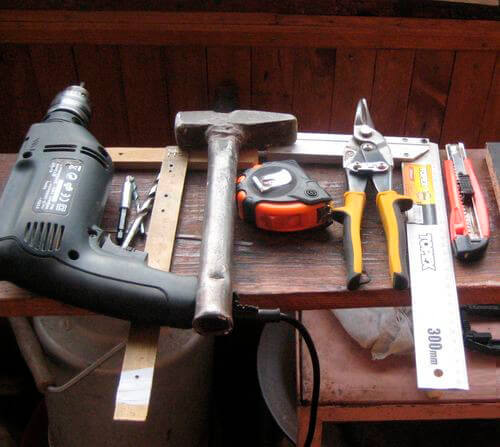
The following tools will be useful for the work. For marking and measurements, you will need a tape measure, a square, and a pencil. For cutting holes, you will need a jigsaw and wood saws. You will also need a screwdriver, bolts, and screws. To glue the joints, buy a sealant. To enhance the tightness, use clamps, which you need to prepare.
Working with the bottom shelf of the cabinet
When installing a built-in hood in a cabinet, there are several options.
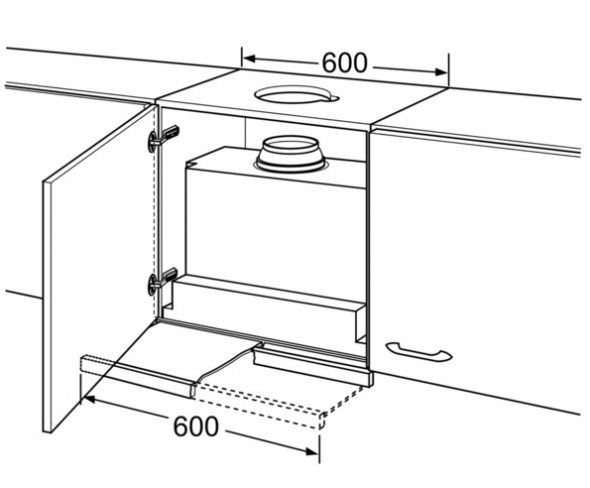
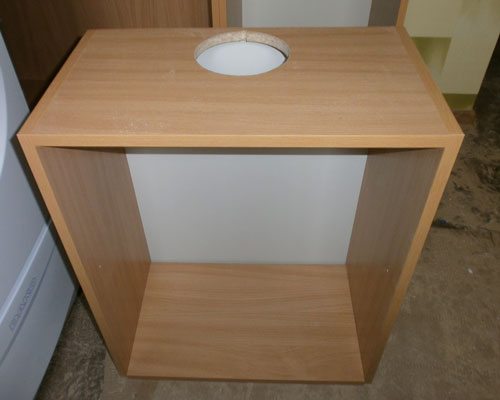
- Order a kitchen cabinet, already without a bottom. To bring out the air duct, you will need to make corresponding holes for it in the middle shelf and the top.
- Make a cabinet for the hood with your own hands, based on the dimensions.
- Rework an existing piece of furniture by first removing the bottom or cutting a hole according to the available dimensions.
There is no need to disassemble the cabinet. You need to remove it from the wall, detach the doors. It will be more convenient to carry out your actions on the floor. "Unstitch" the back wall, unscrew the side fasteners, then the bottom shelf will easily come off by itself.
When cutting out space for the hood, it is necessary to do it so that the body of the device fits tightly to the front wall, and not vice versa. Mark the place where you will cut with a marker, drill holes in the corners of the mark, and then cut.
Transformation of the middle part of the cabinet
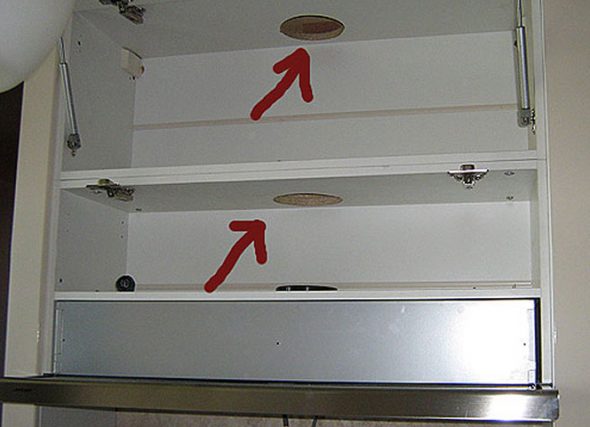
Most often, the hood is attached to the middle shelf. Therefore, it is also necessary to make a cutout for the air duct. We mark the place of the cut with a pencil, if it is round, we drill a hole with a diameter of 10 mm for the saw to enter and cut along the mark.
Then it is necessary to mark the places of attachment of the device to the middle part. Attach the shelf to the body of the device, make a notch with a sharp object in the place of the future location of the screws.
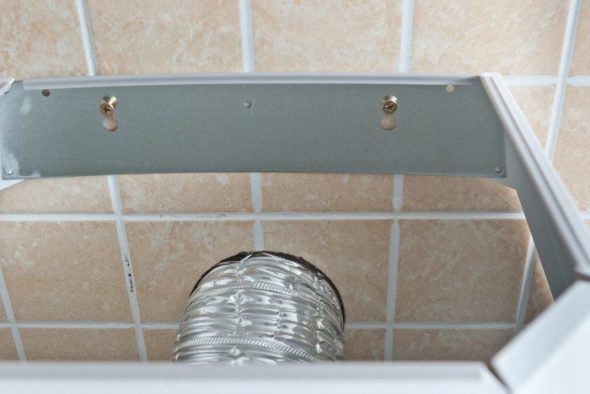
To secure the shelf to the sides, use plastic corners. First, attach four corners to the shelf, adjust its position by placing the box on the floor.
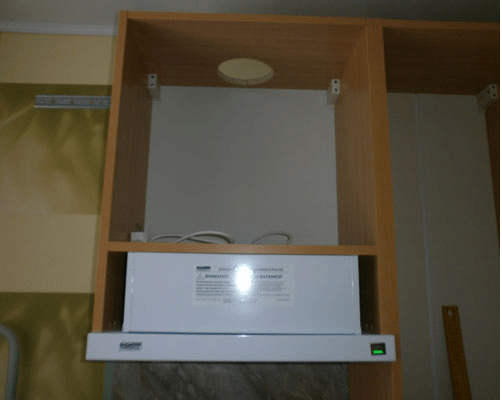
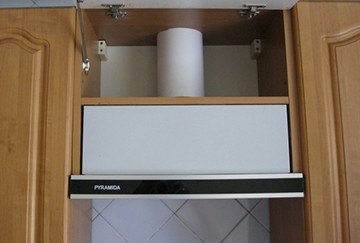
We build the hood into the cabinet and install the air duct
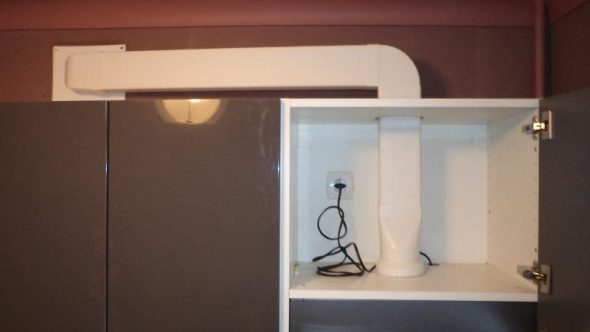
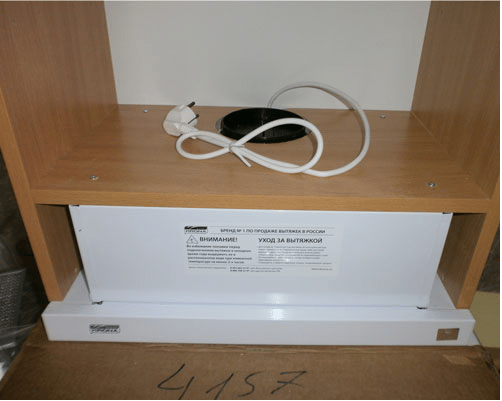
The penultimate stage of work will be the connection of all parts. The cabinet with the middle part and the hood fixed to it is hung in place. Do not forget that the sliding part of the equipment should move freely back and forth. This part contains a filter that catches fat. It starts working when the moving part is located above the stove.
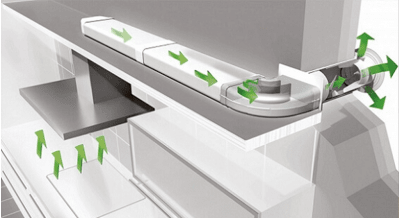
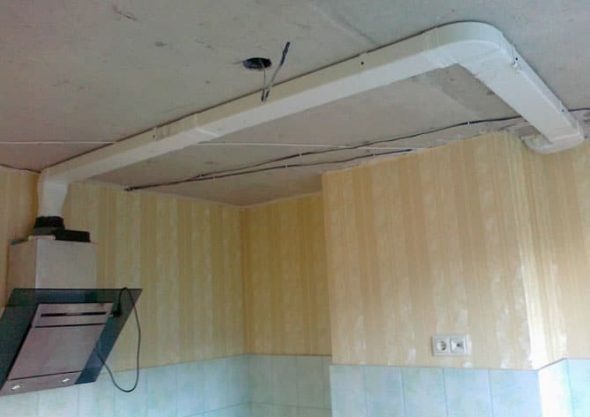
The last stage is the installation of the air duct. It is inserted through the top of the cabinet, into a pre-cut hole, and connected to the device. The joints must be coated with glue and secured with clamps. It is also important to maintain the ability to disconnect the parts to clean the system from dirt.
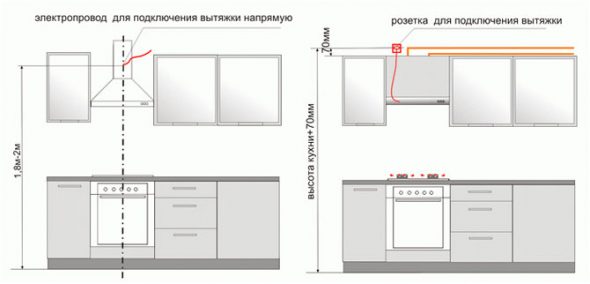
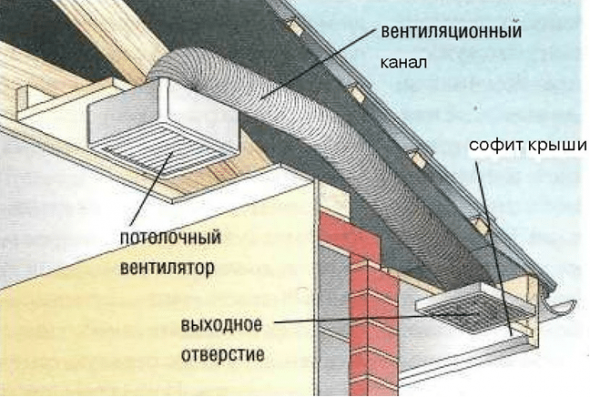
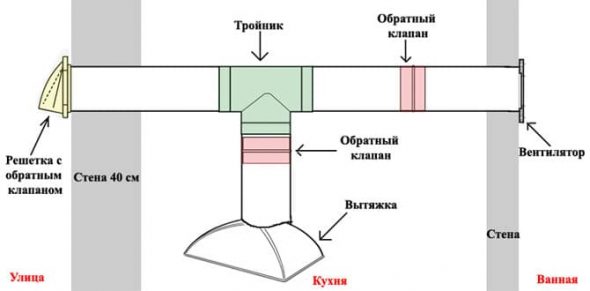
Then the air duct is connected to the ventilation. Special grilles are used for fastening. The hood is an electrical appliance, a grounded socket must be located nearby.
The work is not at all difficult, if you take into account the points described above. The built-in hood is a good option for those who want to save space and maintain a beautiful interior.