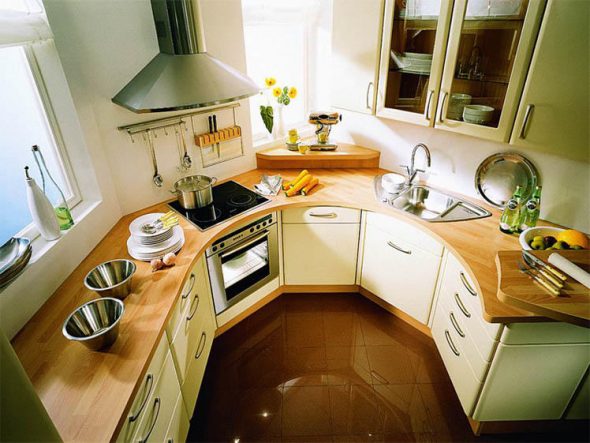
The kitchen is the heart of any home or apartment. The condition of this room determines how cozy the entire living space will seem. The kitchen set project must be approached very responsibly, since this part of the house is not as easy to change as, for example, a sofa or a wardrobe. There are ready-made kitchen set projects freely available that can be used if the kitchen needs renovation. However, they are not suitable for everyone: the apartment owner may have complaints about the design solutions, the project budget or the dimensions of the furniture. In this case, the best solution is to independently design the kitchen set and assemble the cabinets with your own hands.
Content
Preparatory stage
Before drawing up a kitchen set project, it is necessary to gain knowledge in this area. There is no need to become a guru in drawing and carpentry. It is enough to learn basic information.
We recommend that you obtain information from the following sources.
- Video tutorials on kitchen design from professionals. They describe in detail the stages and features of the work. Since this is a preparatory stage, you should not immediately try to repeat what is stated in the video. You just need to understand the principle of the upcoming actions.
- Friends who have recently renovated their kitchen. Ask them how they solved the problem of small footage, what program they used to draw, whether they encountered any problems. A live interlocutor will give the most complete answers to the listed questions.
- Kitchen workshops and furniture stores. Any client can get a free consultation and even make a sample kitchen project in a department of a furniture hypermarket. To do this, it is not necessary to use other services of the company (buy furniture, etc.). Organizations charge a fee for a detailed consultation, but it is limited to only 1 thousand rubles. For this money, you can get advice on the arrangement of furniture, electrical appliances, and the choice of style specifically for your premises. Individually selected recommendations are always more useful.
- Magazines, TV channels, other media sources that provide access to information about repairs. By casually skimming through texts or programs, you can pick up several useful ideas - how to save space, arrange furniture more conveniently, etc.
Below is a general instruction for designing a kitchen set on your own. Remember that when developing a drawing, it is necessary to take into account the features of your specific premises (footage, presence of unevenness on the walls, location of communications, etc.).
Kitchen design
The development of a kitchen set occurs in stages. The first step is a careful measurement of the room in which the furniture will then be installed. Then the budget is calculated, which determines how many units of furniture will be included in the project.
Correct measurement of the room
Measure the following parameters required to create a kitchen set:
- ceiling height;
- distance from the window to the floor and from the window opening to the ceiling;
- width and length of the room;
- evenness of the angles (they must be 90 degrees; if they do not meet this indicator, alignment is required).
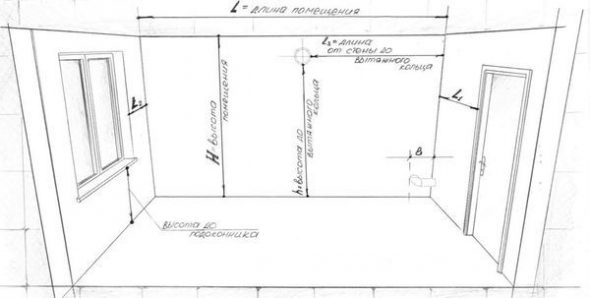
If there are noticeable differences in height in different places of the wall, either eliminate the defects or take this factor into account. Bulges in the upper plane of the kitchen can prevent the cabinets from being installed correctly. In order for them to fit properly, with any unevenness between the sections, you need to make a small gap. Be sure to measure the angle between the wall and the ceiling. If it is less than 90 degrees, calculate how much you need to lower the upper cabinets.
Calculate the total footage of the room. Based on this, choose the principle by which the cabinets will be arranged (see the section "Arrangement of furniture and household appliances").
Budget calculation
The final appearance of the kitchen depends on material limitations. If you have a small budget, you should replace standard cabinets with narrow ones, which are on average 25% cheaper. The differences between regular and small cabinets are discussed below. If you have a small supply of funds, you should also limit the number of cabinets, exclude niches for a dishwasher and other expensive built-in appliances.
Please note that cheap furniture sets are made of MDF, the average wall thickness of which is 1.6-1.8 cm. Natural wood may have different parameters.
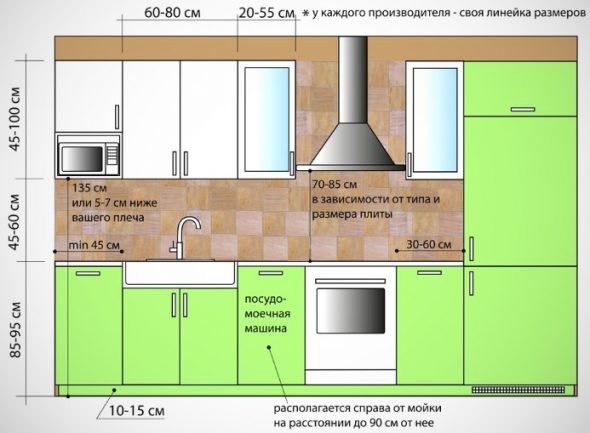
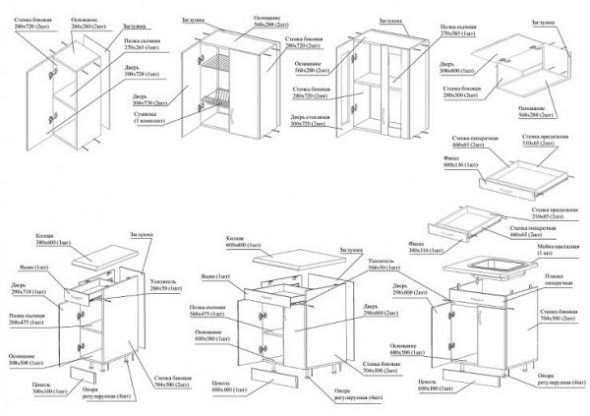
Furniture dimensions

In order not to make a mistake with the installation of furniture and to eliminate the possibility of gaps or mismatches, it is necessary to take into account not only the parameters of the room, but also the characteristics of the cabinets.
Standard indicators of kitchen furniture.
| Table top | Depth – 60 cm, 3-5 cm more than the depth of the cabinets, thickness 28-40 mm |
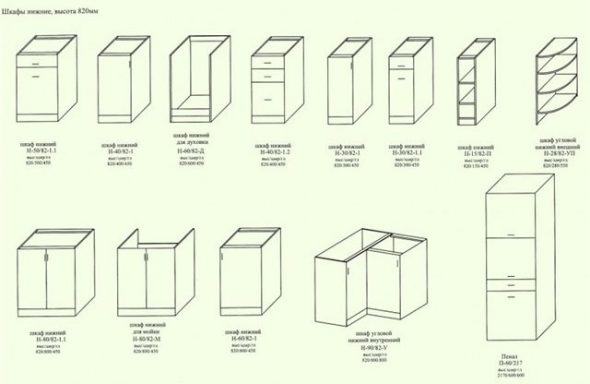
| Floor standing cabinets | Plinth 10-15 cm, main part 72, depth 55 cm, width 15-90 cm |
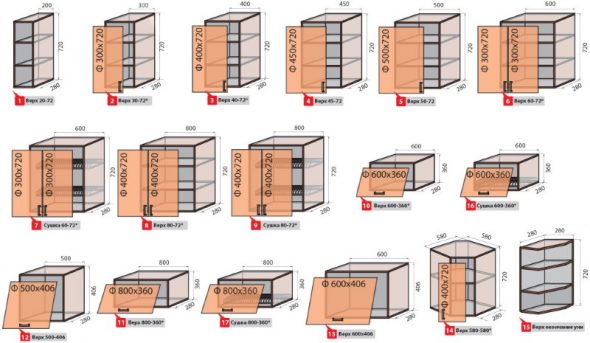
| Wall cabinets | 45 cm from the table top, depth 30, height 70-90 |
| Narrow floor sections | The depth is reduced to 45, then the table top should be no more than 50 cm |
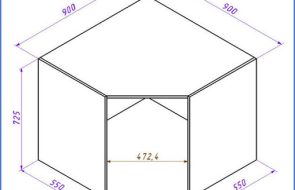
| Corner cabinets | 60 cm long from each corner, front 38 cm |
The height of floor-standing units is usually 80 cm, but not all devices can be built into such cabinets. It is better to take parameters with a reserve: 85 cm, since many washing machines and dishwashers are 82 cm high. If the owner of the apartment is tall, the cabinet should be 90 cm.
How to make a drawing
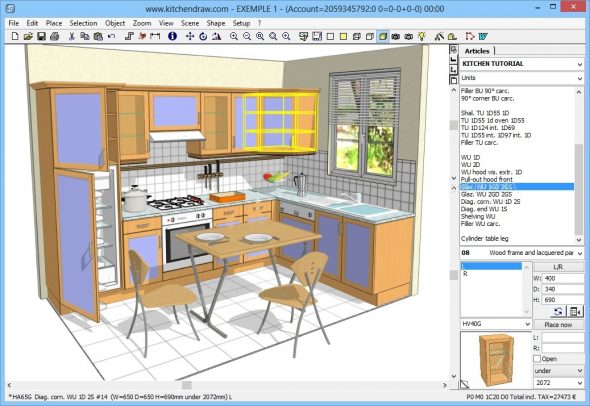
Computer programs for 3D modeling can facilitate the design of a set. With their help, you can calculate the exact dimensions of the furniture, visualize the outlines of the set, the texture of its external finish, and the internal filling. The programs are available even to beginners and can be easily mastered after 2-3 hours of studying the basic rules of use.
The best programs for modeling:
- KitchenDraw;

KitchenDraw kitchen modeling software example - Woody;

Woody kitchen furniture design software - PRO-100.

Furniture design and kitchen design in the PRO-100 program
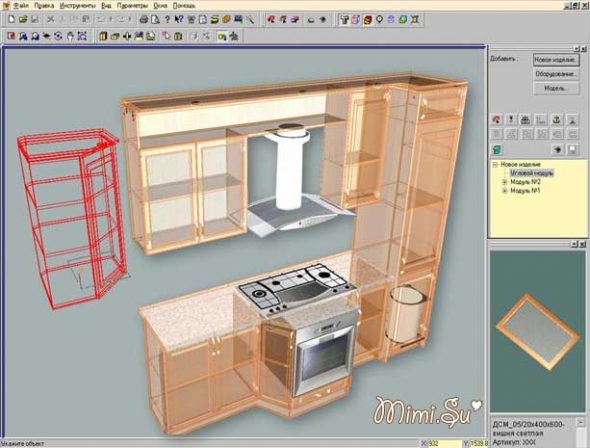
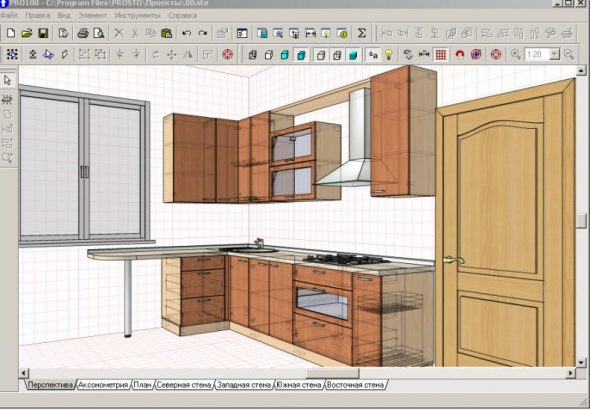
Pay special attention to the last program: it is functional and understandable for beginners. You have to pay for utilities. You can find hacked versions of paid programs.
If your computer skills are not sufficient to use the programs listed, make a standard drawing. Use half or a whole sheet of Whatman paper, pencils of different hardness (H for thin lines, soft ones for notes), a pen (it is used to indicate dimensions).
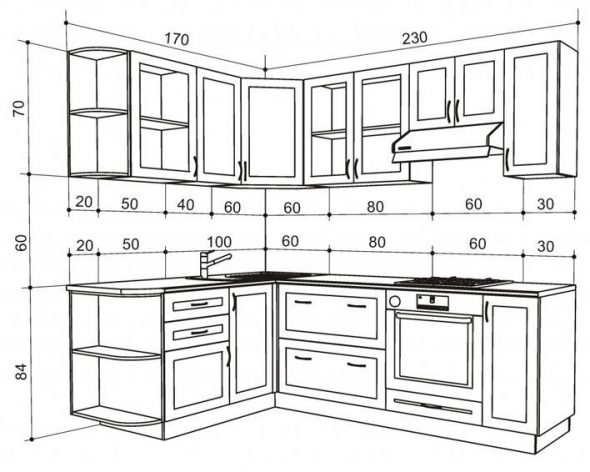
First, make a plan from above, applying the dimensions of the room to the drawing in a 1 to 10 ratio. Mark the window opening, communications, and sockets on the sheet. Then start applying the outlines of the furniture. The top view is suitable for arranging furniture. It is necessary to make a first-person sketch of the plan so that you can select the design of the facades, door handles, and other small nuances.
Arrangement of furniture and household appliances
Depending on the kitchen area, the installation of the set can be done in different forms.
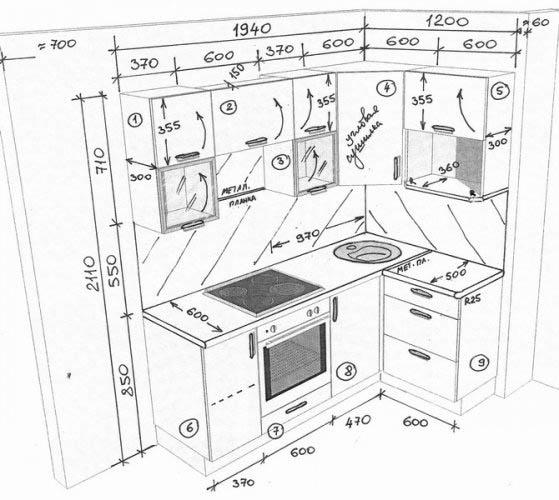
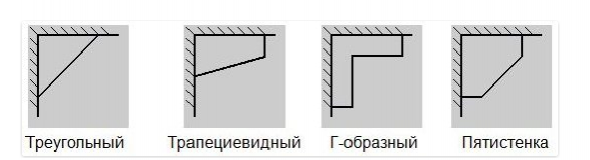
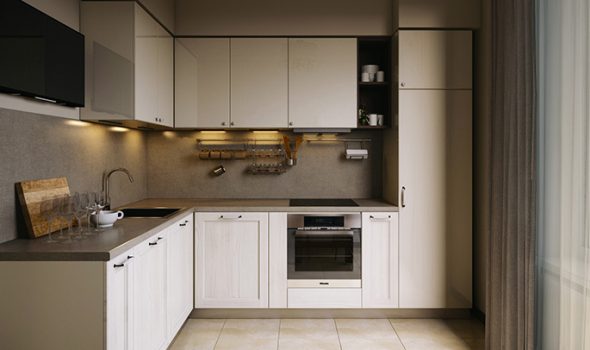
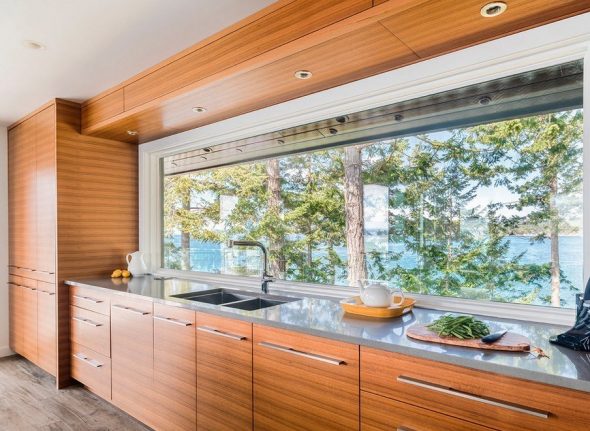
- The letter "G" is the best option if there is a section of wall near the door that is at least 1.5 meters long. It is better not to install a kitchen countertop under the window, as this is associated with difficulties in creating a pocket for the battery. This variation is suitable for kitchens larger than 6 meters.

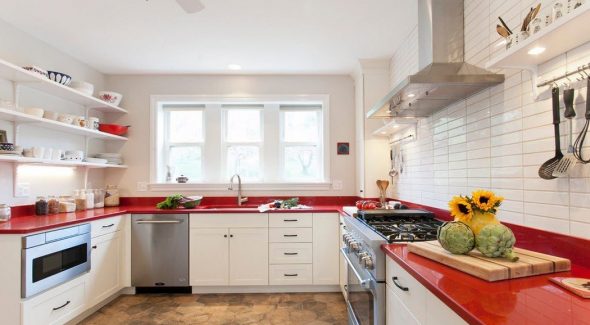
The L-shaped arrangement of furniture makes the kitchen compact, spacious and very laconic. - The letter "P". Suitable for large apartments and country houses, the kitchen area of which starts from 12 square meters. With this arrangement, a "collision" of the countertop and the battery is inevitable. In order not to cover the heating element, you can increase the window sill and make a hole in it for the heat to escape. Another, more complex option is to install a floor battery. The grate is installed directly into the floor.

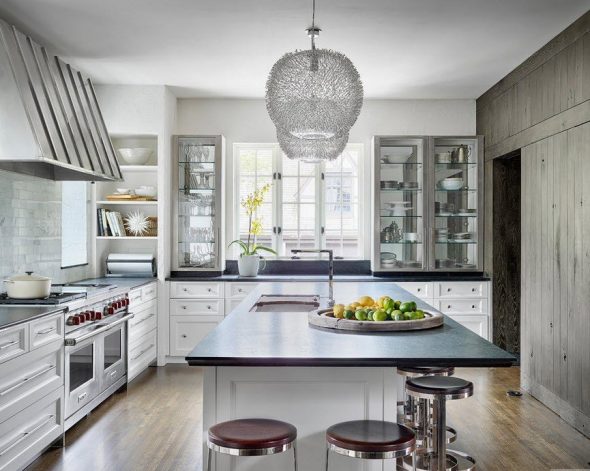
U-shaped kitchen layout – a layout in which all storage systems, work surfaces and appliances are located along three walls - With an attached ledge. Reminiscent of the letter "T". The kitchen island is located approximately in the middle. It can be stylized as a bar counter or perform its main function as a countertop for cutting food. A sink is sometimes built into the island.

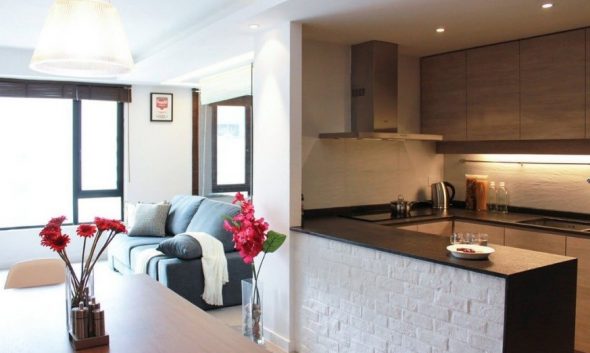
A peninsula layout in which the kitchen island is combined with one side of the work areas located against the wall - With a free-standing island. An option for spacious kitchens over 15 square meters. The island is located approximately 70 cm from the main line of the countertop. Its standard length is 2-4 sections. If there is a free-standing island, the cutting area and an additional sink can be moved to it.

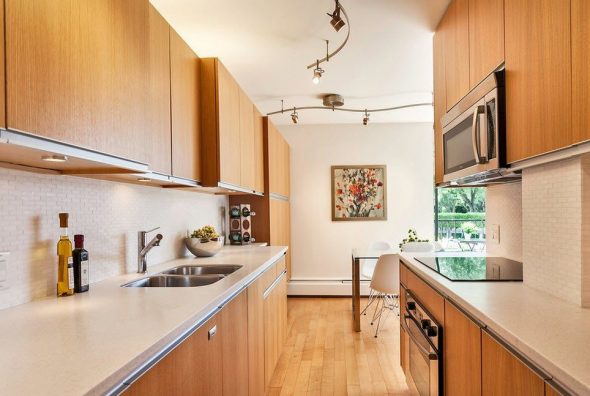
The kitchen island is a free-standing furniture module - In one line. If the kitchen area is less than 6 meters, all that can fit is a single chain of cabinets with a countertop. With the right arrangement of household appliances, a two-seater furniture set for dining will fit. If desired, it can be replaced with a bar table - then you will get a cropped version of the letter "G".

Linear layout is ideal for narrow rooms, small spaces - In two lines. In long and narrow rooms it is convenient to arrange furniture on two sides: on the right – all household appliances and work surfaces, on the left – the dining area.

The parallel layout is suitable for a walk-through kitchen with a fairly large area.
It is not enough to simply choose the curve of the line of cabinets and countertops. You need to clearly calculate where each piece of furniture will be located.
Additional rules for furniture arrangement
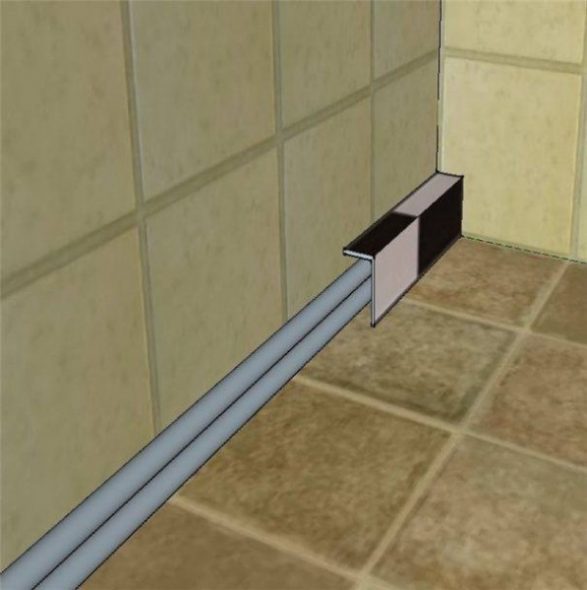
Consider the location of gas and plumbing pipes. It is not advisable to hide the former behind cabinet fronts. But water pipes should be hidden from the eyes of household members and guests. Calculate the necessary openings in the cabinets. If the sink is not located right next to the pipes, you will have to make through passages in the walls.
Do not forget that additional space (for opening doors) must be allocated for cabinets. It is equal to the length of the section, 45-70 cm. Do not place kitchen islands and bar counters closer than this distance.

Recently, the microwave oven and coffee machine have been moved to the top line of cabinets. The lower half of the section is replaced by an open niche where one of the devices is installed. Do not place such niches above the stove or sink, as this can lead to a short circuit. When calculating the height and length, take into account the parameters of the device: microwave ovens are usually produced with dimensions of 50 by 40 cm, coffee machines - 45 by 60.
Recommendations for the arrangement of electrical appliances
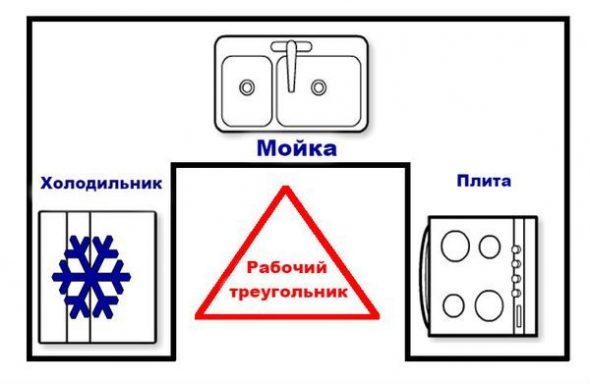
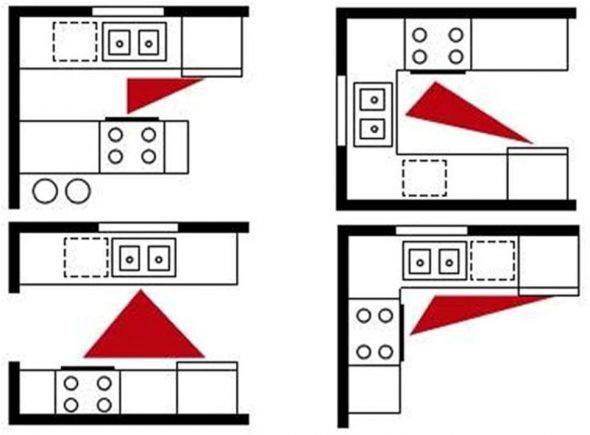
The center of the kitchen should be the "working triangle" - the area where the sink, refrigerator and stove are located. The distance should be such that the owner can move from one area to another in two steps without encountering any obstacles along the way.
Optimal location of the "triangle".
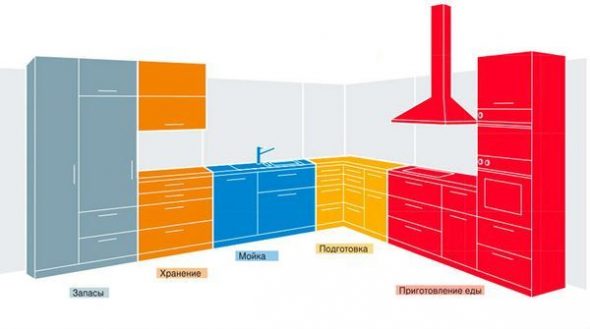
- Refrigerator. Close to the window - the cool air from the street allows to increase the service life of the unit, in addition, the device located in the corner does not block the view of the kitchen and does not interfere with moving around the room.
- Sink. It is advisable to make a gap of one section between the refrigerator and the sink, although it is not mandatory. This distance can simply be used for defrosting products or cutting them. The sink should not be too far from the plumbing pipes.
- Stove. Be sure to keep a distance between the sink and the heating element - at least 70 cm. This will protect the stove from splashes of water, which can lead to a short circuit in the wiring. For the same reason, it is advisable to move the sink away from the refrigerator.
It is better to use the lower section of the cabinets for household appliances: dishwasher, washing machine, oven, etc.
Useful tips
Before you bring your electronic drawing to life, take it to a kitchen furniture store. For a small fee, go over your kitchen set project in detail with a consultant. He or she may notice errors and shortcomings that the owner would not have noticed in time.
When implementing the project, use some services of professionals. For example, entrust them with milling holes for the sink or other devices. With this approach, the furniture will be more aesthetically pleasing, without gaps, and will last longer.
Basic mistakes
Most beginners forget to measure the angle of the wall or the ratio of the side and top plane of the room. This causes problems: the cabinets either do not fit or form an uneven line. This defect can be corrected by making major changes: creating a new cabinet or leveling the wall. To avoid this problem, you need to study the evenness of the wall, ceiling and floor in advance.
Another mistake is the lack of "allowance". When calculating the dimensions of furniture, an error of about 10 mm should be taken into account. That is, the total length of the cabinets should be less than the same parameter of the wall by 1 cm. Then all the sections will fit into the designated niches easily and quickly.