When arranging a home interior, the question of organizing a place for storing household items, things, small accessories inevitably arises. Various cabinets, chests of drawers, wardrobes, shelves are provided for this purpose. However, such furniture is more suitable for storing large, medium-sized items. Various small items are much more convenient to store in drawers. This article discusses their main advantages, provides detailed instructions for making them.
Content
Advantages of drawers
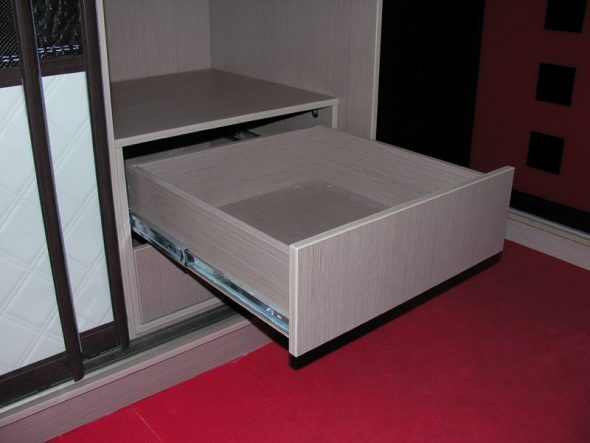
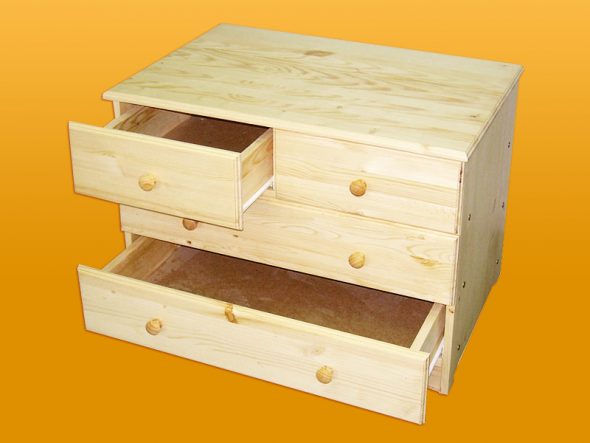
The main task when arranging a home interior is to create a comfortable, functional, practical space. Regular cabinets cannot always cope with this task. In standard furniture, part of the space remains empty - you just can’t reach it with your hand. Things that are in constant use should always be at hand. Drawers will help you store items easily.
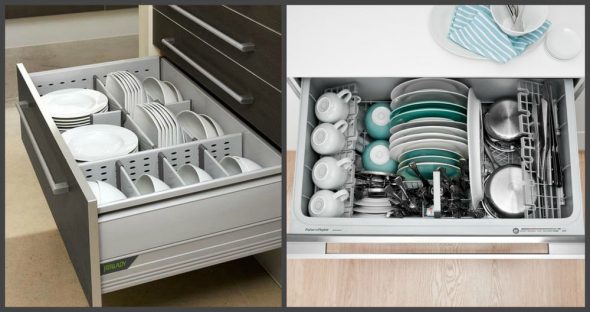
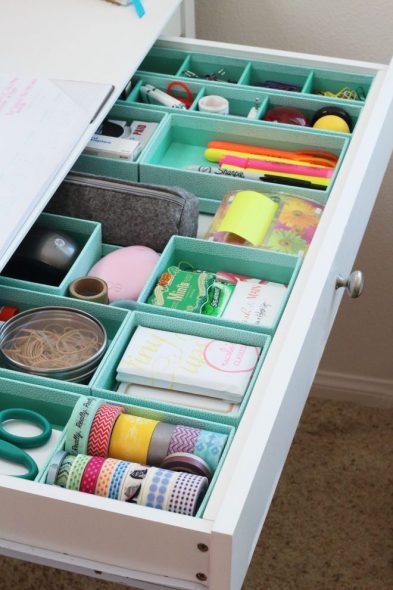
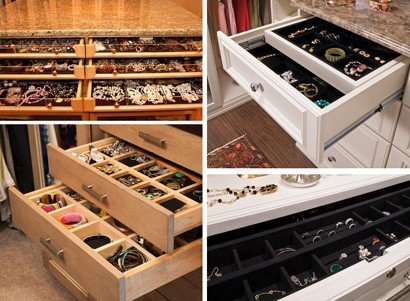
Such systems have become simply irreplaceable. They save space, have an attractive appearance, and are easy to assemble on your own. They are very convenient for storing underwear, cosmetics, kitchen utensils, towels, shoe laces, and other small items. Such furniture is needed in any room.

Varieties
Spacious drawers are made in different sizes, shapes, types. It is simply impossible to list all the variety of types developed by furniture technologists. Let's consider the types of such furniture, depending on the two most common classifications, in the table.
| Classification feature | Types |
| Material of the body | Chipboard. Cheap material, easy to process. Chipboard elements can serve for a long time with proper fastening and handling. |
| Furniture boards. Sold ready-made. They are characterized by high strength and have sufficient density. The boards are more expensive than chipboard and last longer. | |
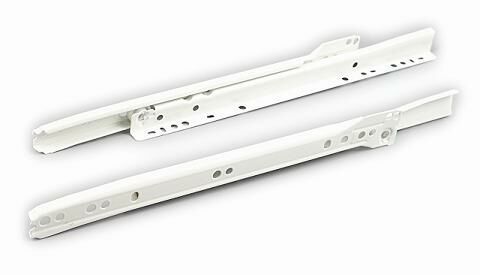
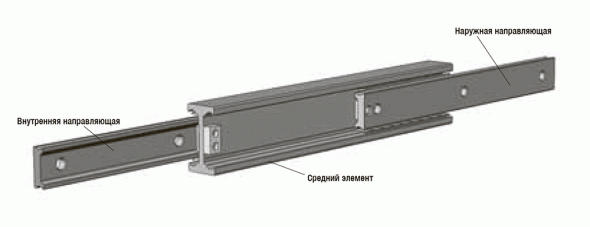
| Guides | Roller. The most popular type. Roller guides are inexpensive, have a reliable mechanism, and a simple design. |
| Telescopic. There are guides of full and partial roll-out. The first are more practical, allow full use of space. These guides are highly reliable. They can withstand a large weight - about forty kilograms, are more expensive. | |
| Wooden slats. The most budget-friendly, simple option. You can make guides of this type yourself from ordinary wood. They can be used to install small drawers. |
Features of DIY production
Making drawers with your own hands is quite simple, following the detailed instructions provided below. Many will find it easier to buy ready-made products. However, the required size is not always available.
Making furniture yourself has its own peculiarities. First, you need to clearly define the materials. An excellent option would be to buy the following elements: chipboard for the side panels, fiberboard for the bottom, full roll-out guides. This is an excellent set of materials from which you can build a solid box.
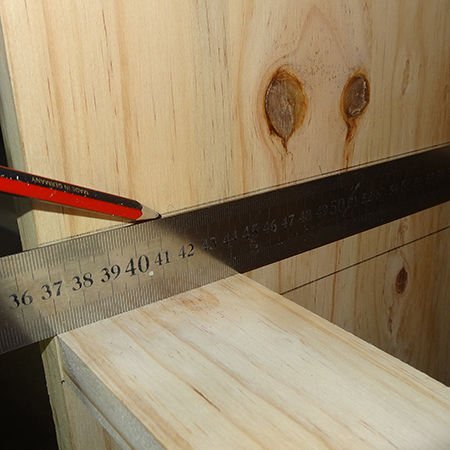
The next step is to create a graphic plan. On a regular sheet of paper, you need to draw the components of the future product, mark their sizes, attachment points. Such a plan will help to complete the assembly as quickly as possible. The most difficult of all the above is the calculation of the sizes. It is difficult to determine the required dimensions by eye. Incorrectly selected sizes of drawers will significantly complicate the assembly and operation process.
Calculation of parameters
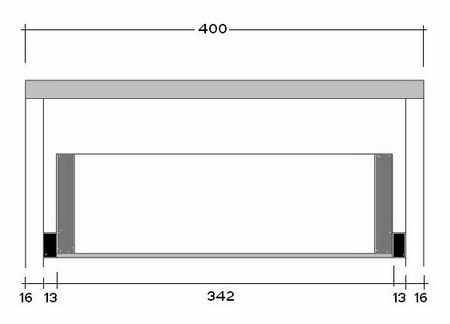
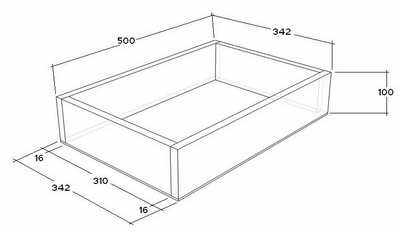
Designing drawers is easy. First, you need to calculate the required width. It should be 26 mm less than the width of the cabinet body - its internal opening. On each side, about thirteen millimeters should remain for installing the guides.
Next, you need to find out the length. It will depend on the depth of the cabinet. This parameter is necessary when choosing guides. They come in different lengths: from 250 to 800 mm. You need to calculate the length of the products in advance, and only then buy guides for it. We measure the depth of the cabinet with a regular tape measure. Do not forget to leave a few tens of millimeters in reserve, depending on the design features of the furniture. Due to the standard sizes of the guides, sometimes you have to slightly reduce the length of the drawers.
Now is the time to decide on the height of the sides. The size of the sides depends on the furniture design of the cabinet. In the production of furniture products, the rule is used - the height of the drawer should be less than the height of the facade by 40-50 mm. There are no prerequisites for deviating from this rule. The space left will provide an opportunity to correct errors, correctly adjust the operation of the finished product.
Tools, materials
To assemble drawers, you need to prepare the following list of tools and materials:
- drill (sometimes it can be replaced with a screwdriver, but you need a very powerful screwdriver);
- electric jigsaw (it will allow you to cut chipboard with the highest possible quality, eliminating damage and chips);
- ruler;
- construction angle;
- rag;
- knife;
- pencil;
- roulette;
- nails, screws, fasteners;
- guides;
- the main material for the construction.
When buying slats, elements of the design of future drawers, you need to consider several important criteria. The first is strength, high quality. The materials must withstand loads, not lose their qualities after several years of use. The second criterion is resistance to damage. A feature of such drawers is their frequent use. When pulling out the structure, you can easily cause minor damage. Durable material must withstand minor impacts, collisions with the cabinet structure.
Step by step instructions
So, how to make a drawer yourself? Let's look at the step-by-step instructions.
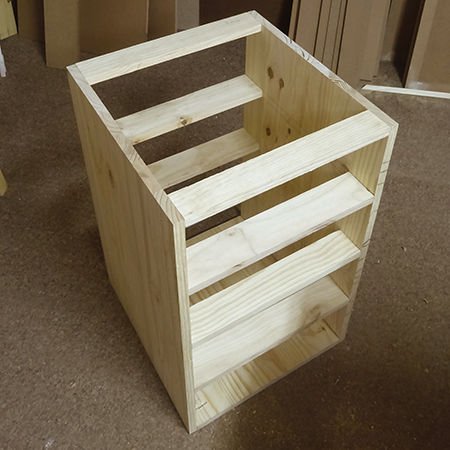
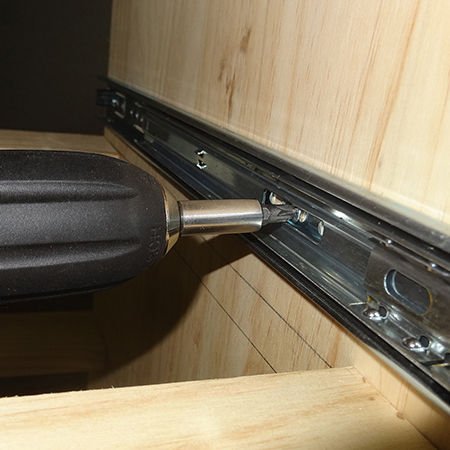
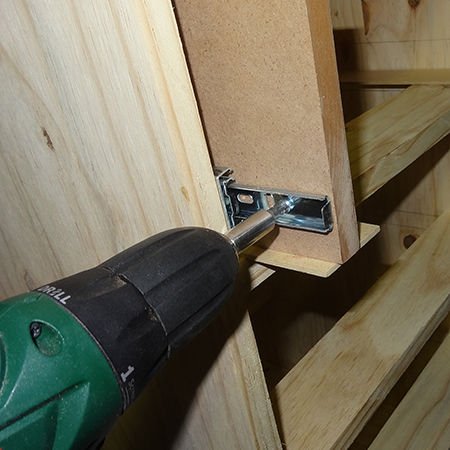
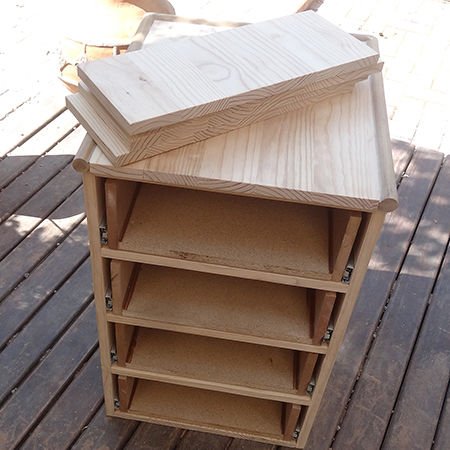
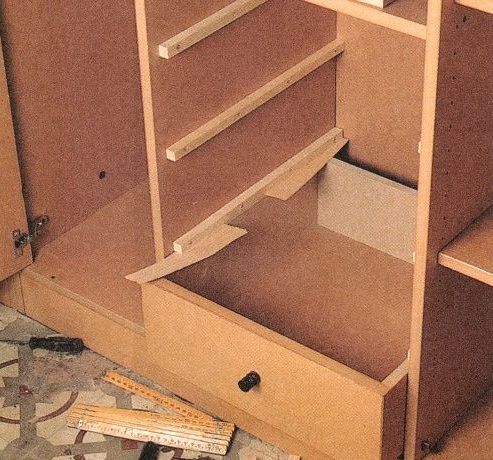
- Assembling the cabinet. First, you need to fully assemble the drawer frame. You can mark the guides on the side of the cabinet.

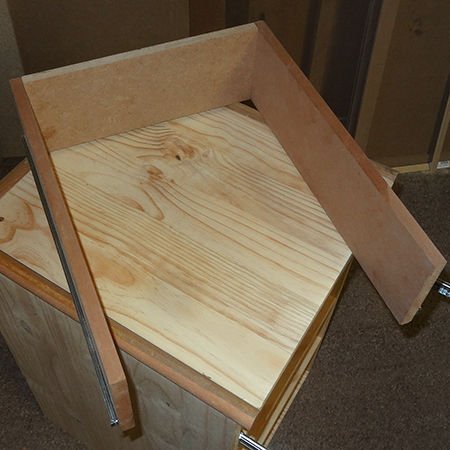
Ready assembled frame of a nightstand with drawers Bedside table frame with top panel We apply markings on all sections and for all drawers for drawer guides - Fastening the side parts of the guides. For this you will need 3x15 screws. They are usually sold together.
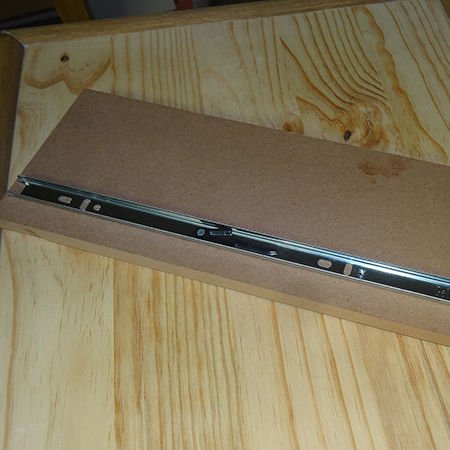
We fix the guides on the side panel using a screwdriver, constantly checking with the markings We install the mating part of the guides on the side walls of the drawers Drawer side panel Correctly installed side panel - Cutting out the elements of the box. For ease of work, we use a pre-prepared graphic plan, where all the dimensions are indicated. Chipboard mode with an electric jigsaw.
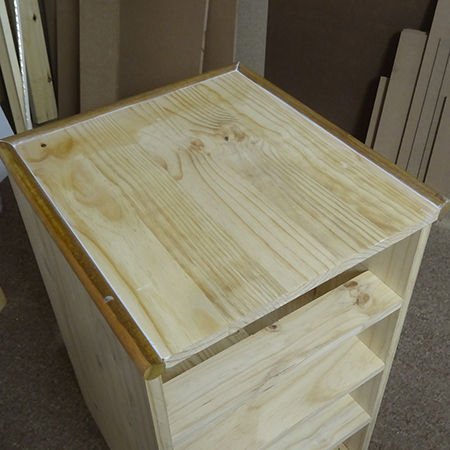
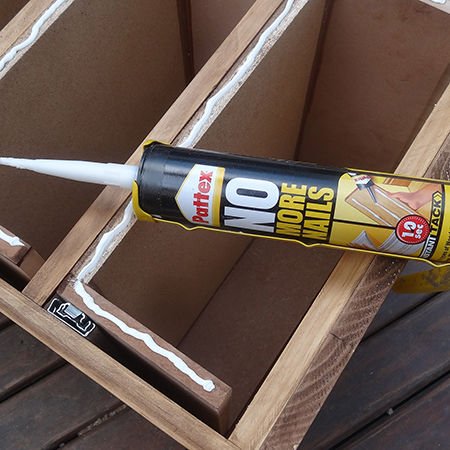
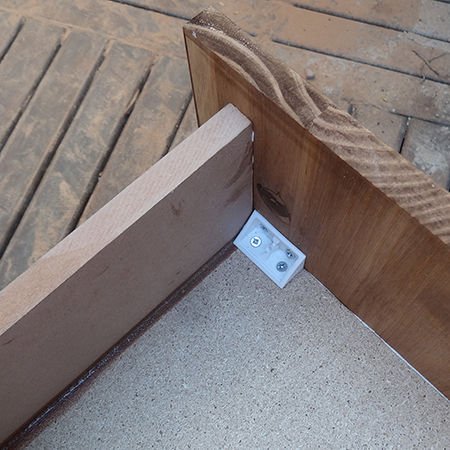
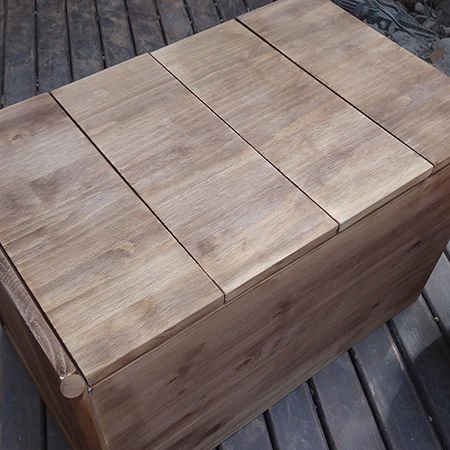
We connect the fragments of the boxes Bedside table without front panels - Fastening the prepared elements together. We act according to the plan. For fastening, we use special furniture fasteners. The fasteners must be strong and of high quality;
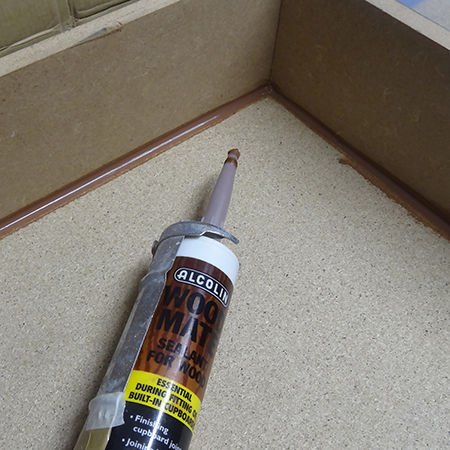
We apply adhesive to the drawers and install the panel. We fix the panels using a corner - Installing the bottom. You can attach the bottom to the frame with small nails.
We are fixing the bottom of the box 
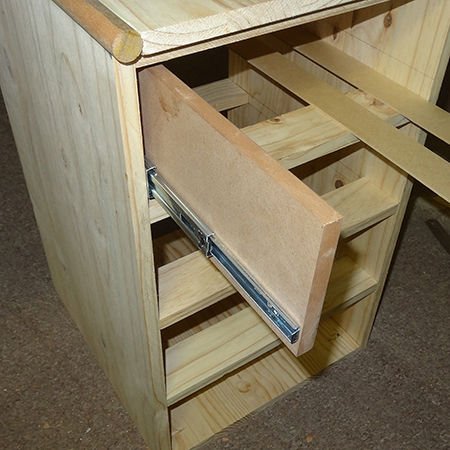
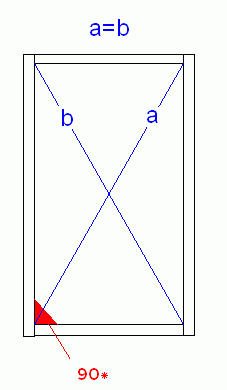
Checking the diagonals of the boxes for distortions - Fastening the second part of the guides. We use screws. Their size will depend on the type of slats chosen.
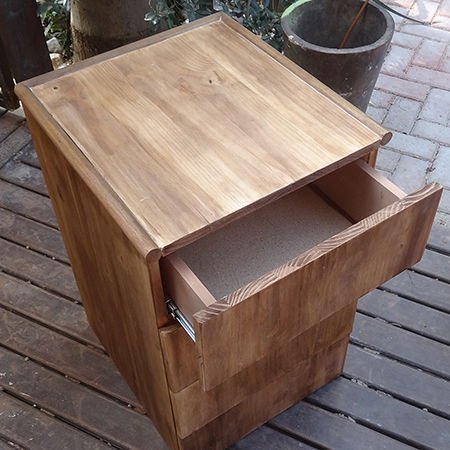
- Fastening the facades. It is important to set the facades correctly. The gap between the drawers should be the same. You can adjust the position of the facades using regular tape. We stick double-sided tape on the front walls, temporarily fasten the facades, adjust the gaps. Drill holes, remove the tape, finally fasten the facades. The drawer is ready!
Installed panels Ready-made bedside table with drawers