A wardrobe is an integral part of the interior, a functional component of any apartment, house, office space. Many people, when choosing it, give preference to the design of sliding doors, with their help you can save useful space, accommodate large-sized things and objects, independently design the dimensions, individually model the number, sizes, functionality of shelves and partitions.
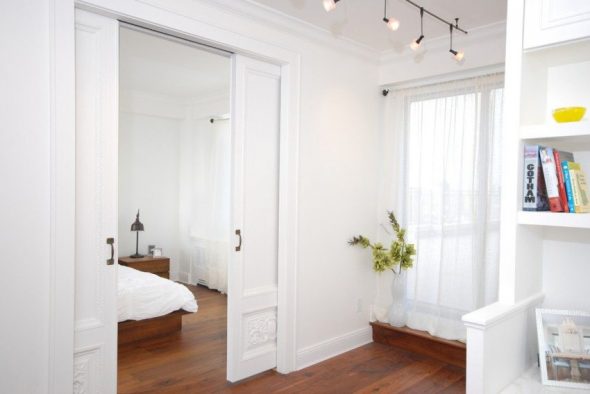
As practice shows, the design of sliding doors is used for cabinets, separating spaces, room niches, storage rooms, hallways, and installing interior sliding doors. Of interest is how to install doors for a sliding wardrobe with your own hands, since with the installation of its insides everything is more or less clear.
Content
The benefits of DIY
You don't need to have great construction skills to install, design, assemble doors for a sliding wardrobe with your own hands. If you decide to do this, you will receive a number of advantages.
- You will save money on paying a furniture assembler, designer, measurer, and sales manager.
- You will be able to independently select the necessary materials and components for installation.
- Choose an individual design for your facades.
- Make rational use of available space.
- Save time, because you don't have to wait for the assembly technician to be available. Often, about two weeks pass from the moment of ordering until the day of assembly.
- You will gain invaluable experience in installing sliding doors and apply it in other rooms, at your dacha, or at your relatives’.
The only downside of compartment doors is that they cannot be moved. However, the fact that their doors do not need to be opened ninety degrees, which significantly saves useful space, allows you to think through the installation location in a rational way, so that you will never want to move them.
We decide on the design and construction
Each house has its own world, each room has its own design. When choosing a canvas for a sliding wardrobe, facing materials, you need to select an individual design, their unique construction.
The choice of the design of the canvas is significantly influenced by the room's furniture content, style, renovation, wallpaper color, furniture fittings, curtain material, room lighting, and the functionality of the room: bedroom, living room, children's room, hallway, kitchen, balcony, office, dressing room, storage room, warehouse.
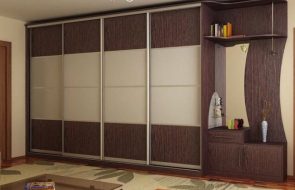
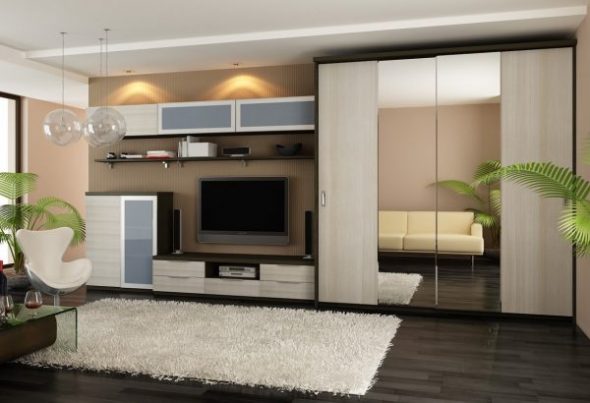
For the living room, the facade is made of glossy, wooden materials, warm, light, dark tones. Doors can be made of combined materials: gloss is combined with matte inserts, wood, mirror, glass. The color is selected according to the color of the furniture.
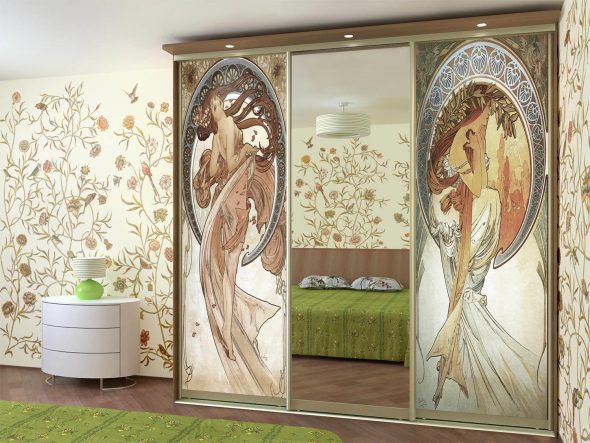
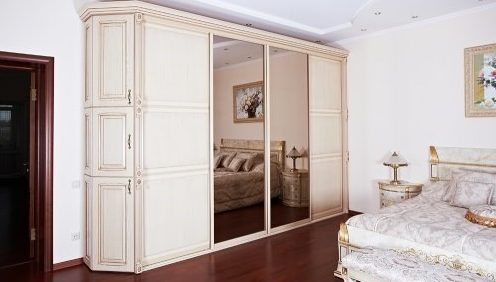
Light, warm shades are suitable for the bedroom: white, beige, milky shades, ivory, gray, various shades of wood. Often in the bedroom, inserts of a mirror, a pattern on a glossy base, matte glass with an ornament over the area of the door or a small part are installed.
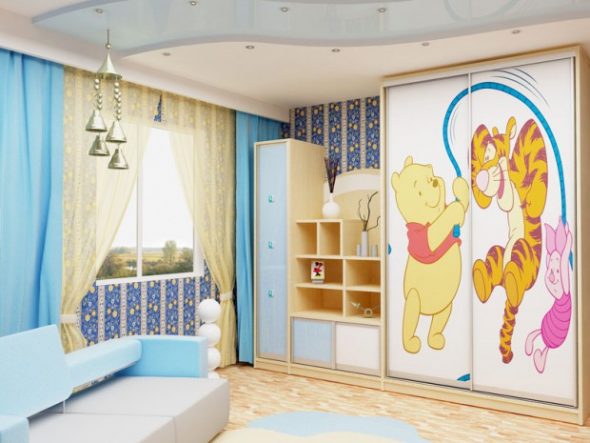
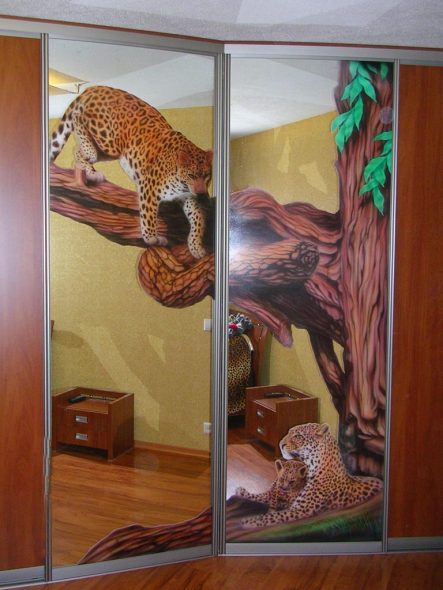
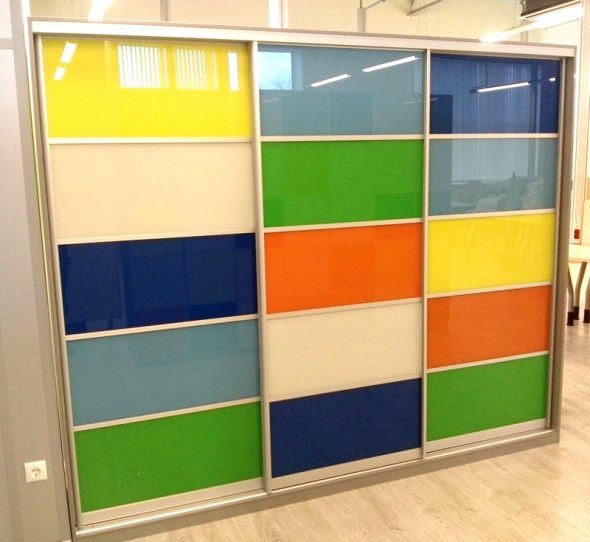
For a child's room, a sliding wardrobe is made in bright saturated colors with images of animals and cartoon characters. It is not recommended to install mirrors in a child's room, to avoid it breaking. It is not recommended to use gloss, as such material may leave traces of children's hands, which must be constantly removed.
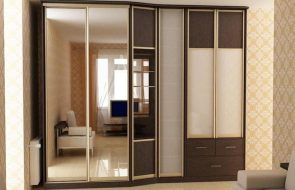
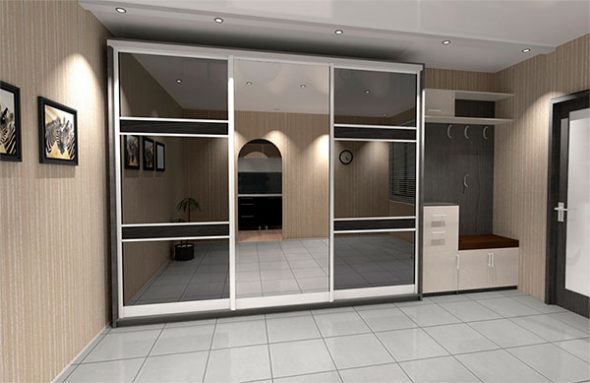
For the hallway, designers recommend using brown, dark, beige tones, or mirrors that visually increase the boundaries of the room.
For interior sliding doors, preference is given to materials made of solid wood and chipboard.
Drawings of flowers, plants, trees, personal photographs, and animal stickers are added to the canvas design.
Door designs come in different varieties:
- straight rectangular shape (the most common design, built into free corners, useless niches, along the length of the room, between rooms);
- oval shape with rounded corners (the oval design is considered the most complex and expensive, but looks very attractive, rounding off various angularities);
- full-height ceilings – the most common design;
- below the ceiling – used when, at the time of installation of the sliding structure, the ceiling is already installed: suspended, made of plasterboard with an abstract design, built-in lighting;
- with lower and upper guides - used for cabinets, separating part of a room, converting a space into a small office or storage room;
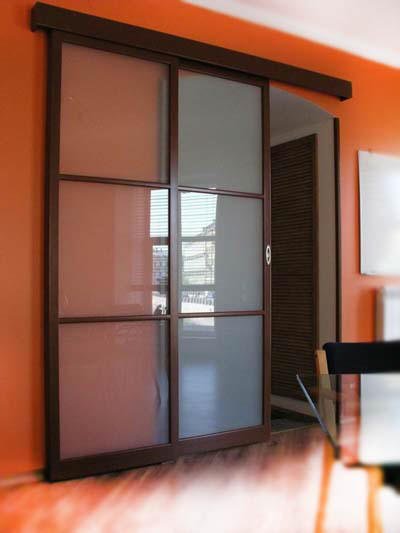
- with a suspended structure - used as interior doors;

Fittings for hanging sliding doors - cassette - when part of the structure is hidden in the walls, suitable for separating space, like interior ones.

In the open position, the panel of the cassette sliding door is located in a niche inside the wall
Calculation of door sizes
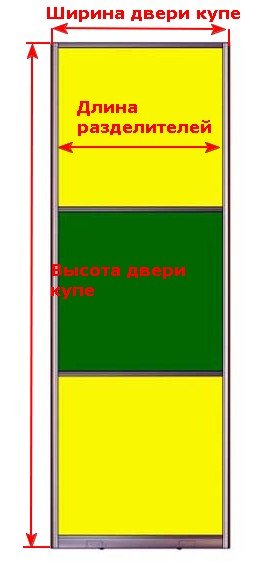
To install doors, you need to measure:
- the height of the room from floor to ceiling,
- the length along which the doors will be installed.
If the height of the room is more than 280 centimeters, then the use of a cabinet with high, heavy doors will become very inconvenient, the mechanisms with wheels will quickly wear out, which can lead to unpleasant consequences: doors falling out, getting stuck, warping. At such a height, it is recommended to divide the cabinet vertically into the main and auxiliary, acting as a mezzanine.
For example, the height of the room = 300 centimeters, then the main cabinet will be 240 centimeters high, the auxiliary one – 60 centimeters.
Once the cabinet width is determined, it is necessary to determine how many doors need to be installed. For ease of use, it is recommended to install doors with a width of 60 to 90 centimeters.
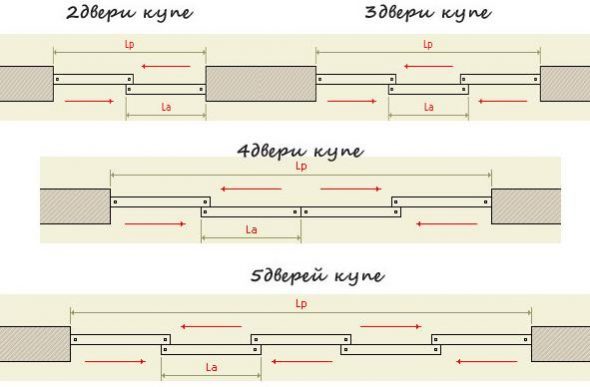
For example, the width of the cabinet = 280 centimeters, then the width of the door will be 70 centimeters, 4 pieces. Do not forget to add to each door the so-called gap of 3 - 5 centimeters, so that there are no gaps when the cabinet is completely closed.
It is necessary to take into account the optimal ratio of the door width to its height. The ratio should not be more than 2 to 1, and less than 4 to 1.
For example, the height = 200 centimeters, then its width cannot be less than 50 centimeters (4:1) and more than 100 centimeters (2:1).
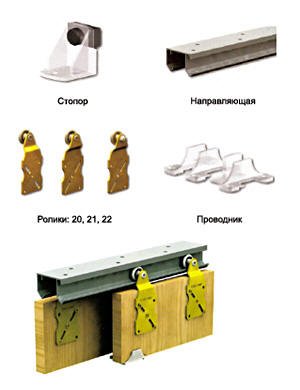
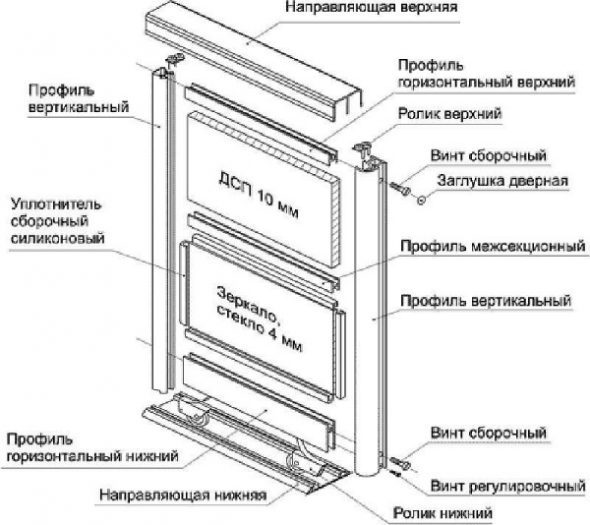
Necessary materials
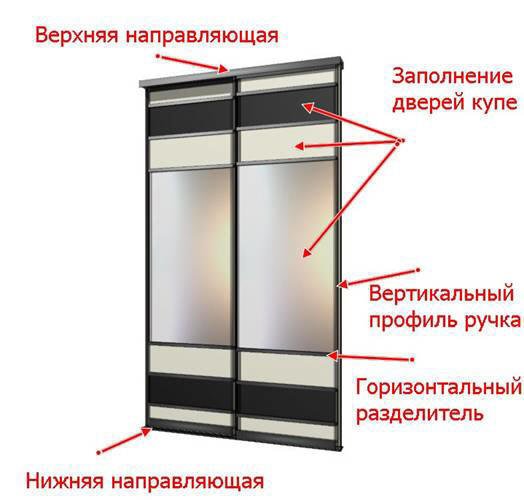
After the design, material, construction, size, installation location are determined, we proceed to the assembly itself. To do this, you need to purchase the necessary materials:
- door leaf,
- metal rails (upper and lower guide),
- rollers for the rolling mechanism of doors (lower, upper),
- buffer tape, softening the impact when sliding doors,
- silicone sealant,
- profiles,
- vertical frames (profiles),
- special adhesive film that protects against splinters if it accidentally breaks.
Necessary tools
You will need the following auxiliary tools:
- screwdriver,
- self-tapping screws,
- electric jigsaw,
- hammer,
- screwdrivers,
- hexagon,
- drill,
- building level,
- roulette,
- pencil,
- scissors,
- stationery knife.
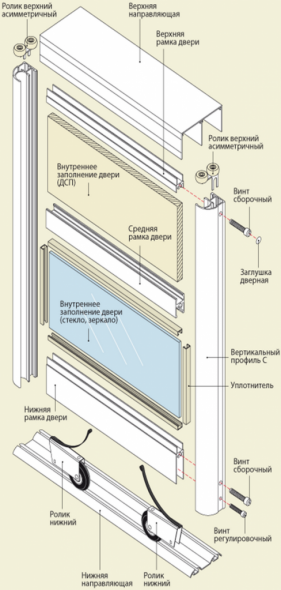
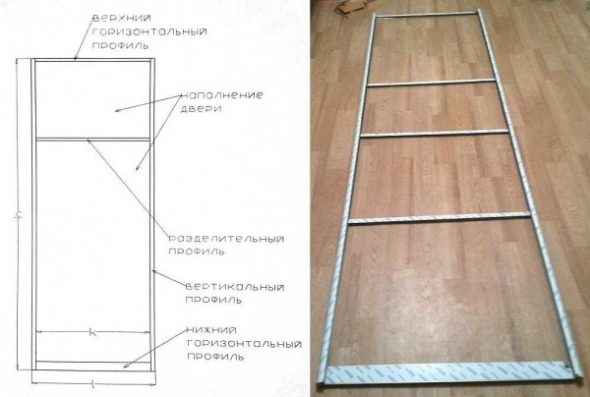
Assembling the frame with your own hands
First, let's proceed directly to the assembly of sliding doors. The sequence is as follows.
- We attach the silicone seal to the ends of the door leaf along the perimeter. It is recommended to cover the mirror surface from the back with a special film that will protect it from fragments if it accidentally breaks.

The silicone seal is attached around the perimeter of the door leaf. - We insert the panels into the vertical and horizontal profile using a rubber hammer.
- We install vertical posts on the sashes from all vertical ends, hammering them in with light blows of a hammer.
- We attach the roller mechanisms to the horizontal profiles first from below, then from above.
- We glue a buffer tape to the vertical profiles of the doors to protect against impacts.

The process of installing sliding wardrobe doors

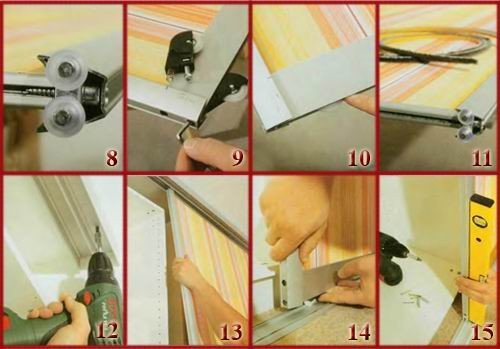
Installation and adjustment
- First of all, we install the upper guide rail to the ceiling. Please note that the installation of the upper guide must be strictly horizontal. Therefore, use a building level when installing it.

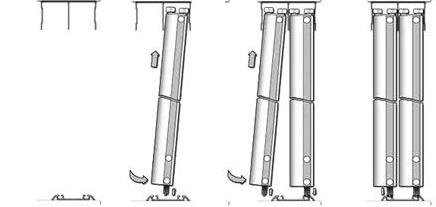
Upper guide for sliding wardrobe door - We insert the ready-made doors into the upper guide.
- Without fixing the lower guide to the floor, we insert the sashes into it.

Bottom guide for sliding doors - We align the position of the lower guide horizontally using a building level, and align the position of the inserted doors vertically using a level so that they stand strictly vertically.

When installing the door, first insert it tightly into the upper guide, then lift the door to the stop and place the lower rollers in the corresponding socket. - We fix the lower guide to the floor.
- Using a screwdriver and a hex key, we align and adjust the position of the doors exactly in relation to each other, parallel to the floor, so that they are located horizontally at a position of 3-5 millimeters from the floor.

Door stops in the bottom guide


The final stage is decoration
When the installation of the sliding wardrobe doors is completed, their appearance can be interestingly decorated. Door decor is often used when the furnishings or interior change, to hide damage or abrasions.
Let's consider the options:
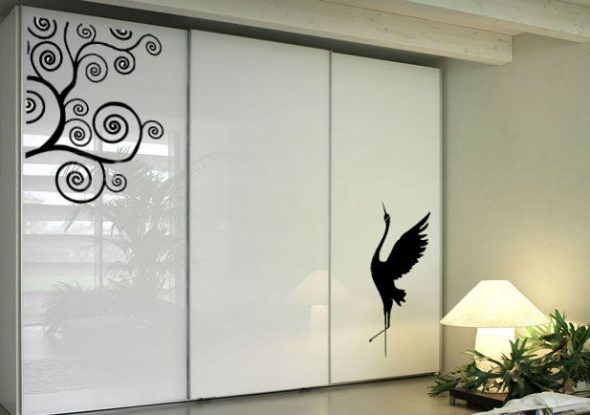
- Vinyl stickers. They can be the size of the entire door or be located in interesting geometric prints, a strip in the middle, at the top, at the bottom, a pattern in the corners, randomly scattered elements of the design around the perimeter of the entire cabinet.

A simple idea for the hallway - using stickers to decorate a sliding wardrobe - Full-color posters. There is a huge selection of posters with a variety of drawings and paintings with views of nature, flowers, copies of famous paintings, views of beautiful cities, personal photographs.

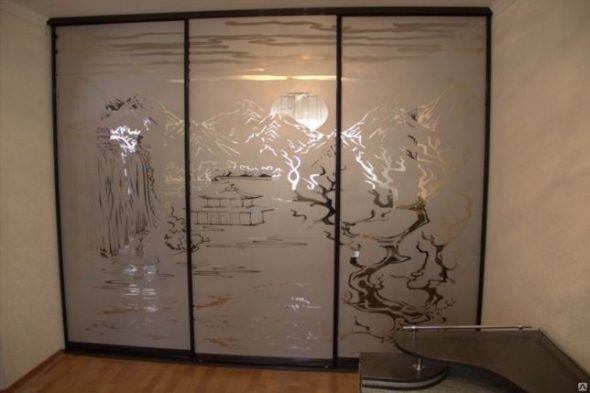
Poster for wardrobe doors "Lilac lavender" - Matting. Suitable for glass, mirror, glossy surfaces. It is done using a stencil, special paste and a spatula.

Artistic matting (sandblasting) for sliding doors - Airbrushing. This technique is used to apply a drawing of any complexity to a cabinet. This is perhaps the most unusual composition for decorating an interior, it looks expensive, luxurious, rich, exclusive.

Airbrushing on wardrobe doors - Colored and stained glass film. The simplest, most economical option for decorating furniture. With its help, you can cover any furniture, giving it an individual, unique style.

Colored films for decorating sliding door glass

Thus, there is nothing complicated in the design and assembly of a sliding wardrobe with your own hands - especially if you like to learn something new, to arrange your home in accordance with your desires and ideas.
Imagine how pleasant it is for any woman to receive a handmade gift from her beloved son, husband, son-in-law. The long-awaited, desired sliding wardrobe in the hallway or bedroom will be appreciated by every family member, because everyone will use its functionality.
The process of creating a cabinet may be long, but the result will definitely please you for many years. Do not be afraid to experiment, take the tools, necessary materials and go for it. If you feel that you cannot or are afraid to spoil the purchased materials, it is better to contact professionals.