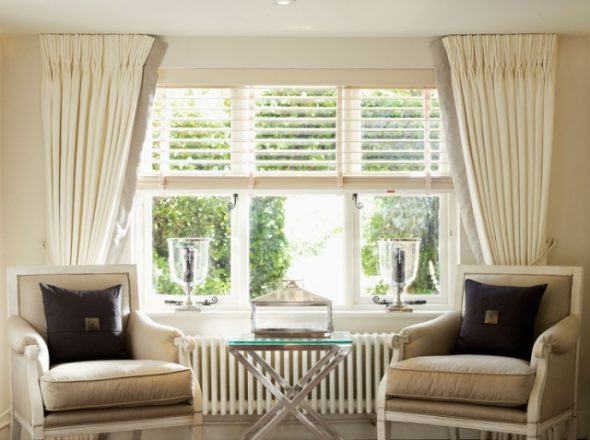
The final stage of renovation work in a house or apartment is usually the purchase of window textiles - curtains, blinds and drapes. But in order for these decorations to harmoniously complement the design, they need to be attached to the wall with something.
Before hanging a curtain rod on the wall, you need to accurately mark the surface and take into account all significant dimensions. Each type of curtain rod has its own installation method, failure to comply with which can lead to damage to the wall or window textiles. Further in the article, we describe in detail how to hang a curtain rod according to all the norms and rules.
Content
What types of cornices are there?
In general, window cornices are subdivided depending on where they are attached. Thus, they are distinguished:
- wall;

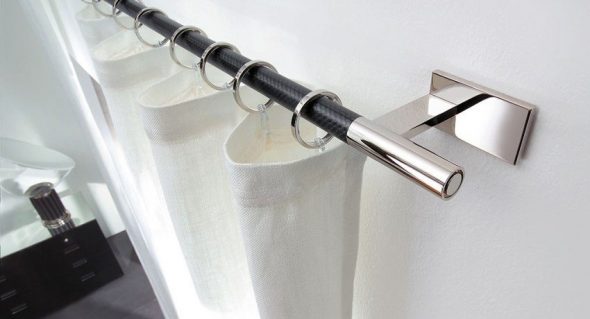
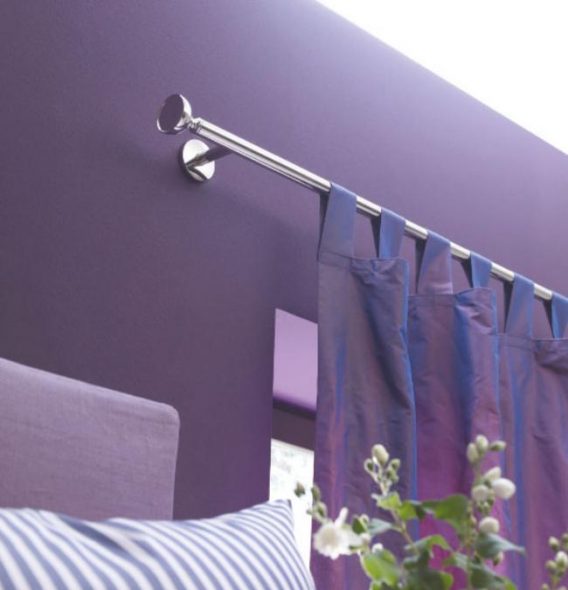
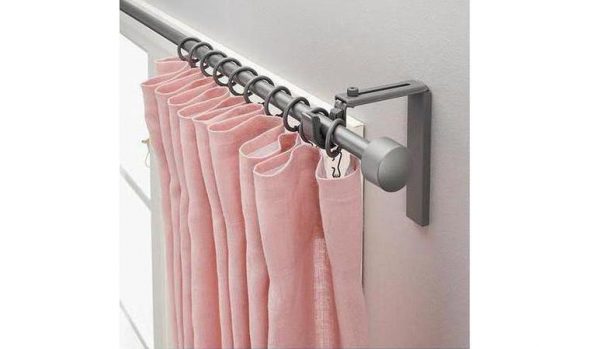
Round wall cornice with chrome elements - spacer;

The original type of cornices are spacer models, the design of which is a telescopic rod that is adjustable in length. - ceiling;

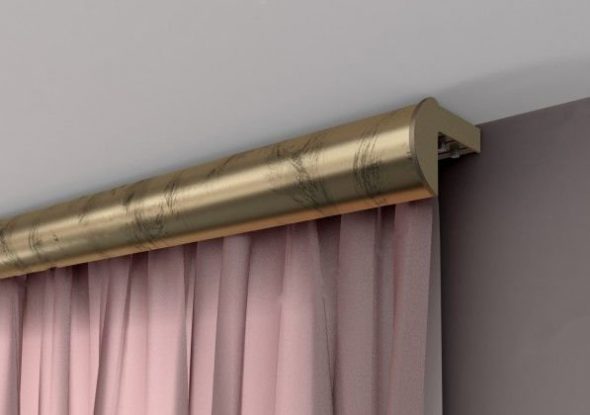
Ceiling curtain rod visually expands the space and is an interior decoration - window.

A mini cornice or window cornice is attached directly to the window frame and is used to decorate rooms.
The spacer type is essentially a type of wall type. It is suspended by a telescopic tube with a spacer design. One tube, with a diameter, is located inside the other. The presence of springs and threads allows you to attach such a cornice without drilling holes. The only disadvantage of this system is the small loads. Only one or two tulle can be hung on such a curtain rod.
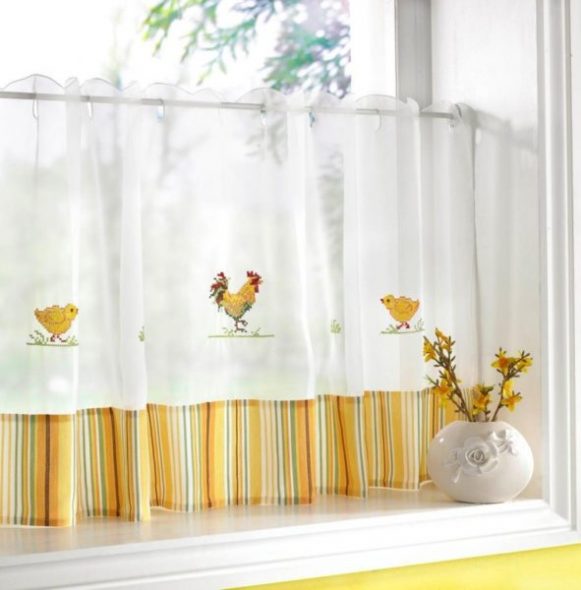
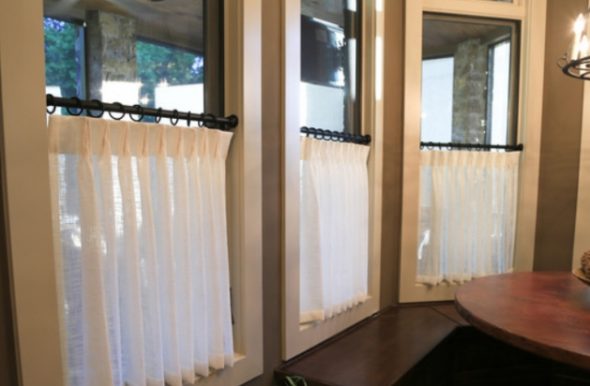
The window type of curtain rod is intended for small curtains that are placed directly on the window frame. A popular type of this design is the "cafe" cornice.
The most common type is wall curtains. Their use allows you to correctly distribute all the distances between the hooks on the curtain, harmoniously complement the interior design, and also economically use the space of the room.
What types of wall cornices are there?
- Single row.

A single-row curtain rod can be of any length and can be used to make several lines for curtains. - Double row.

Double row wall curtain rods are suitable for people who want to hang curtains and drapes on their windows. - Three or more rows.

Three-row wall cornices are suitable for complex textile compositions of curtains, drapes and lambrequins
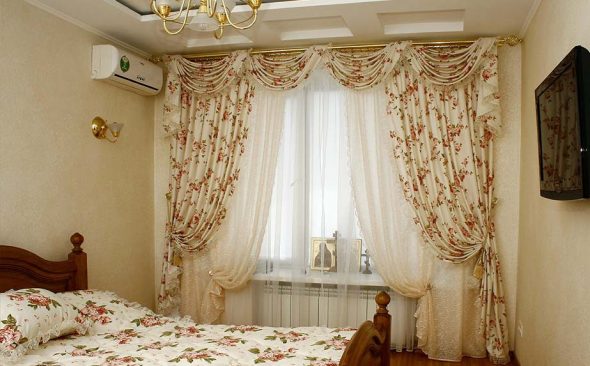
The number of separately hanging tulle, curtains, and the presence of a lambrequin depend on the number of rows.
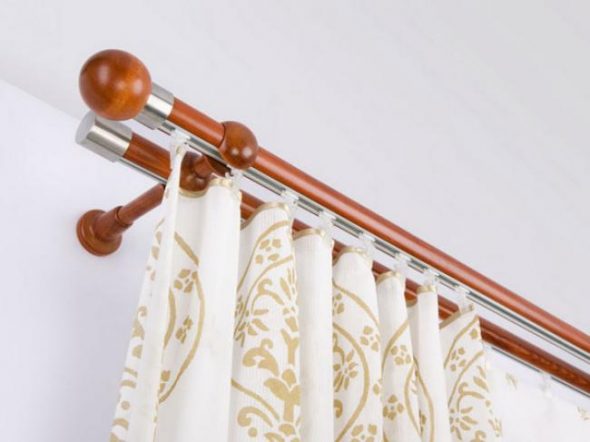
According to the design, there are profile, straight and string designs. The material of manufacture is varied - it can be both inexpensive plastic and expensive types of wood, as well as forged metal.
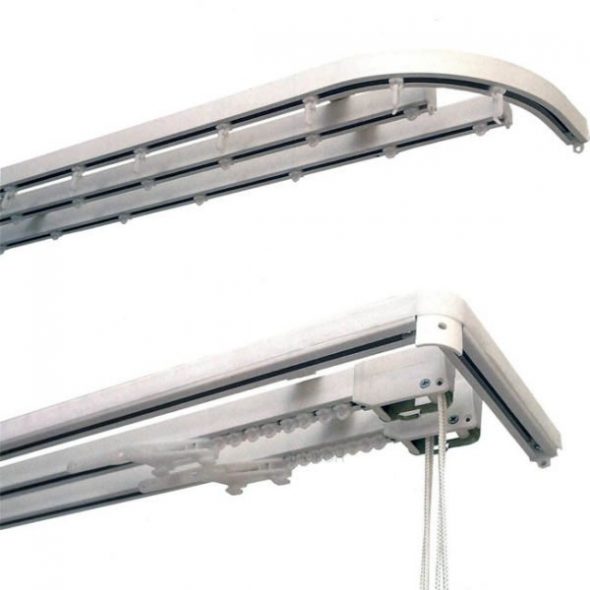
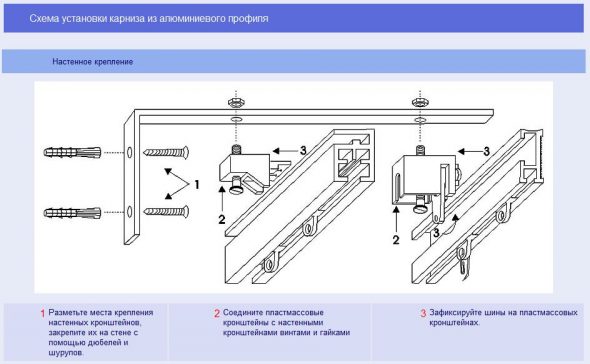
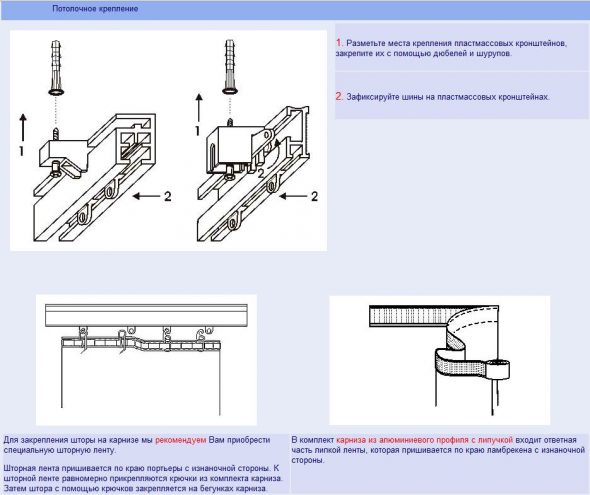
Profile structures have one guide rail, which is attached to the ceiling using dowel nails. If the suspension is planned to be installed on the wall, then brackets are additionally purchased. As a decorative decoration of this type of suspension for window textiles, a plastic baguette is used. It performs two functions at once:
- directly decorative (as it complements the overall style of the interior);
- hides the not very pretty tire from the eyes of an outside observer.
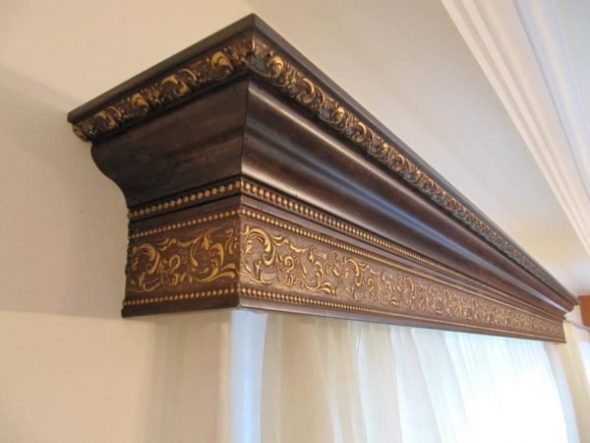
Wooden baguettes look very beautiful. They are carved on special computer machines with a numerical algorithm. This approach allows you to make perfectly even patterns of the most intricate shapes.
Straight curtains can be made in the form of round and rectangular tubes. Here everything depends on the design of the room for which the product is purchased.
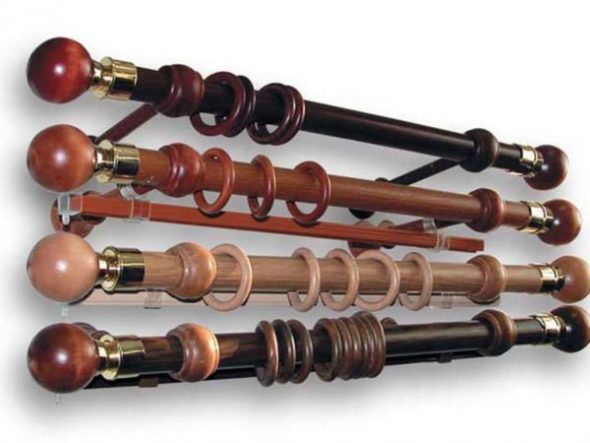
Wood and metal are usually used as materials. Profile products are most often made of PVC plastic (polyvinyl chloride). But there are also aluminum guides. Here the choice depends on the weight of the curtain components, as well as the window textile itself. Accordingly, the heavier the curtains you hang, the stronger the cornice should be (i.e. aluminum for heavy textiles).
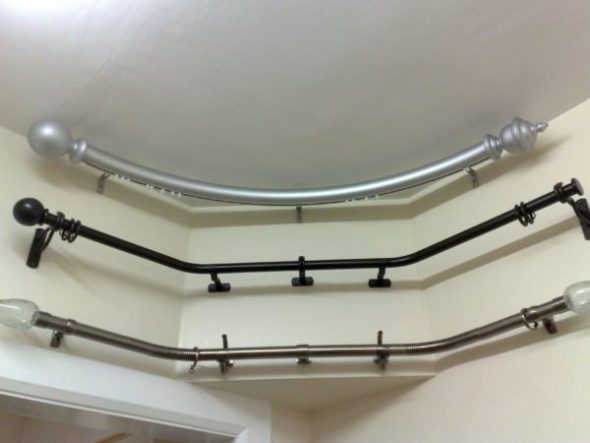
In addition to regular, straight curtain hangers, they also produce curved products. Such designs are irreplaceable for modern apartment architecture. Curved hangers are convenient to use for bay windows and rooms with non-standard wall layouts.
How to hang a curtain rod on a wall?
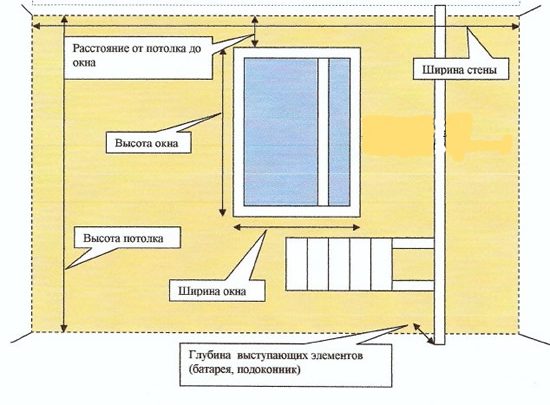
At first glance, the question of how to attach a curtain rod to a wall does not seem difficult. What could be easier: drill a hole in the wall and that's it. But in reality, everything is much more complicated. It is necessary to take into account the geometric parameters of the room, which are very often far from ideal. Also, the material of the surface on which the fastening is planned, as well as the side of the world on which the windows face, play an important role.
So, let's sum it up. What influences the suspension installation process?
- The dimensions of the room and its geometric parameters.
- Type of cornice.
- Material used to make the mounting surface.
- Type of window textiles, its weight and quantity.
- The direction of the world that the windows of a room face.
- The presence of a window sill and the size of its projection relative to the window.
- The presence of a heating radiator.
Important! Before you start installing the curtain hanging structure, find out what material the surface you plan to mount it to is made of. This will determine the choice of fasteners, as well as their quantity.
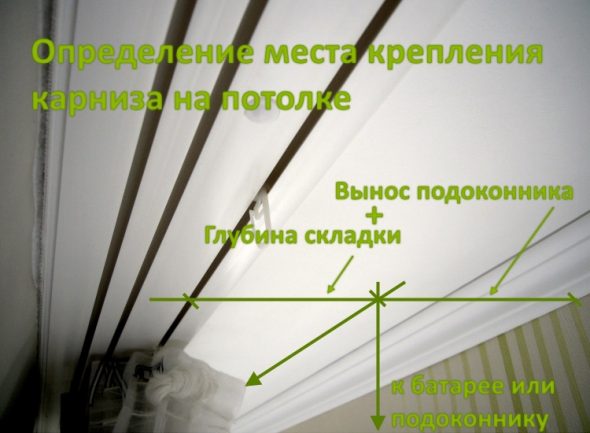
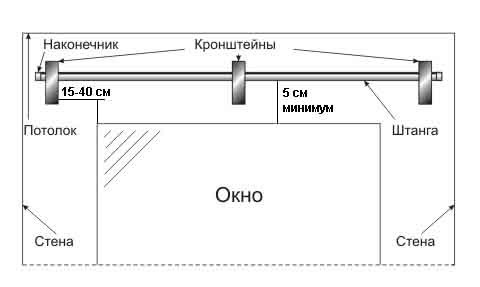
The first thing to do is to decide on the gap between the outermost tulle and the window opening. Here, attention is paid to the most protruding surface. Usually, this is a window sill or a heating battery. When renovating a room in compliance with all building codes and requirements, the width of the window sill should be greater than the edge of the open window, and the heating radiator is installed exactly under the slope. Therefore, the indentation is made from the window sill.
Not all apartments have window geometry made according to GOSTs. Moreover, modern construction in our country is determined by European trends. Building codes, which are clearly different from those adopted in our country, also originate from there. Therefore, when determining the gap between the outermost (usually tulle) curtain and part of the window, consider these three distances at once:
- from the windowsill;
- from battery;
- from the open window.
The minimum gap value is 7-10 cm.
At the next stage, you need to pay attention to the geometry of the wall and ceiling. The curtain rod should be located strictly parallel to the ceiling joint with the window. With this placement, the visual qualities of the room will be correctly observed.
Advice: Be sure to position the hanger or its brackets parallel to the ceiling.
To do this, step back from the ceiling at the same distance for each bracket and make a mark for the holes.
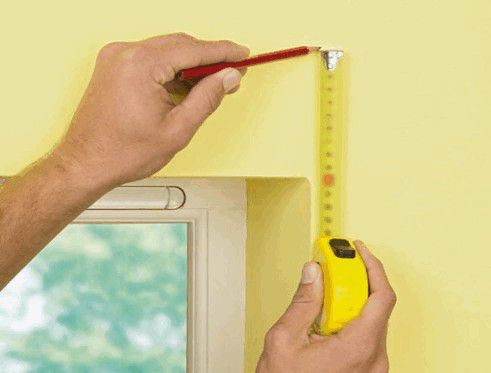
The height of the indent depends on the brightness in the room. If the bedroom windows face south, there will be a lot of sun during the day: in this case, it is better to hang the curtain almost under the ceiling (an indent of 5 cm will be enough). If the room is located north, the indent can be increased to 15 centimeters.
Assembling the curtain before installation
Before hanging the curtain rod on the wall, it must be completely assembled on the floor. The most common design is a straight hanger, consisting of:
- metal guide (crossbar);
- brackets;
- rings or clips for fixing curtains;
- plugs;
- decorative body kits;
- fasteners.
Rings and clips may be missing. Instead, loops are sewn onto each curtain, tulle or lambrequin, through which the crossbar is threaded.
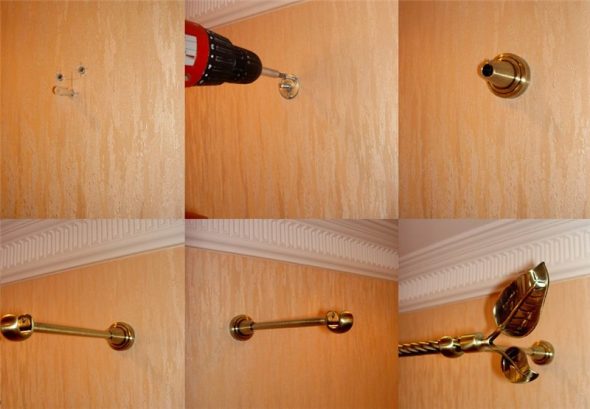
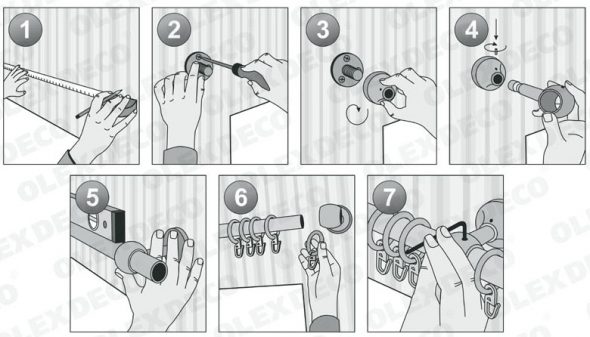
First, rings (if any) are put on the crossbar. Then the brackets are attached. The location of the latter depends on the manufacturer of the product. Some companies provide compatible grooves in the brackets and crossbars, which allows you to easily fasten these two elements. Other models are fixed in any place. In both cases, fastening is carried out on special bolts.
After installing the bracket, proceed to the installation of plugs and decorative components of the suspension. Most often, decorations are made in the form of metal forging and wood carving. For ease of installation, they are combined with plugs.
Advice. When choosing metal forged products, pay attention to the surface finish. In order for the beautiful appearance of the curtain to be preserved for a long time, it must be treated with a primer or special durable paint. It is worth noting that it is difficult to repaint forged twisted parts on your own.
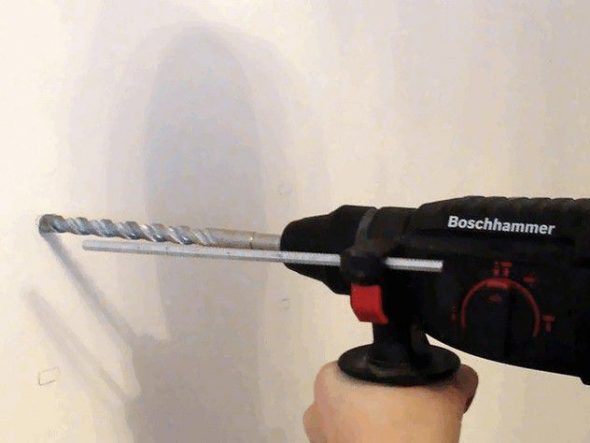
After fixing the plugs and marking the wall, you can proceed to drilling holes for mounting the suspension.
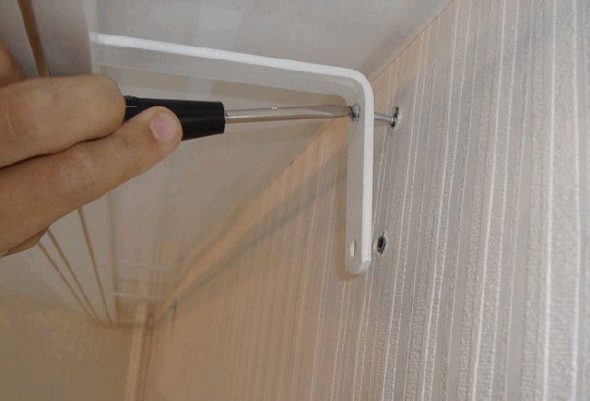
How to attach the bracket to the wall?
The order of fastening to the wall (as well as to the ceiling) is the same in all cases. The only difference is the choice of fastening elements, which in turn depends on the wall material.
This is what material the wall can be made of.
- Brick.
- Cinder blocks.
- Aerated concrete blocks.
- Reinforced concrete slabs.
- Wooden beam.
- Plasterboard cladding.
- Layer of plaster.
The last two points, of course, cannot be present in an apartment as an independent material for walls. But as a finishing layer - easily. When installing a hanger for window textiles on a wall, the best base for fastening is wood, concrete or its derivatives. If there is plasterboard or an impressive layer of plaster, an inexperienced layman has to puzzle over it.
Ordinary dowel nails are suitable for mounting brackets to a brick or concrete base. The diameter of the fastener, as well as its quantity, is selected based on the weight of the product and the textiles on it. Accordingly, the higher the weight, the larger the diameter of the dowels you will have to buy. For "particularly difficult cases" you may even need anchor bolts. They are made of metal, so they bear high loads.
Anchors are a must for large curtain formats. For example, Japanese sliding structures for panoramic windows have an impressive weight due to their steel base, as well as an automatic sliding drive. In this case, you cannot do without high-quality fasteners.
But for plasterboard sheets, ordinary dowels are not suitable. Here you will have to buy a special opening fastener. A butterfly dowel will work perfectly. Due to the increased fixation plane, the plasterboard does not deform under significant loads. But for heavy objects, you will still have to use the same anchors. In this case, the order of work is as follows:
- the plasterboard sheet is drilled with a wood or metal drill to the base of the wall;
- after the plasterboard has been completely passed through, the main wall is drilled with a stone or concrete drill to the size of the anchor;
- The entire structure is secured through a bracket into a metal dowel.
Be sure to take into account that the anchor must go into the concrete wall to its full possible length. With this method, the reliability of the structure will be high.
The most unpleasant case is the presence of a thick layer of old plaster, which also crumbles at the touch of a finger. It is very problematic to fix anything in such a wall, not to mention a heavy curtain. Here you have two options.
- Use an anchor into the base of the wall.
- Strengthen the plaster layer with special compounds.
If you are going to hang one light tulle in the kitchen, there is no need to drill the wall to the brick. Do the following:
- drill a hole of a larger diameter for the dowel (2-3 mm);
- insert the dowel, filling the voids with liquid nails;
- let the mixture harden;
- attach the bracket.
This is a very reliable method of fixing the hanger in a loose layer of plaster.
But if we are talking about a full-fledged design of the window opening (lambrequin, curtain, etc.), then only anchors will help here. The procedure is the same as when installing in plasterboard. Upon completion of the installation, the gaps in the plaster must be rubbed with cement mortar or tile adhesive.
Fastening curtains to two windows
Very often people ask: "If there are 2 windows in a room, how do I hang a curtain on 1 curtain rod?" There is no particular difference when installing a hanger on two adjacent window openings instead of one. Here you should pay attention to the size of the room. If the room is smaller, and you want to visually enlarge it, then it is better to install a separate curtain rod on each window opening.
But if the room is large, especially if the ceilings are high, installing one solid pendant will give the room an incredible grandeur.
The installation process is similar to that for a single opening. Maintain all significant gaps. If you plan to install one solid cornice, consider the number of brackets per crossbar length. There should be 2 brackets for every two meters. That is, if the crossbar length is 3 meters, then there should be three fastenings to the wall.
Dismantling rules
If you need to remove an old curtain rod, there are a few rules to follow.
- First, remove the curtain from the rings, pegs or hooks.
- Next, carefully unscrew the screws, trying not to touch the facing part of the brackets.
- After the last screw is unscrewed, the suspension can be freely removed.
It is better to carry out the dismantling process together. This way you are guaranteed to save the product.
If you are going to hang a new curtain rod, you will need to drill out the old dowels from the holes and fill the wall with cement mortar.
Take a look at the selection of photos below, which show different methods of attaching curtains to walls.
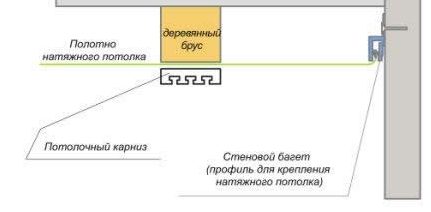
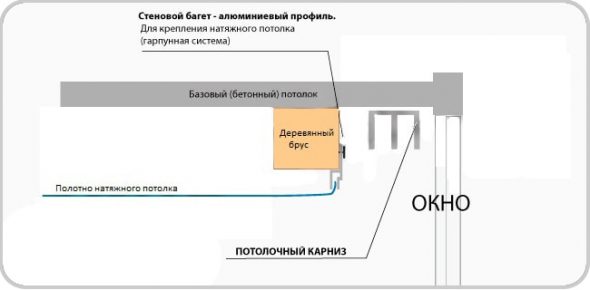
Fastening of curtain hangers to walls can be caused by different cases. The presence of stretch ceilings that do not allow fixing brackets without damaging the integrity of the covering, incorrect ordering of window textiles by length - all these shortcomings are easily eliminated by mounting on the wall.