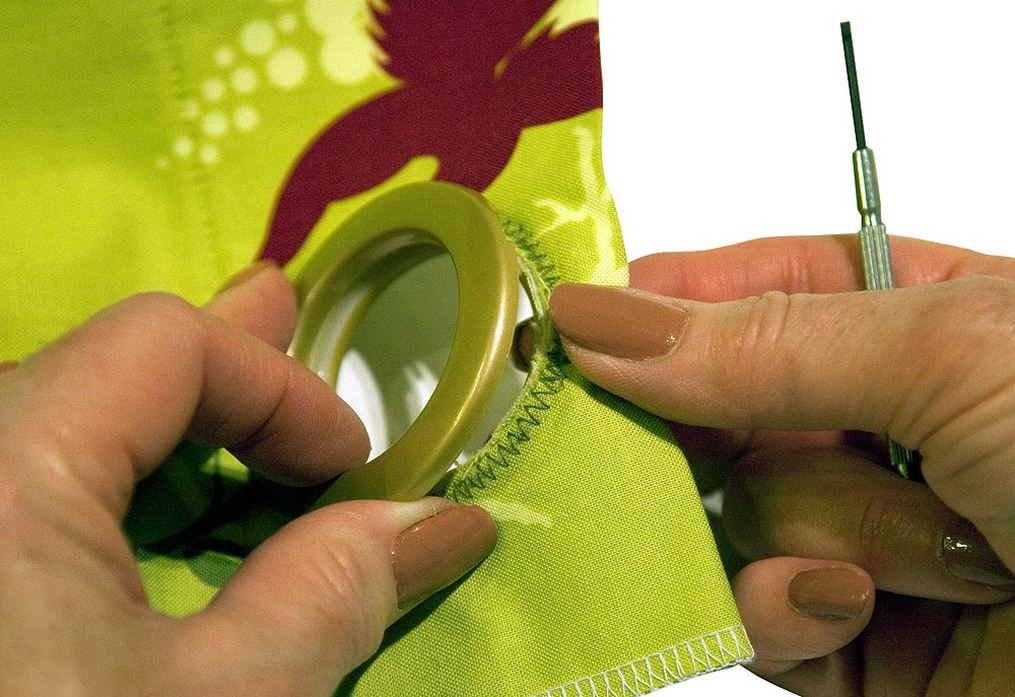
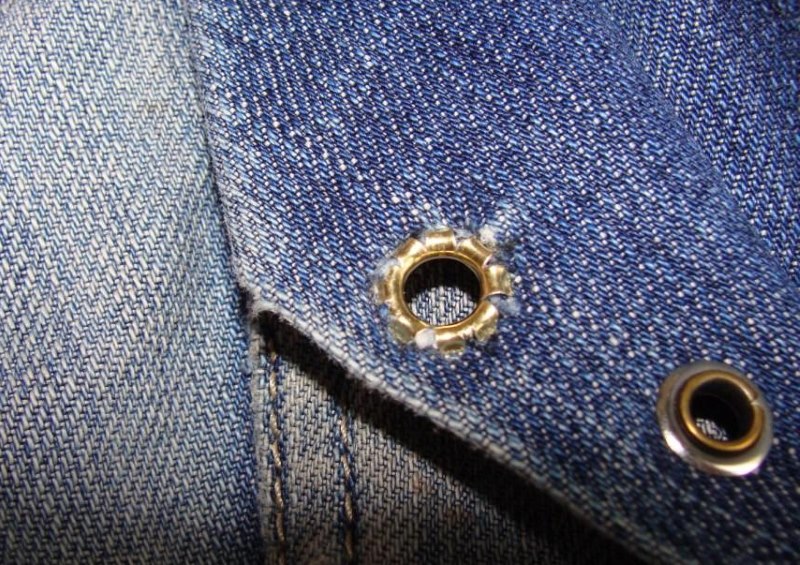
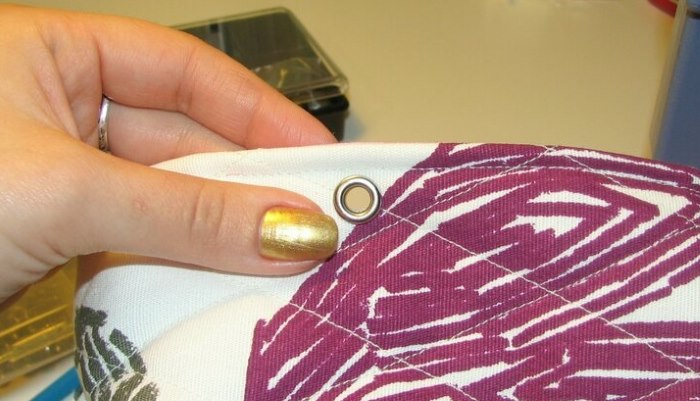
A curtain eyelet is a separate type of fittings, which is an element consisting of a washer with a shaped bushing, designed to strengthen the edge of the fabric, or more precisely, a hole cut in it, into which a curtain rod, rod, or cord is threaded. This is the most universal, beautiful in appearance, and most convenient option for attaching curtains to a curtain rod.
Content
- Brief description, where they are used, how to install on fabric
- List of installation tools
- Hand pliers: description, operating principle, limitations, disadvantages
- Punch tool: description, operating principle
- Crop-a-dile installer: description, operating principle
- Installation of eyelets with the Ter-2 press
- Is it possible to install eyelets without tools?
- Equipment for installation of non-standard eyelets
- Conclusion
- Video review of manual punches and eyelet setters
Brief description, where they are used, how to install on fabric
Eyelets are used in the production of sewing, footwear, haberdashery, and printing. They are used to decorate belts, bags, make parachutes, all kinds of awnings, tents, fasten advertising banners, in paper binding, scrapbooking, etc.
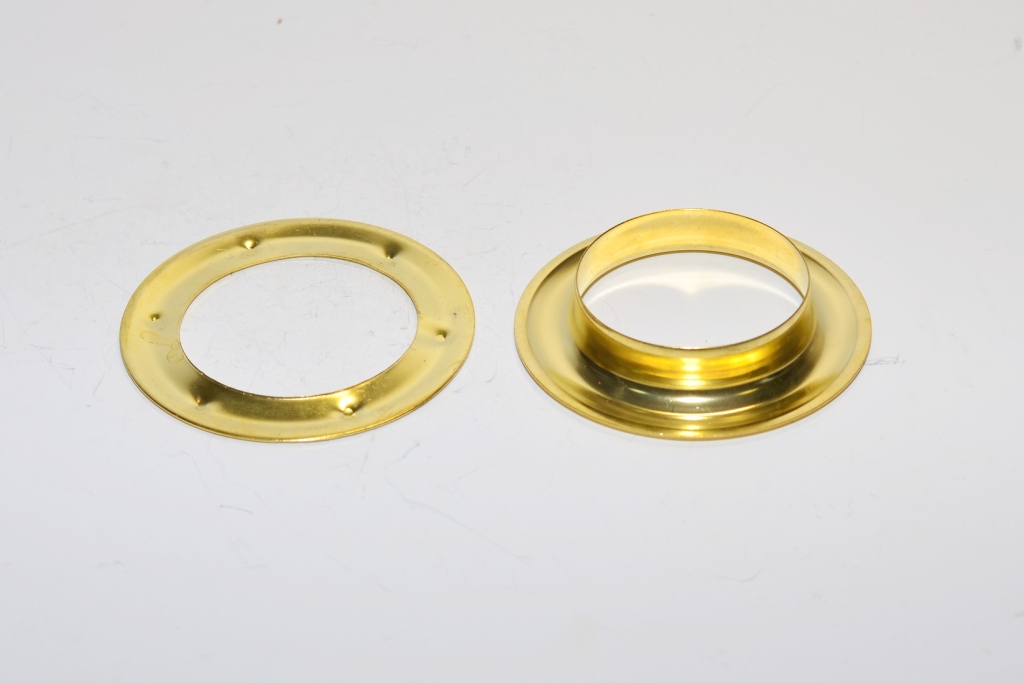
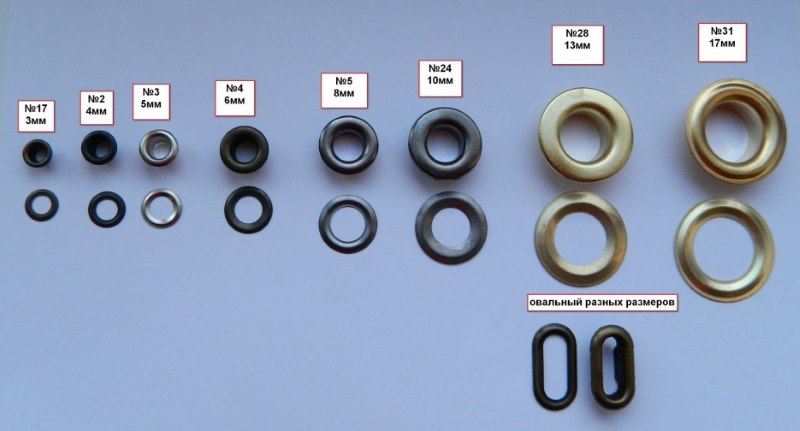
This type of fittings is made of plastic, wood or metal (brass, aluminum, steel), and looks like rivets of various diameters with holes in the center. The products differ in external and internal diameter, height. The shape of their internal part can differ greatly from the external configuration.
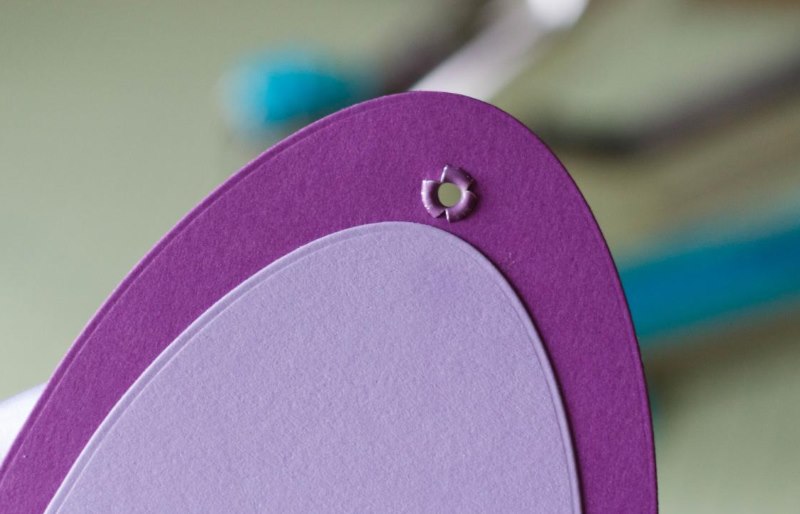
Eyelets can be of different colors, decorated with stones, imitate different materials. During installation of the eyelet, its shaped bushing is inserted on one side into a pre-punched hole, and a washer is put on the other. The structure is secured by flaring the first element.
The undoubted advantage of eyelets is the increase in the lifespan of the product into which they are inserted, due to the strong fixation of the hole, the absence of abrasion, sagging of the material, fraying of the edges of fabric, leather, paper, etc.
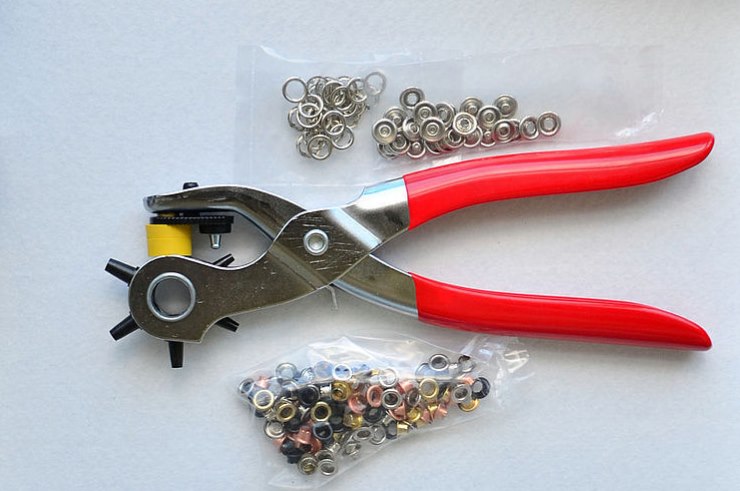
At home, amateurs manage to install the product using a regular hammer and pliers, which often leads to irreparable deformation of the element; professionals use special pliers to install buttons and eyelets.
Advice. Eyelets are most often made in a practical round shape, square, oval, and figured ones are used only for decorative purposes. Compatibility with tools is checked individually each time.
List of installation tools
The tool for installing eyelets is not only a specialized punch that can make round holes, also known as a hole punch or fabric punch, but also multifunctional pliers, presses, clamps of various configurations. Experts recommend purchasing devices in whole sets, but using universal, multifunctional ones is no less convenient.
Types of devices:
- manual – punch, cropodile, pliers, collapsible hammers, instruments with a set of three or four functions, Fiskars, Micron, Kangaroo devices;
- semi-automatic ones have high productivity – with their help it is possible to install about 1300 rivets per hour;
- Automatic – these are heavy, bulky machines used only for mass production.
For plastic parts, special devices are used that have the function of “welding” the upper and lower parts of the rivet.
Advice: To ensure that any eyelet installer lasts as long as possible, it must be kept clean, visually inspected periodically, and lubricated with machine oil.
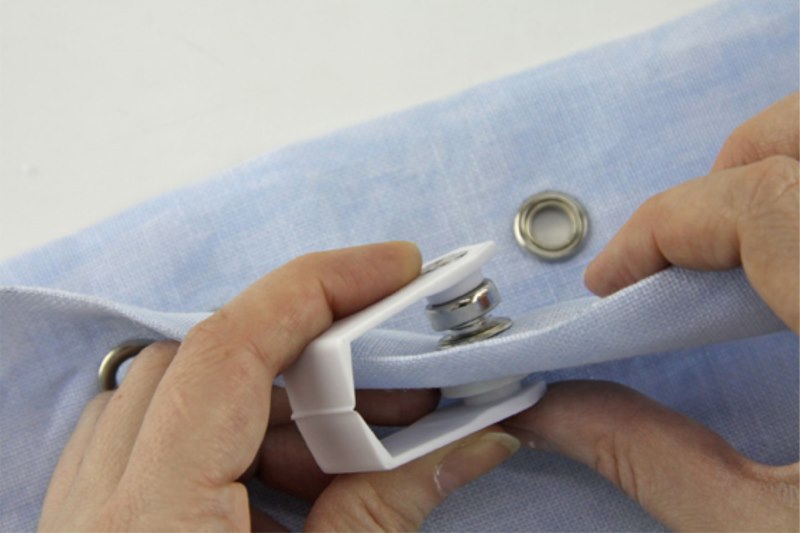
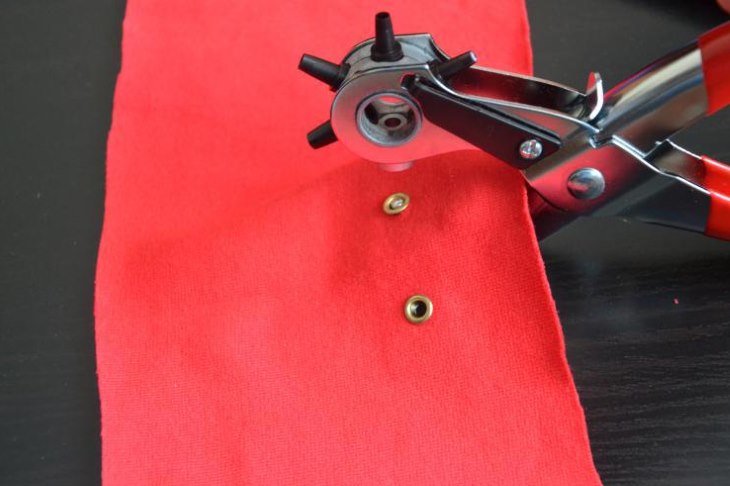
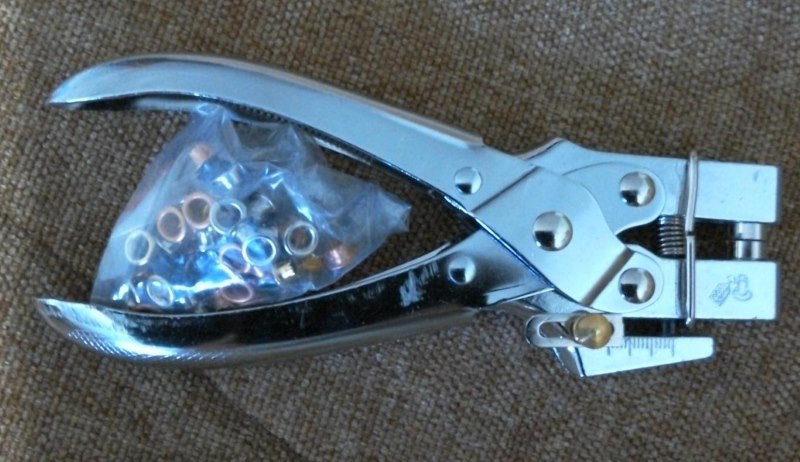
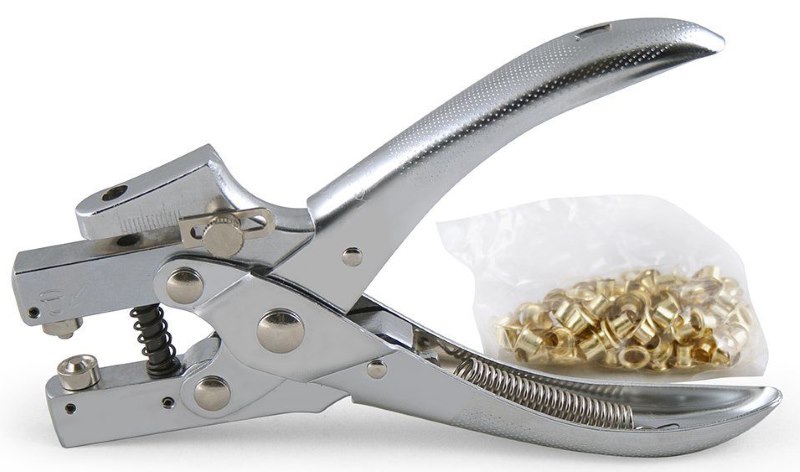
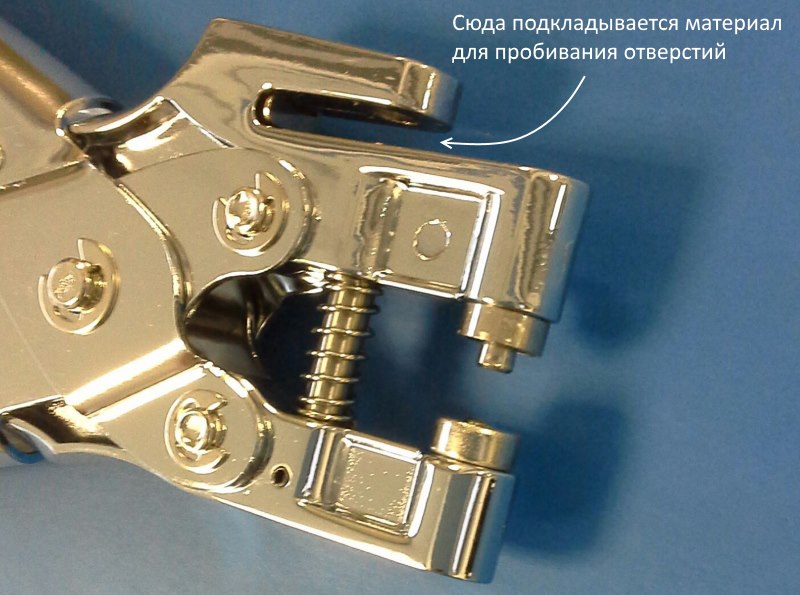
Hand pliers: description, operating principle, limitations, disadvantages
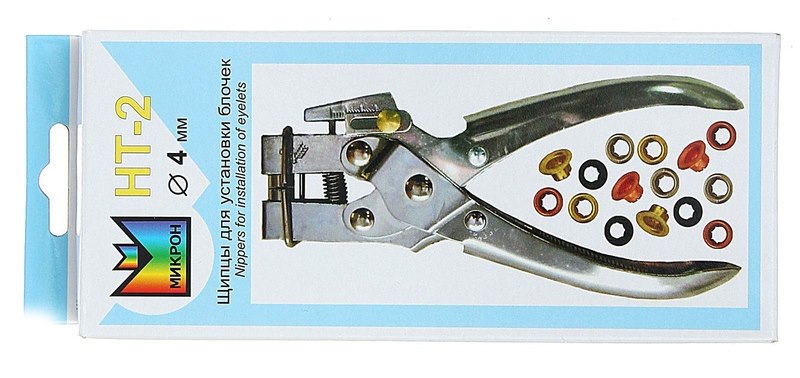
The Micron NT-2 eyelet pliers are equipped with a ruler for measuring the diameter of fittings, a hole punch - the attachment is located on the side of the working tool, used for elements with a diameter of less than 4 mm.
The good thing about this hand-held device is that:
- capable of punching holes of several sizes;
- weighs little;
- safe;
- easy to use;
- virtually silent;
- takes up minimal space when stored;
- performs assigned tasks efficiently.
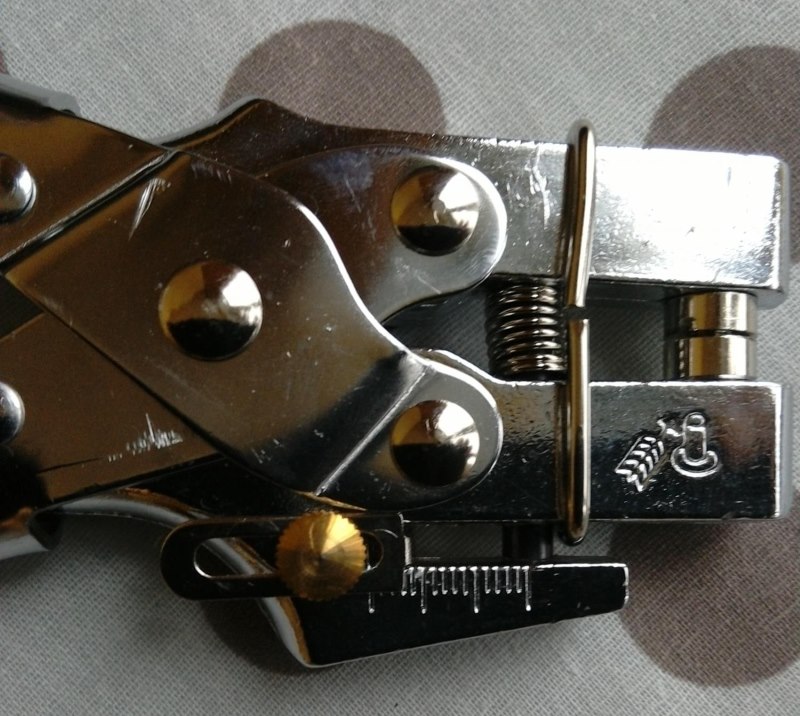
The installation pliers are not universal – the clamp for eyelets and blocks of different sizes is selected individually. Some models are equipped with removable flaring attachments, allowing you to install elements of two different diameters.
Punch tool: description, operating principle
To work with impact-type eyelet punchers, a hammer is required, and the process itself will be noisy. The core installer is reliable, convenient, easily punches holes, installs fittings of the appropriate size. Manual presses are also used to punch the canvas - the fabric is placed on a special platform, secured, and by pressing the lever at the back, a hole is punched that corresponds to the diameter of the nozzle used.
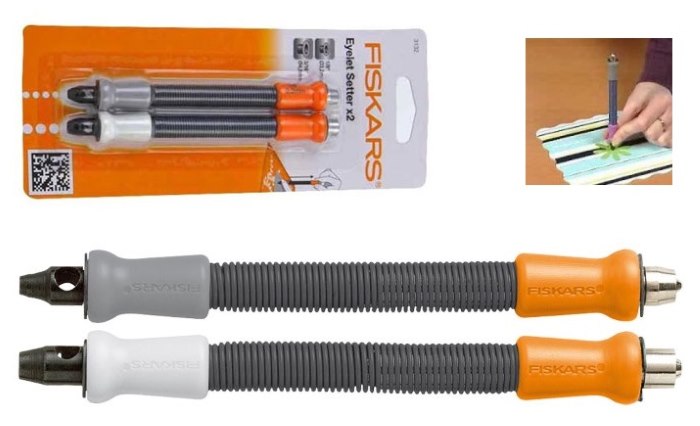
One of the tools suitable for installing eyelet fittings is "Fiscars". It is used for elements with dimensions of 1.6, 3.2, 4.8 mm, and is perfect for dense, thick materials. Punching and installation are performed using parts with springs that are pulled back to a distance of up to 5 cm.
The Kangaro tool is a pair of pliers with a punch and a ruler. Their handle is anatomically shaped to ensure comfortable holding in the hand. The work process is standard: punching a hole, fixing the rivet with light pressure on the handles of the pliers. The disadvantage is the impossibility of installing parts with a diameter greater than 4 mm.
A special eyelet hammer is a heavy but compact tool made of steel, all the attachments of which fit into each other like nesting dolls. The minimum size of the fittings to be installed is 6 mm.
Working with a hammer is a rather noisy process, it is necessary to place a metal anvil under the workpiece, since the puncture site is not fixed (which in various situations can be both an advantage and a disadvantage), there is a risk of the fabric slipping - this will lead to its damage. It is necessary to mark the point of installation of the rivet in advance, the punch is installed perpendicular to the edge of the canvas. A couple of blows with a hammer and the leg is flattened, and the part is firmly fixed.
Crop-a-dile installer: description, operating principle
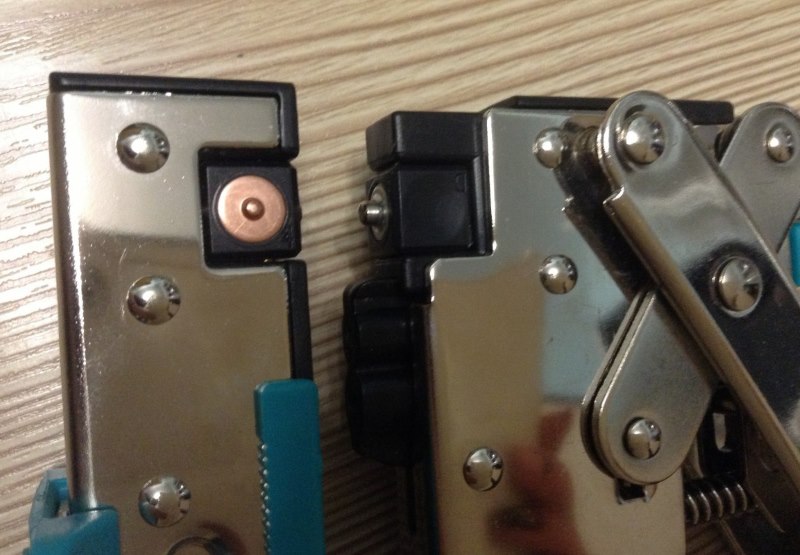
The Cropodile is the most commonly used manual eyelet setter, which has a rotating head and cubes for changing positions, a switch.
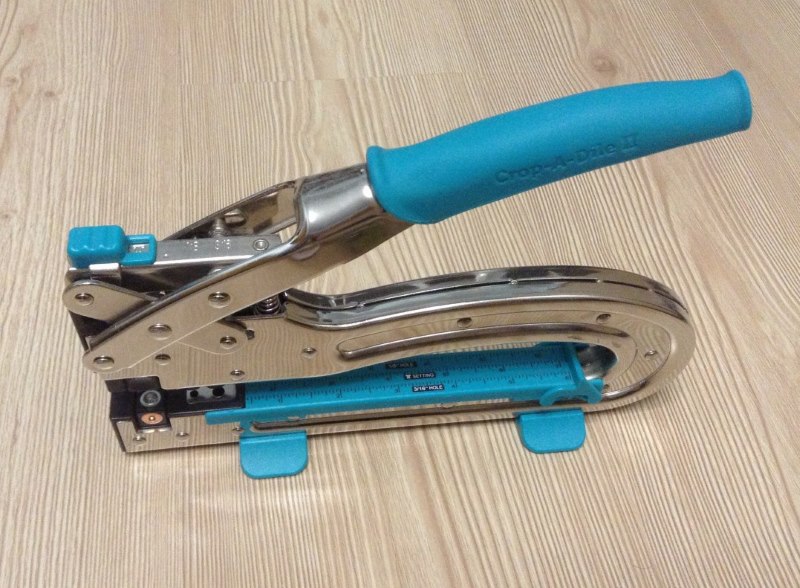
The device has almost no restrictions on the diameter of the fittings. It is capable of:
- carefully make holes of several sizes;
- securely mount buttons and eyelets;
- replaces three different tools;
- switch from one mode to another;
- cut through fabric, leather, plastic, paper, thin metal, chipboard, CD and other dense materials;
- can fix the part at any distance from the edge.

Crop-a-dile is capable of installing a grommet more than 15 cm from the edge of the material
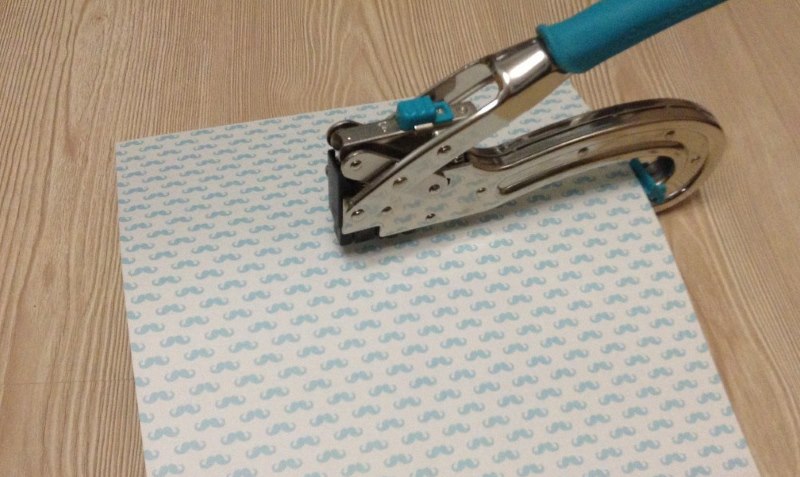
This eyelet tool is available in a variety of colors. The device makes it easy to fasten parts with dimensions of 3.2 mm, 4.8 mm, buttons, elements with 8.3 mm pins. To do this, first punch a suitable hole, then insert the part into it and press it tightly.
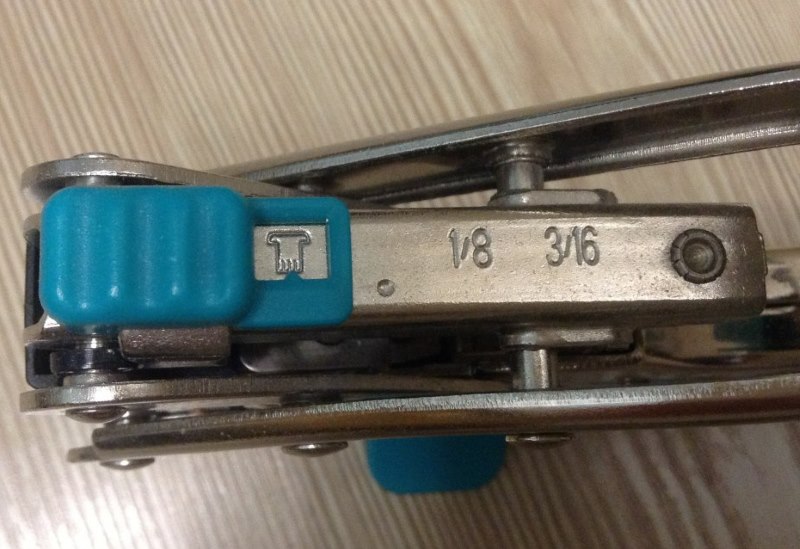
The tool has three positions:
- The first one is punched with 3/16 inch diameter holes.

Switching from one operating mode to another is done using a convenient switch. - In the second - 1/8 inch.
- In the third part they are installed.
There is also a compact version of the Crop-a-dile machine for installing eyelets, which is distinguished by the fact that it is not capable of making holes far from the edge of the surface being processed – only within 2.5 cm.

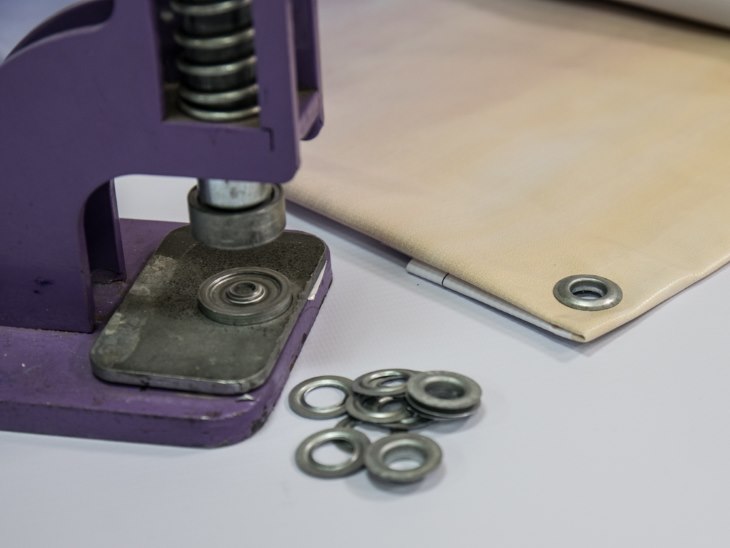
Installation of eyelets with the Ter-2 press
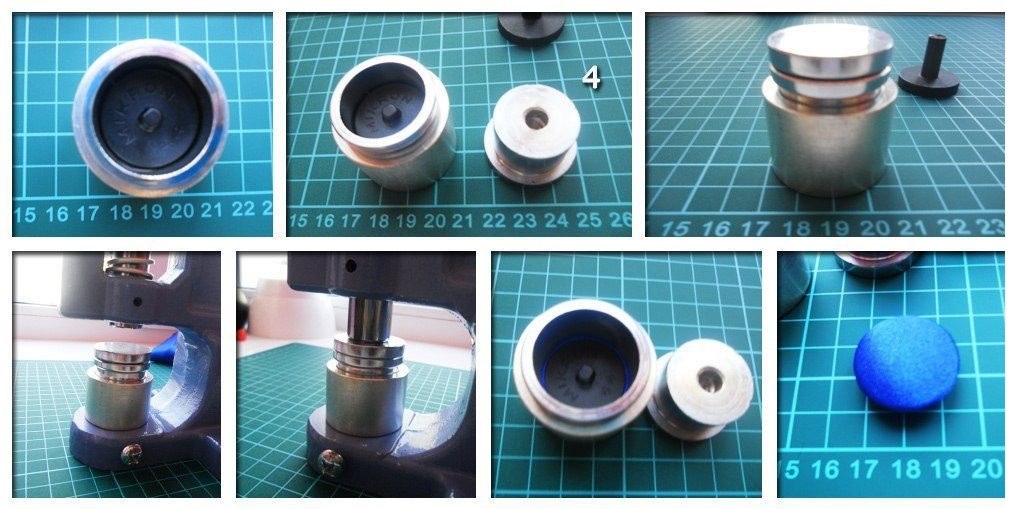
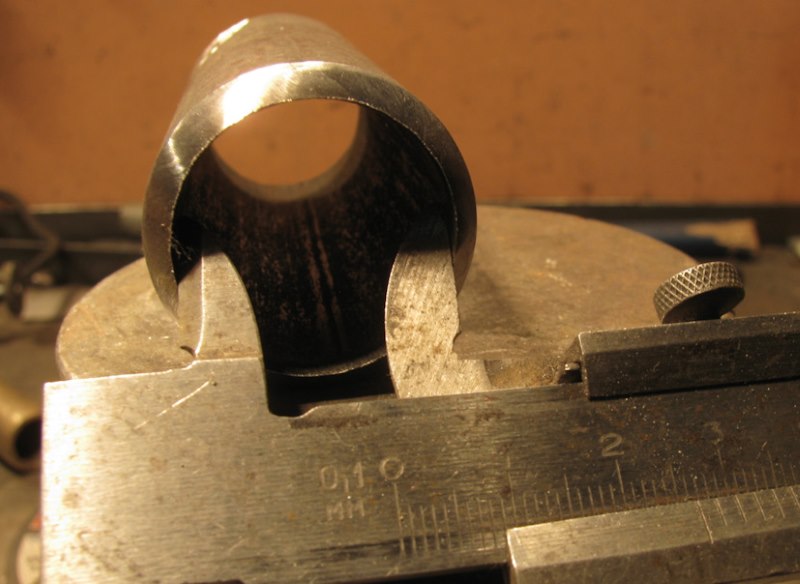
The universal press "Ter-2" is used for mounting metal fittings. This is an improved design of the "Ter-1" device. For work here, removable attachments are used, which are used for eyelet parts, up to 14 mm in diameter, rivets, buttons (ring, shirt), jeans buttons, etc.
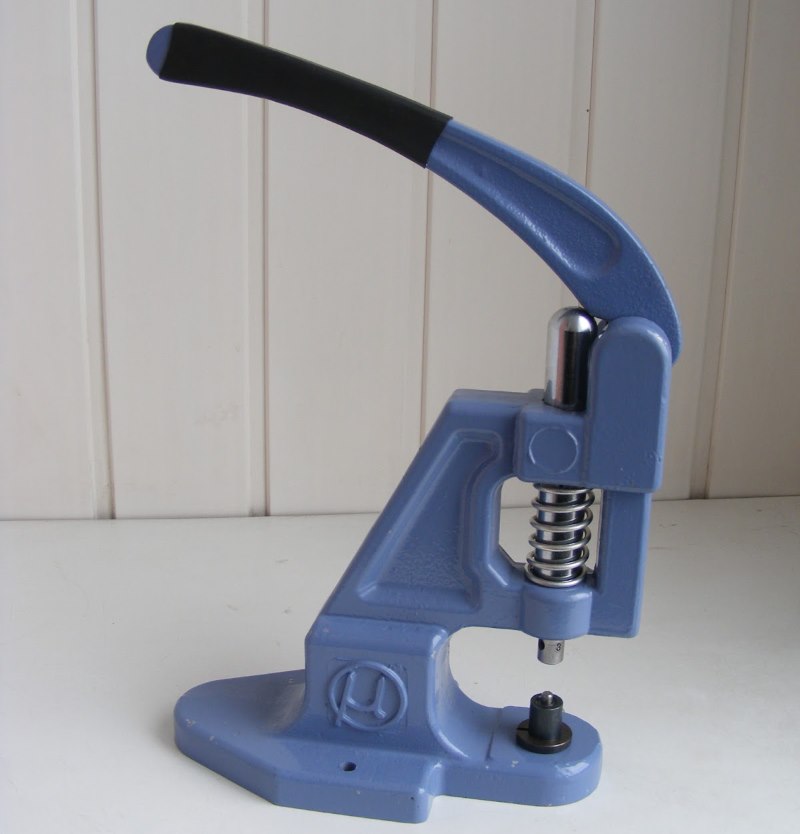
Punches of various diameters are also removable parts. Installation of eyelets of 15 mm in size requires considerable effort, therefore, for installation of such elements, it is recommended to use another press – “Der-2”.
The main disadvantage of the product is that all removable parts must be purchased separately from the main device. There are several significant advantages: the relatively low price of the device, small dimensions. The device is ideal for mounting parts on dense, heavy materials.

It is important to select the right size of the attachments - if the parameters do not match, the eyelet element will be deformed and will not be able to fully perform the functions assigned to it.
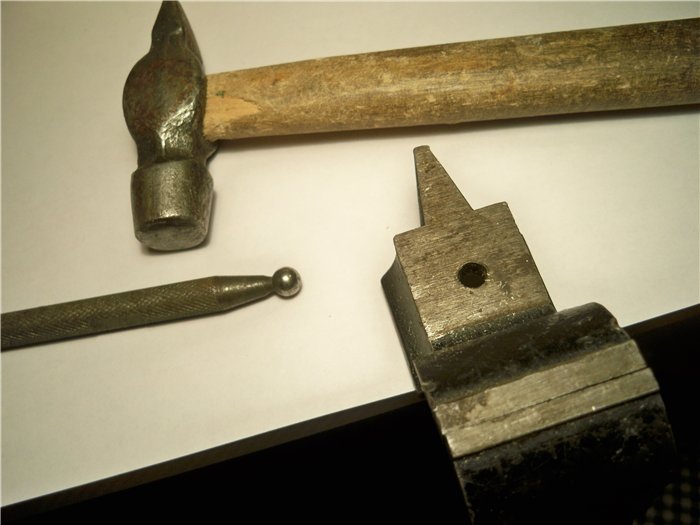
Is it possible to install eyelets without tools?
Rivets are sometimes mounted practically without the use of special equipment or tools. The following are needed for the job:
- hammer;
- special punch, sharpened iron tube, very sharp scissors;

The punch can be made from a tube of suitable diameter. - flaring tool for flattening a ring or a ball from a bearing;
- metal anvil;
- shock absorber board, block.
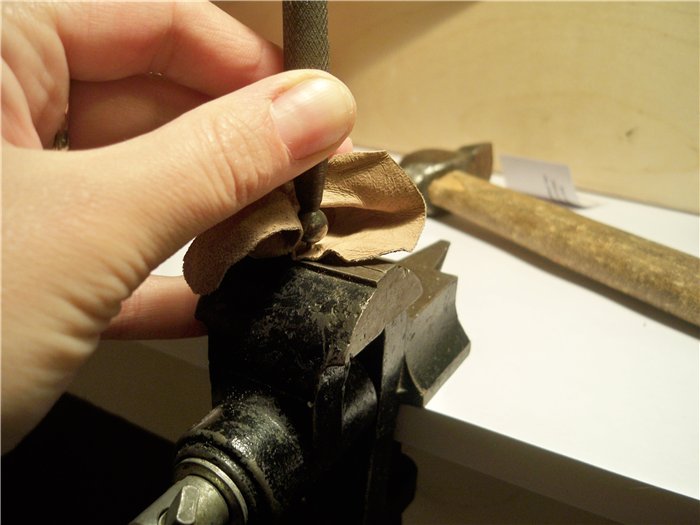
It is done like this:
- the edge of the fabric is folded in half and secured with tape or electrical tape;
- a piece of wood is placed under the future location of the rivet;
- using a punch, holes are made at equal distances from each other, on the nearest edge of the fabric;
- both elements of the ring are connected on both sides of the canvas, with an anvil placed at the bottom and a flaring tool at the top;

It is important to install the flaring tool strictly perpendicularly! - then a hammer is used to strike the flaring tool;
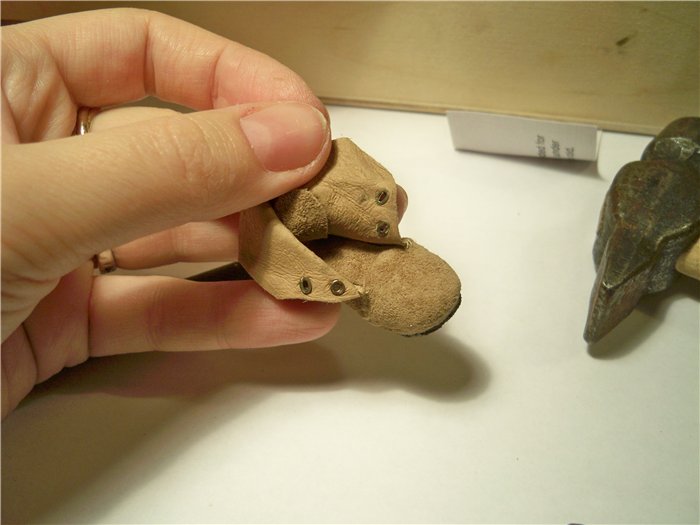
- Another option is to use a metal ball and hit it until the rivet flattens;
- to ensure a strong fastening, you need to additionally hit the sleeve itself;
- The process is repeated as many times as there are rivets installed.
There is an easier way to install rivets - using pliers. More physical effort is required here, and without the necessary skills there is a risk of hopelessly ruining the product, so you should practice on an unnecessary piece of textile beforehand.
Tip: When flattening a part, sharp edges often appear that can tear the fabric. To prevent this, use a backing ring.
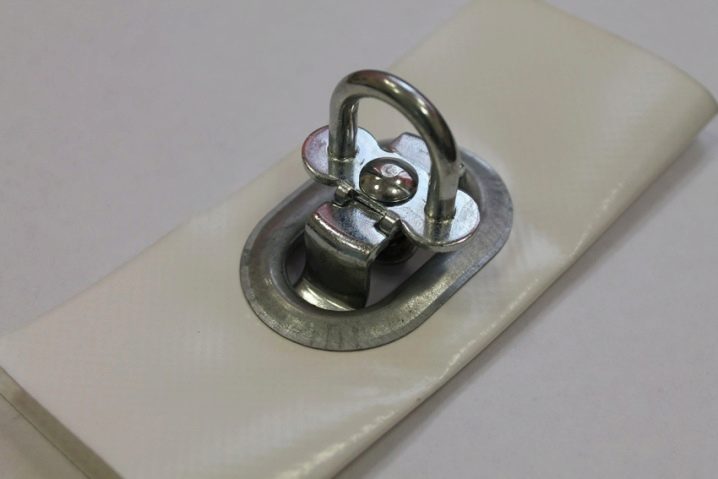
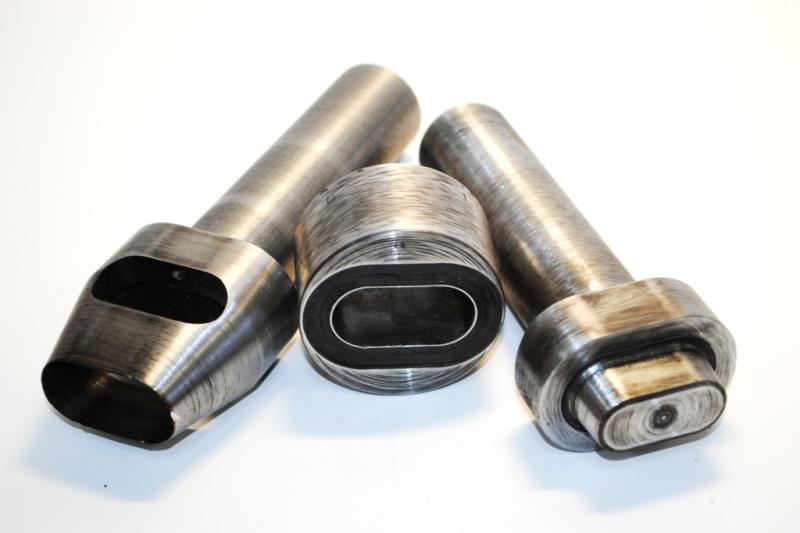
Equipment for installation of non-standard eyelets
When it is necessary to install oval rivets with holes, this can be done manually: cut suitable holes in the textile material with scissors, bend the inner edges of the part with any metal tool, and clamp with pliers. Oval-shaped products are used to secure boat and car awnings, parts of tents, pavilions, etc.
A set for installing non-standard oval eyelets 42x22 mm. consists of a punch, a punch with a matrix, and a crimper. The method of punching and installing the product is practically no different from fixing conventional round rivets. Other devices with parameters of 11 x 17 mm. or 22.5 x 13.5 mm are also used for oval-shaped products.
Advice: When installing curtain eyelets, their internal diameter is selected to be 1-1.5 cm larger than the rod thickness, which allows the product to move without unnecessary effort.
Conclusion
It is not difficult at all to use devices and eyelet machines on your own – you just need to imagine what the end result should be, draw a drawing or sketch of the finished product, and carefully read the instructions. Having a set of tools with a punch for installing eyelets and buttons at home, you can not only hang curtains with your own hands, make all sorts of crafts for home decoration, but also organize a profitable family or individual business.
Video review of manual punches and eyelet setters
https://www.youtube.com/watch?v=ETw-jO4VITk