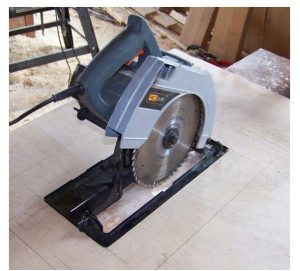
A circular saw is used to cut wood.
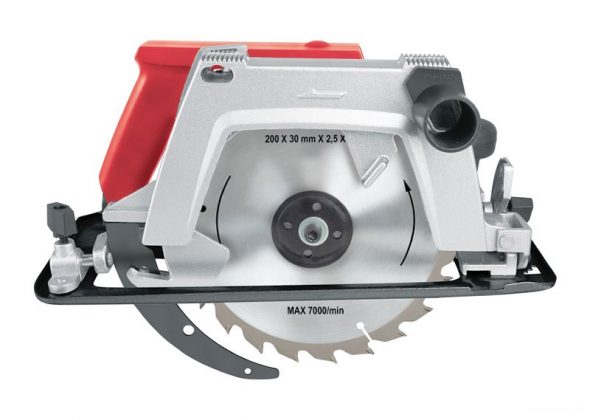
The cutting base has a plane resembling a disk equipped with an outer edge with teeth. There are models not only of the manual type, but also with the possibility of fixing on the table.
There are several ways to get the latter for ease of manipulation. You can build a table for a circular saw yourself, strictly adhering to a certain scheme.
Content
The benefits of DIY
Making the element yourself allows you to make the saw as suitable as possible for individual conditions. There will be no difficulties in the process if you carefully study the issue. You can adjust the product to the desired size, distribute everything so that it is convenient for you.
A hand-made model will be one of a kind, which makes it unique.
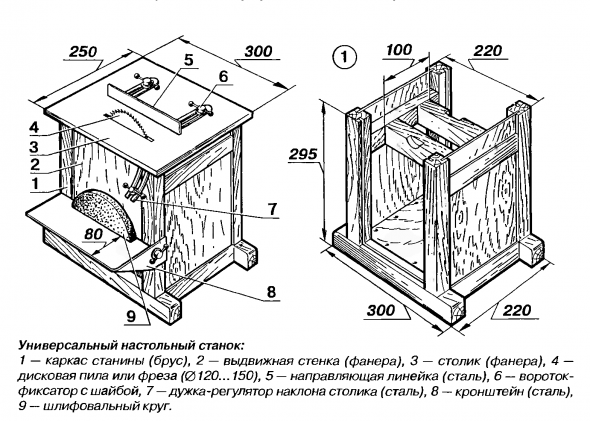
We decide on the design and construction
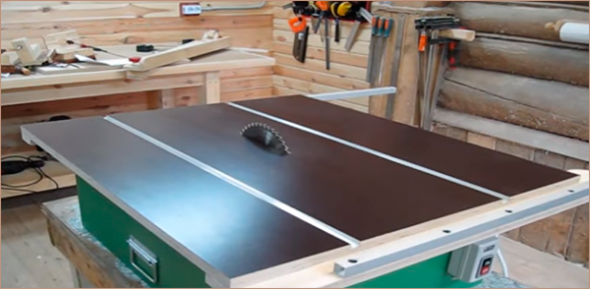
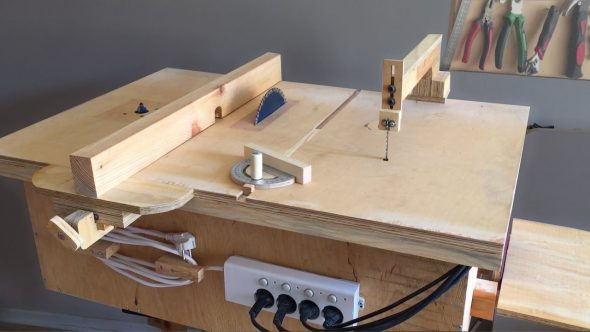
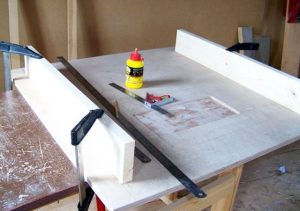
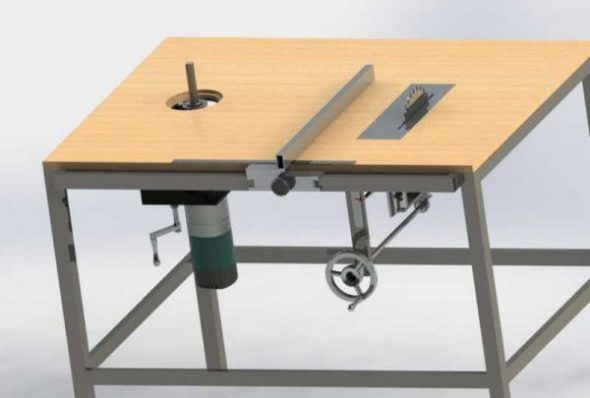
The base can be made of wood or metal. For the tabletop, leafy tree species are chosen. A special hole should be made in it for the disk. The key feature of the created table should be convenience.
Care should be taken to ensure its stability. No loosening is allowed, otherwise it will negatively affect safety. The tabletop should have the smoothest possible surface. Then the likelihood of injury during work will be reduced.
The device can be supplemented with a special riving knife. It can be removed. It is equipped with a special disk protection, allowing to get rid of the chips flying at the worker.
Some people remove the factory cover and replace the factory platform with a homemade one. If you are not going to do any angle sawing, you can remove the parts that adjust the angle of the blade.
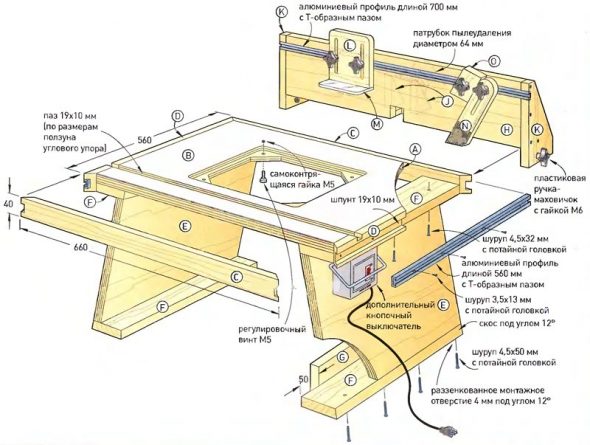
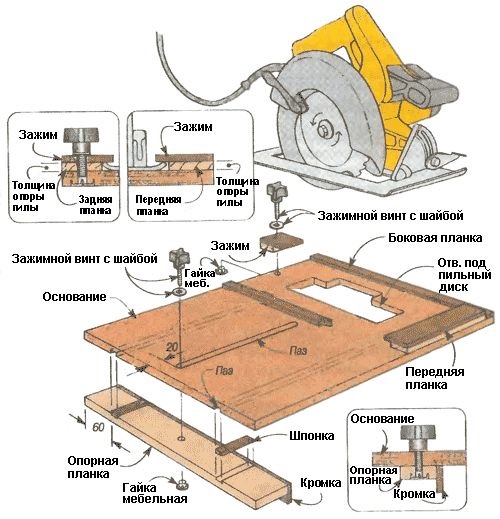
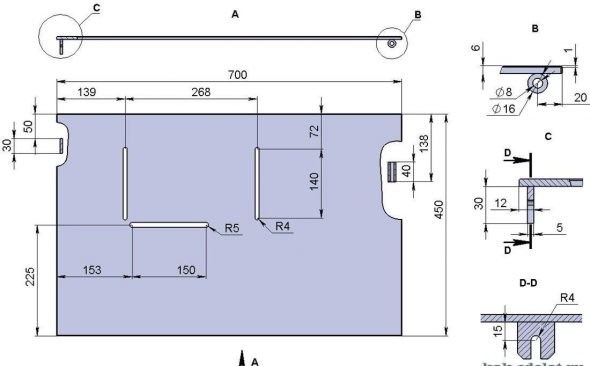
Drawings

Before starting work, it is recommended to go through the preparatory stage. It is necessary to make a drawing. This will facilitate the process of creating the structure. First, calculate the dimensions of the table, then transfer the obtained data to paper. The hole made in the structure must exactly match the dimensions of the saw. Everything depends on the brand of equipment. Therefore, it is impossible to make a universal hole. The base must be stable and withstand mechanical loads well.
It is unacceptable to overhang the structure to one side. The dimensions of the tabletop must fit the cutting flow. The final version is determined based on individual wishes. Some people work comfortably with a folding table or a product with small dimensions.
An important point should be taken into account in the drawings. If the plans include leaving tools or materials on the table during work, then the dimensions of the tabletop should be increased to a square meter in area. A suitable size would be 120 by 120 cm. The drawing should be done carefully and slowly to do everything correctly.
Necessary materials
For such a table, wood, plywood or laminated chipboard can be used. MDF and chipboard are also suitable. Some people prefer to choose steel or aluminum.
It is not recommended to use plastic, it is completely unsuitable for a table of this purpose. If wood is chosen, then after the assembly is complete, the product should be treated with a special antiseptic composition. This will provide reliable protection from moisture and help to avoid rotting.
To make a saw table yourself, you need to prepare the materials.
- Selected raw material for the base. The thickness should be 21 mm.
- The timber required for the frame. A 3-metre long edged board with dimensions of 50 by 150 mm will do. You will need 5 pieces in total.
- Wooden dowels measuring 10 cm. Not less than 12 pieces.
- Wood glue.
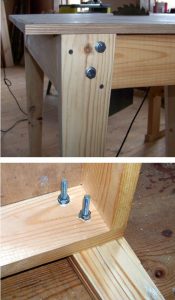
- Metal fasteners, 4 pieces.
- Metal corners. 10 pieces are enough.
- Self-tapping screws.
The specified elements must be prepared in advance and placed near the workplace.
Necessary tools
In addition to materials, you should prepare tools.
Among them:
- pencil and marker;
- measuring instruments, including a meter and tape measure;
- jigsaw;
- hand router;
- grinding machine;
- sandpaper (should have medium or fine grain);
- plane and drill;
- screwdriver.
You need to prepare everything in advance and keep it on hand throughout the entire process.
Manufacturing process: step-by-step instructions
To make a quality structure, it is necessary to follow some advice. The process consists of several steps, presented in the table.
| Steps | Description |
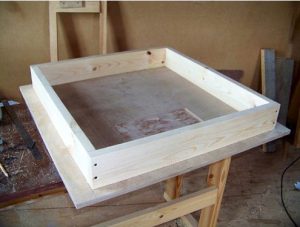
| 1 | The block should be planed on all sides. Then the frame of the future table is assembled from it. Several 5 mm holes should be drilled in each side of the tabletop. Additionally, one through hole is made for the legs of the product. |
| 2 | Several holes of similar diameter are made in the tsars. One through hole is made in the legs. The diameter remains the same, 5 mm. |
| 3 | Proceed to install the dowels in the tabletop. Before this, they are covered with wood glue. The legs and sidebars are placed on top. If there are clamps with ties, the product should be fastened with them. When the glue is completely dry, you need to fasten the sidebars and legs using special metal fasteners. Additionally, you should tighten them with self-tapping screws. You can add reliability and strength to the structure by using corners. They will become an element of additional fastening, giving the product stability. For the short side, 2 pieces are enough, and 3 will do for the long side. |
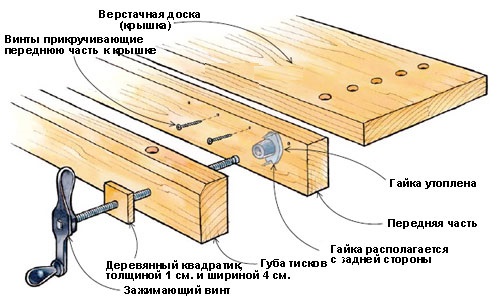
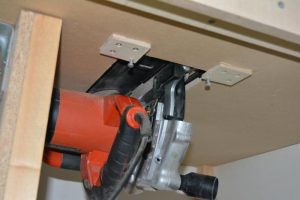
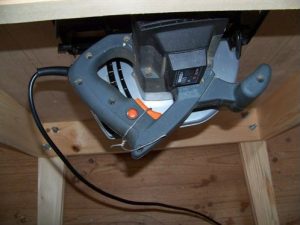
| 4 | The next step involves securing the saw to the product from the inside. There are several methods to accomplish this task. M4 bolts or bars with screws are suitable for securing. The first method is fast and reliable. The second method does not involve additional holes, which eliminates the need for drilling. You need to make a cut in the bars, the width of which is equal to the dimensions of the saw platform. Then screws and bars on both sides fasten the equipment and the tabletop. |
| 5 | After installing the saw, you will need another block of a larger size. It is secured to the base of the structure using screws. Screwing is done at the marks made when setting the platform in a level position. These manipulations will help, when removing the saw, to return it usually quickly without looking for markings |
| 6 | The saw blade is installed in the right place. The base is sawed to obtain a longitudinal hole. Then the product needs to be turned over |
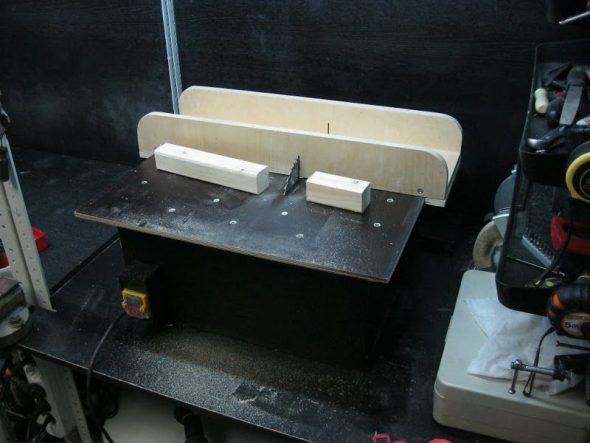
| 7 | Then they begin making the parallel stop. Two strips are sawn off from the plywood. Their length should match the width of the table. On average, these dimensions are 10 cm. The corners should be rounded. |
| 8 | The resulting strips are sanded. They need to be fastened at an angle with self-tapping screws. A metal corner should be screwed inside |
| 9 | If you need to attach a stop to the base and the structure will be used frequently, you should attach the guide so that it is perpendicular to the disk. Attach a roller to the bottom. This will allow it to move. |
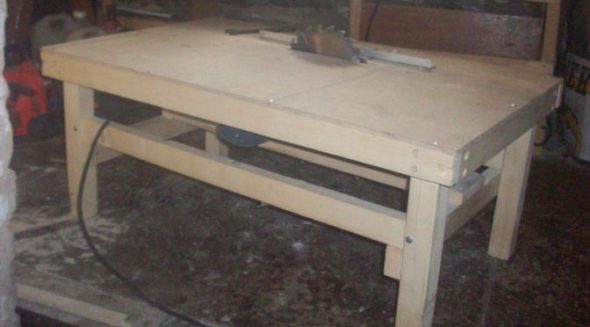
The design is complete and ready for use. When performing the described manipulations, it is important to remember to observe safety precautions. This also applies to any manipulations with a circular saw.
Check the position of the table and its strength regularly. The structure should be stable, without wobbling.

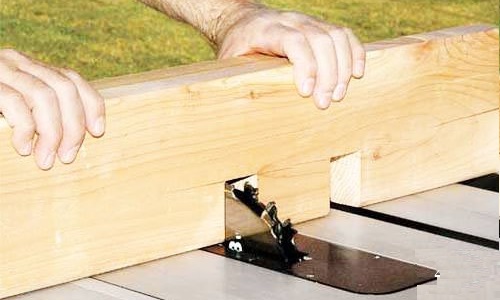
First, make sure the saw is securely fastened, only then turn it on. Do not hold the material being cut with your hands. This will help to avoid wood getting in your face when knots start to bounce off. It is also recommended to use special protective glasses when working.
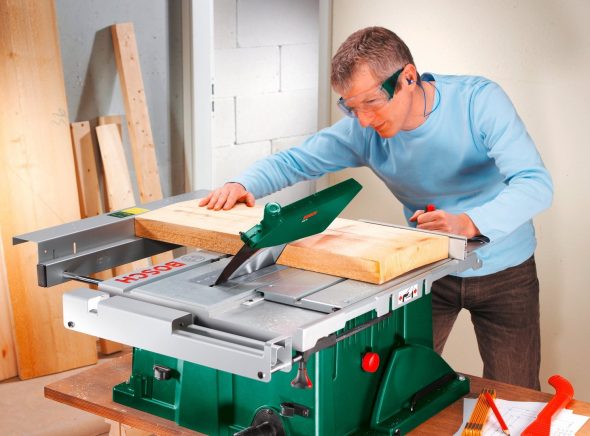
These simple tips will help you avoid injuries in the workplace.
Thanks for the interesting article! You really helped me make my own table saw!