Everything that is done independently is always interesting and pleasant. In addition, "homemade" gives the opportunity to let your imagination fly and implement the most daring ideas. Those who have a summer cottage at their disposal have especially much scope for creativity.

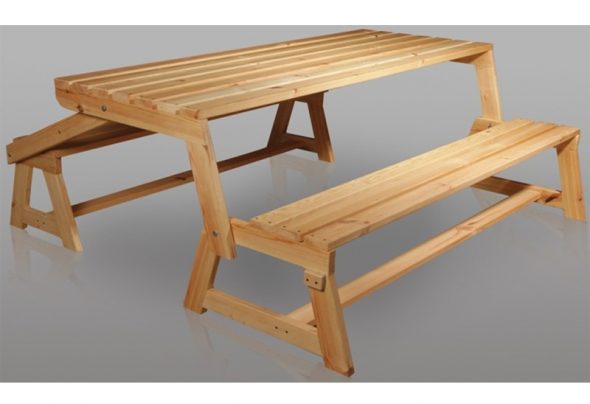
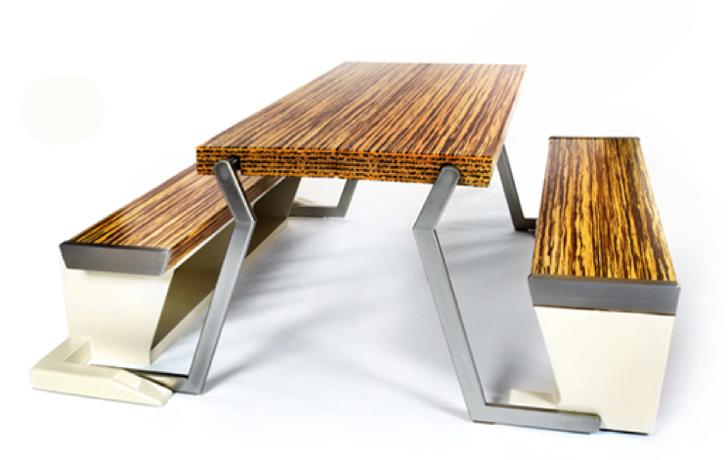
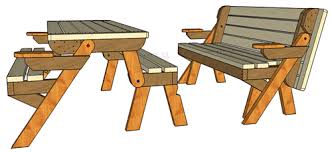
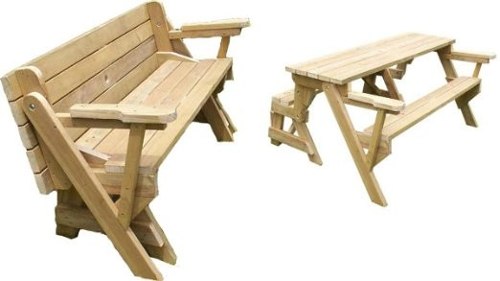
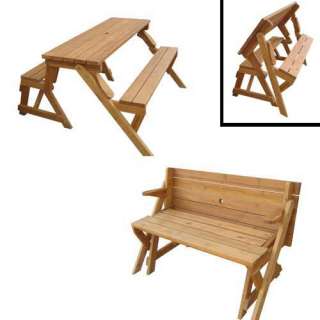
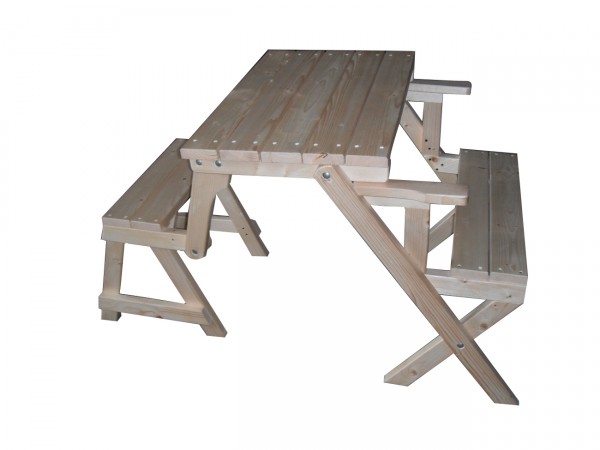
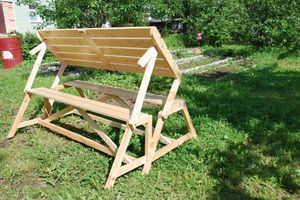
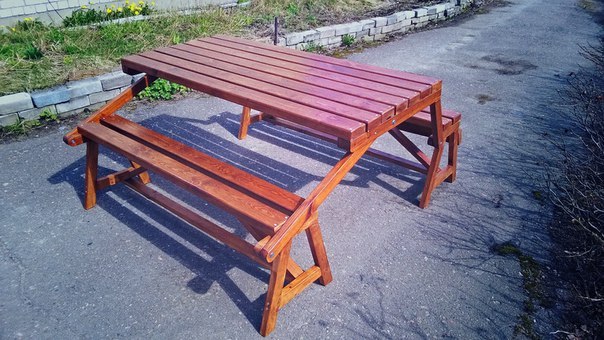
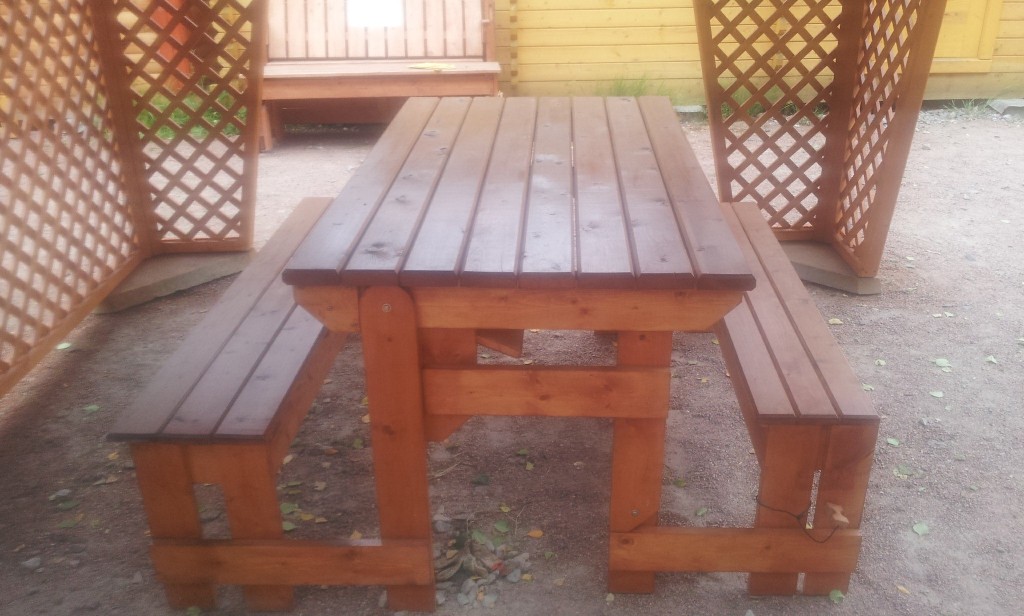
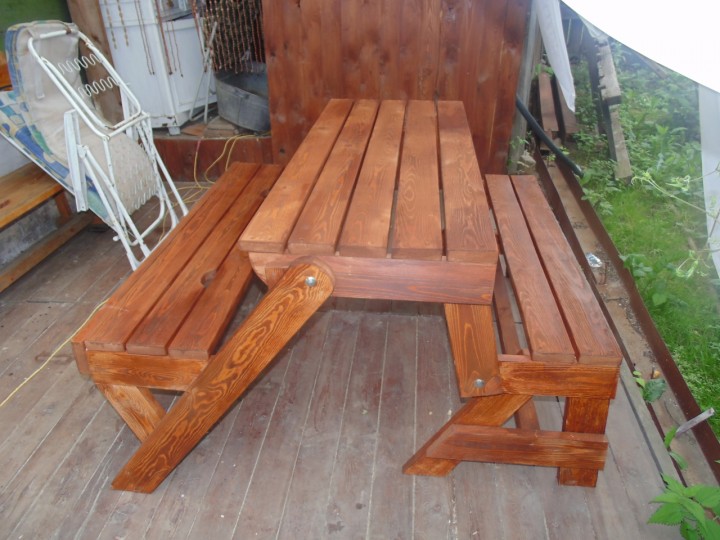
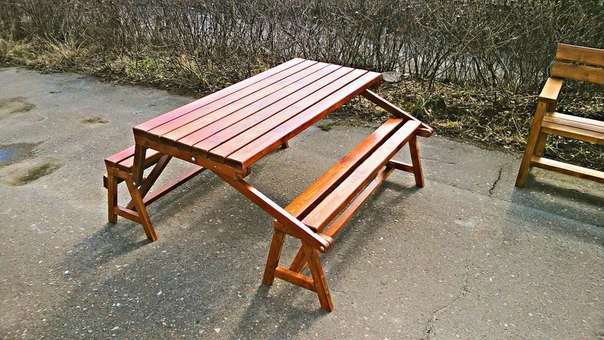
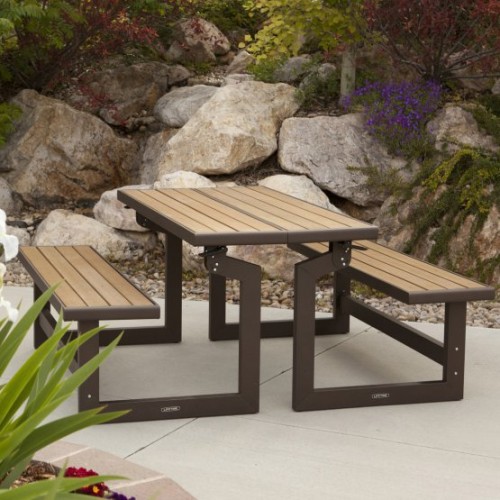
One of the wonders of home craftsmanship is a transforming table bench, which can be made with your own hands using ready-made drawings or drawn by yourself. It is best to use graph paper: the scheme of such an unusual product will be made most accurately on it.
Depending on the ideas about the capabilities of the transformer, drawings are made; when preparing them, all the advantages that this product will provide are taken into account:
- it is compact and takes up minimal space, which will be an additional plus in small areas;
- it can be moved to any point without any problems;
- universal in application, as it turns into a set for wide use.

Content
We decide on the design and construction
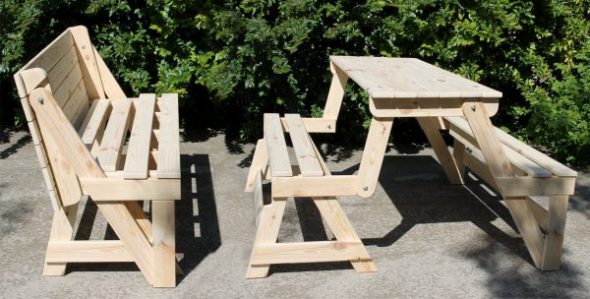
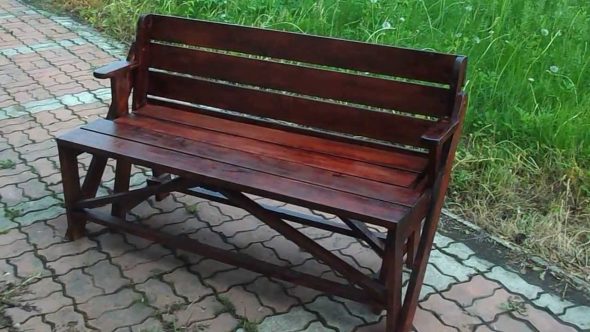
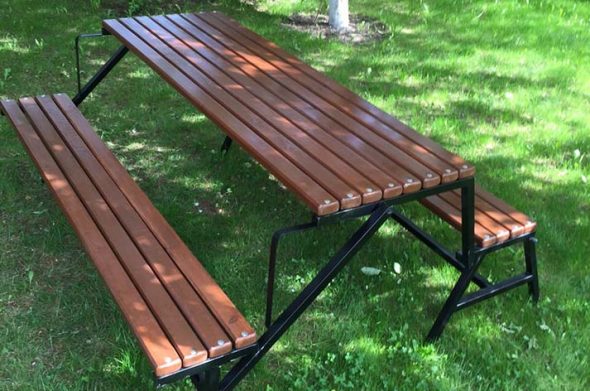
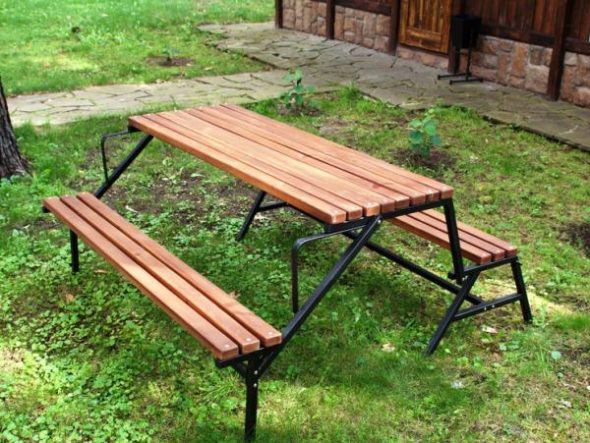
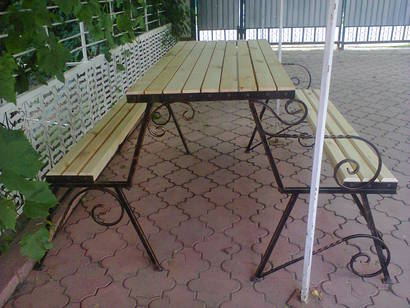
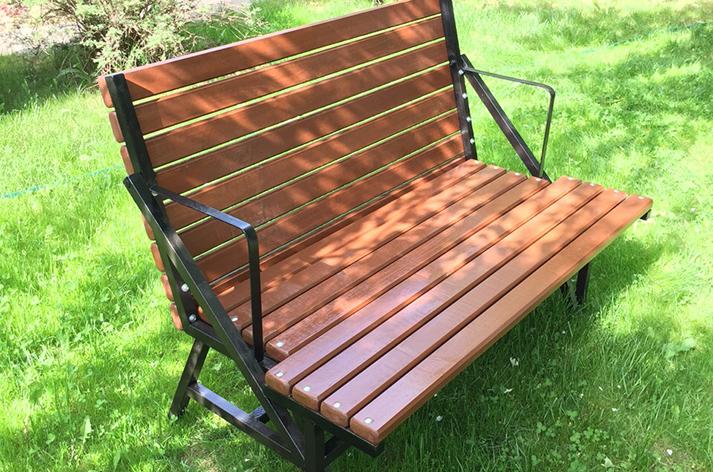
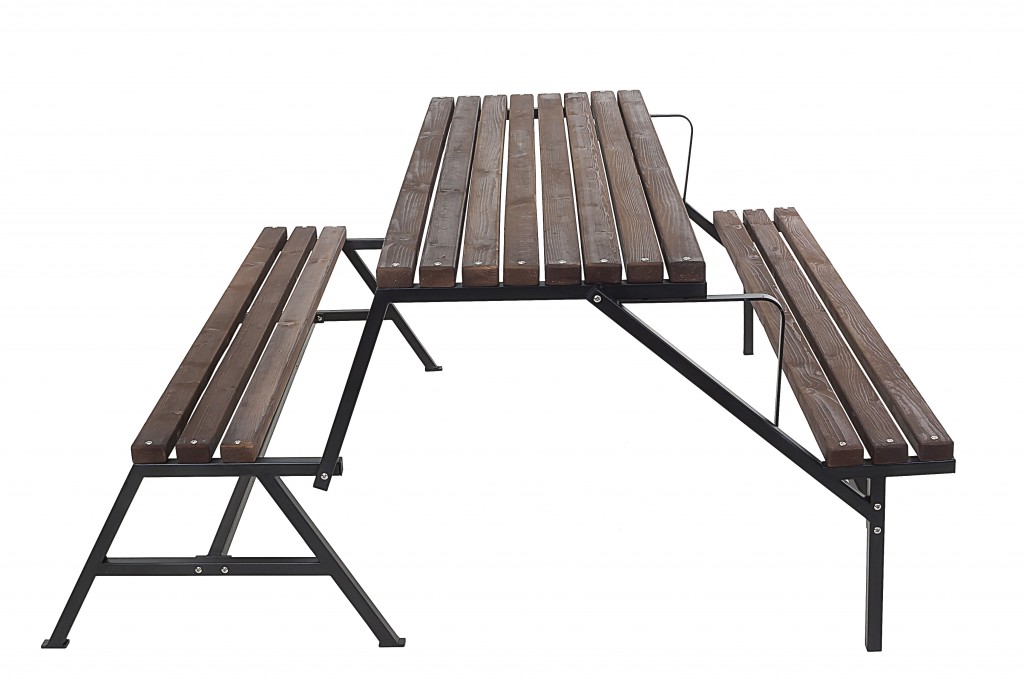
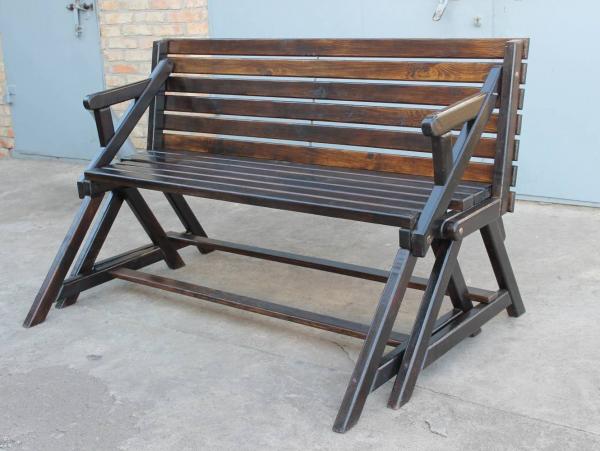
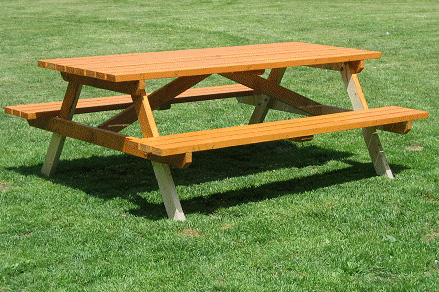
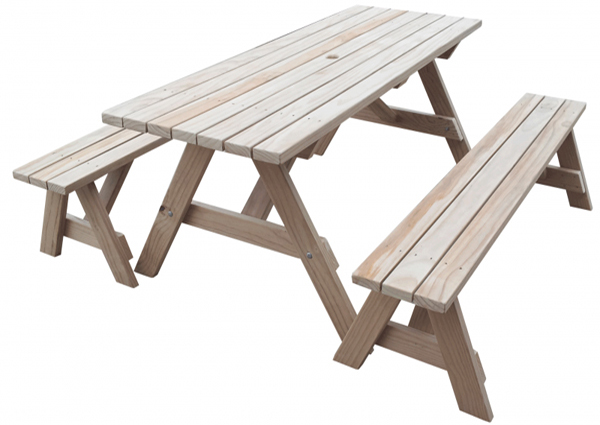
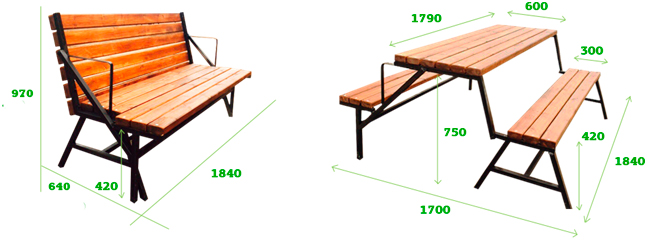
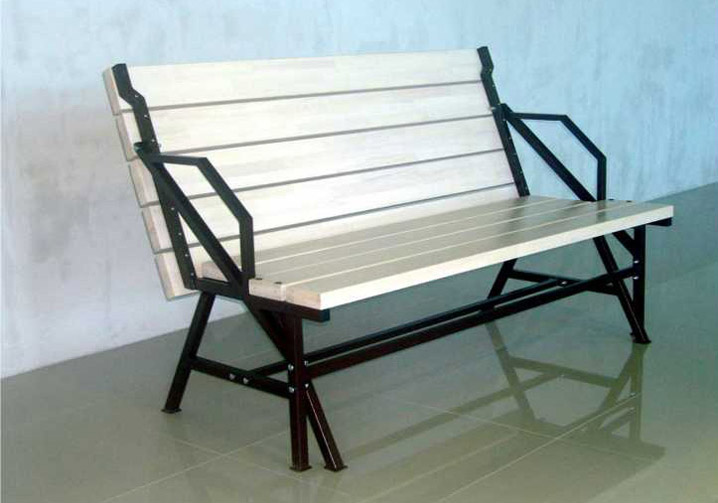
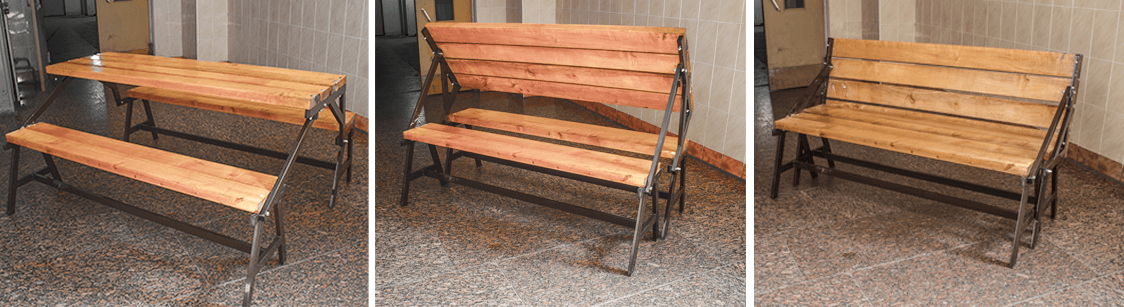
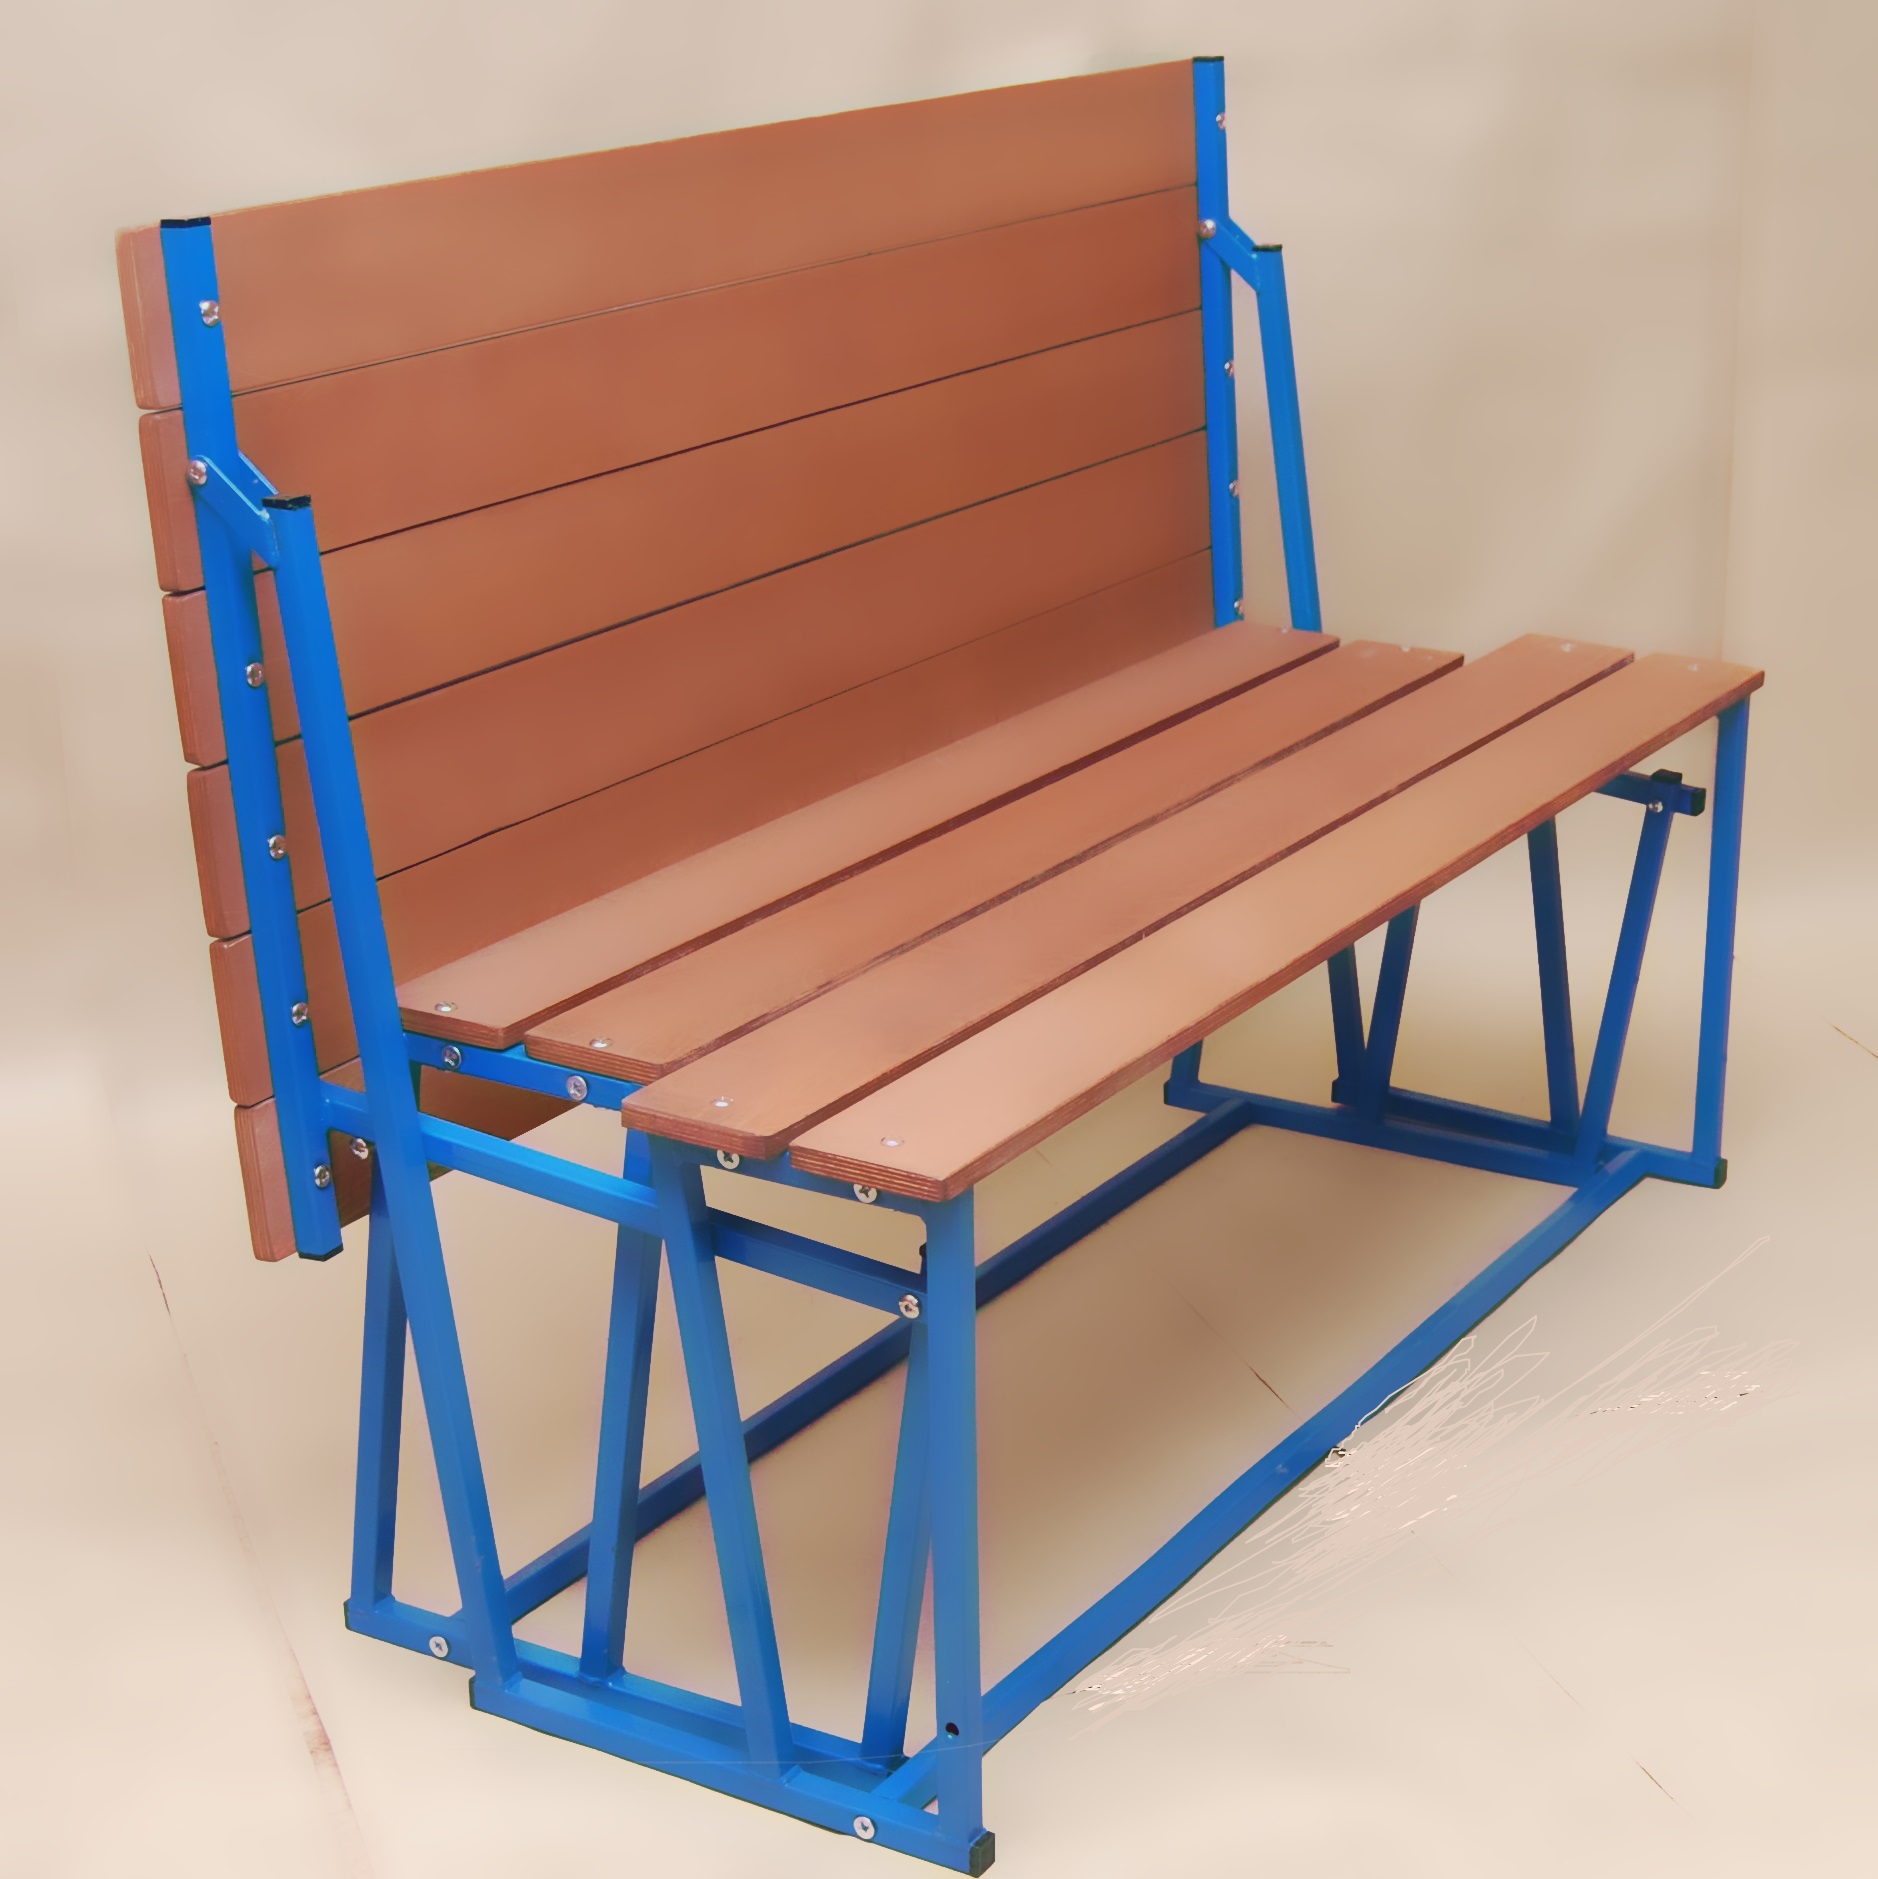
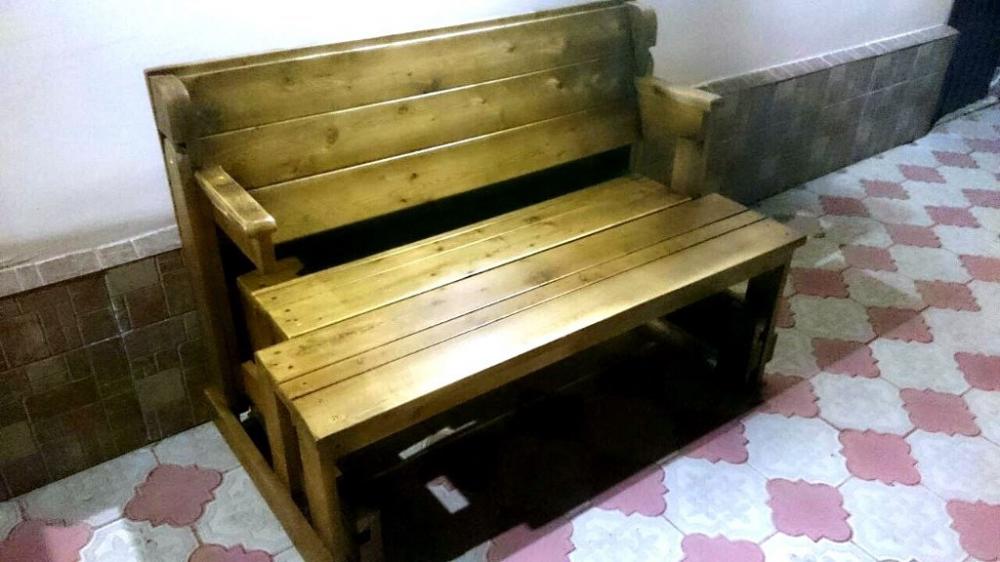
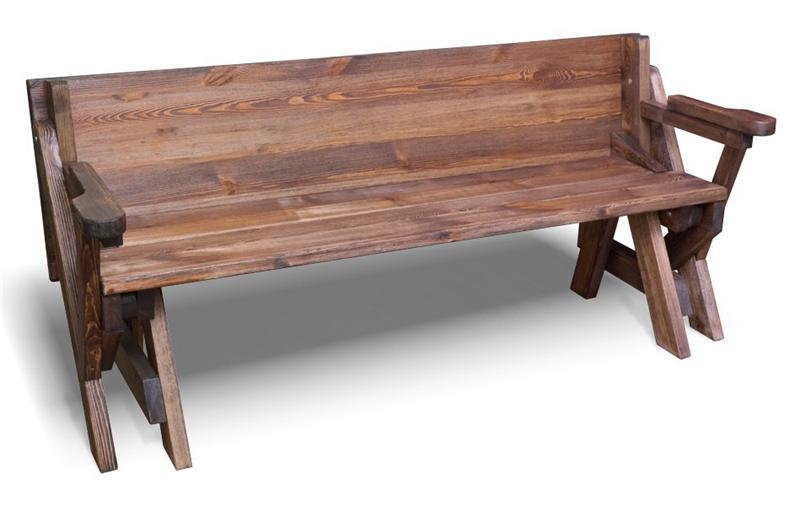
The transformer can be equipped with one or two benches, with backs and armrests, or without them. Their dimensions will also be determined by the home craftsman, based on the needs of the family and his own creative vision.
To ensure that the product is strong and durable, you need to select the right lumber.
To work you will need:
- edged boards;
- wooden beam.
Experienced owners claim that beech, ash, oak or birch wood will be suitable. You can also use pine, but you will have to choose very carefully, avoiding blanks with many knots.
Prepare the tools
To ensure that the work moves forward without interruption and time is spent as efficiently as possible, it is important to prepare the tools, not forgetting any detail:
- tabletop miter saw: will make the work much easier; you can also perform the operations manually with a fine-toothed hacksaw, and use a protractor to apply markings;
- electric drill and drills;
- plane or router for chamfering;
- Phillips screwdriver;
- a small sanding machine or a block with sandpaper;
- rasp.
Additionally, PVA glue and wood screws may be useful.
Manufacturing process: step-by-step instructions
The durability and longevity of operation depend on the accuracy and consistency of execution.

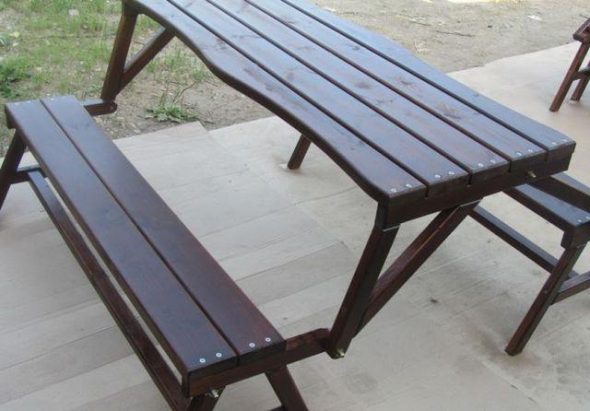
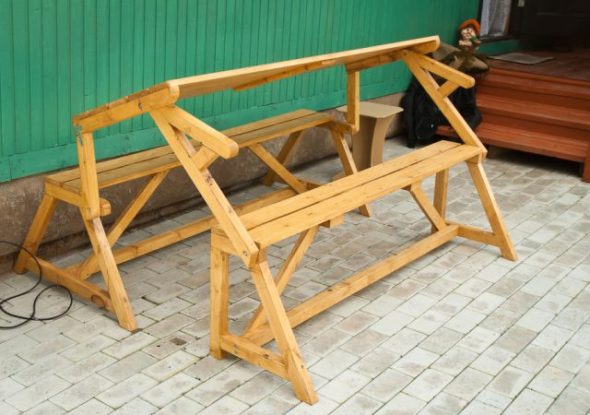
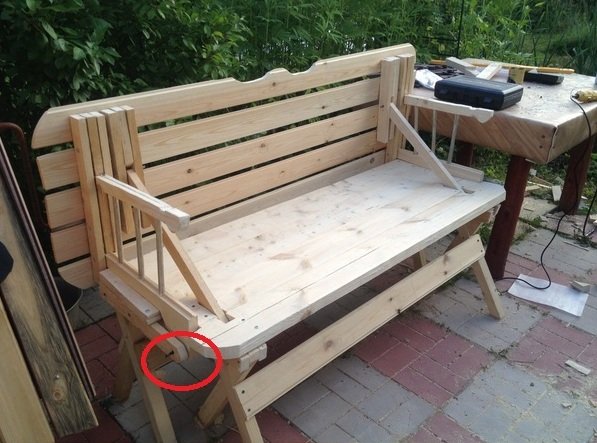
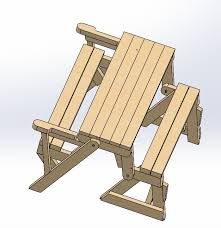
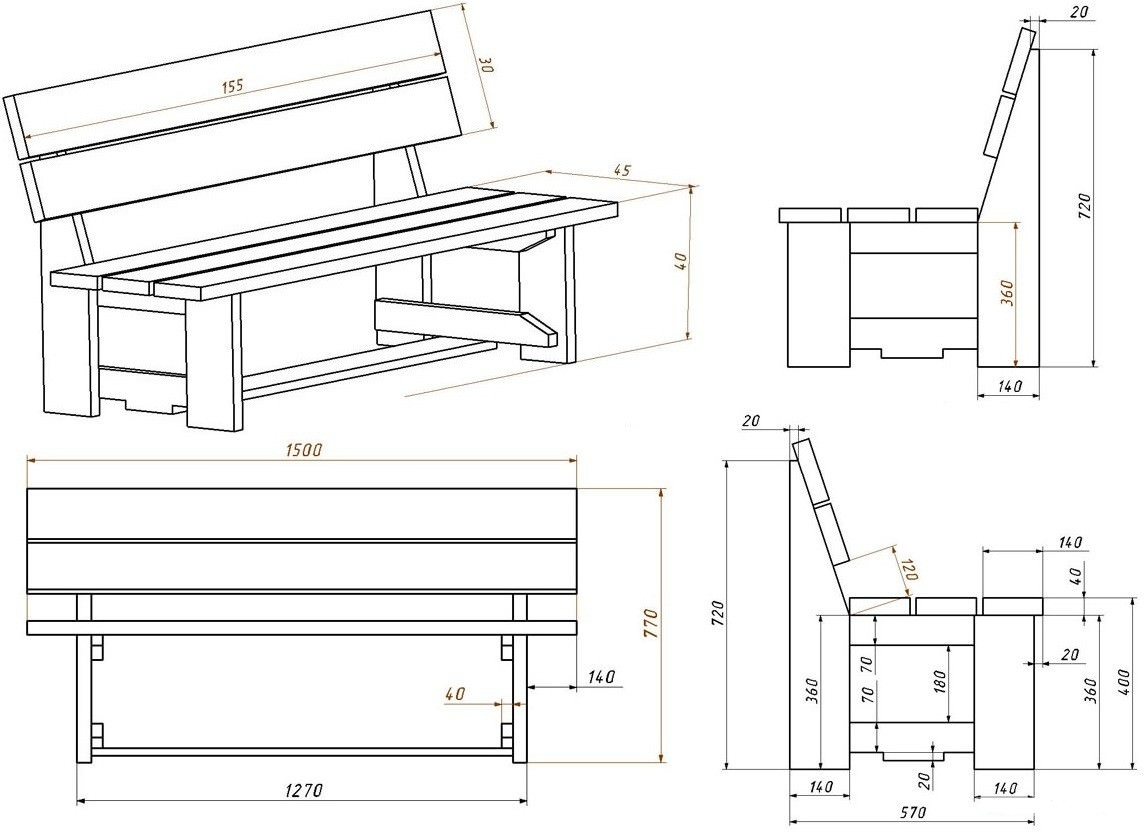
To ensure that all parts of the product are at hand, the craftsmen recommend that before starting work on the drawing, where its elements are marked, immediately prepare the legs (8 pieces) up to 70 cm long, making oblique cuts on them at the bottom and top.
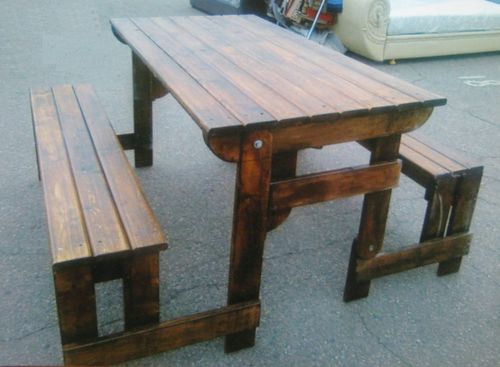
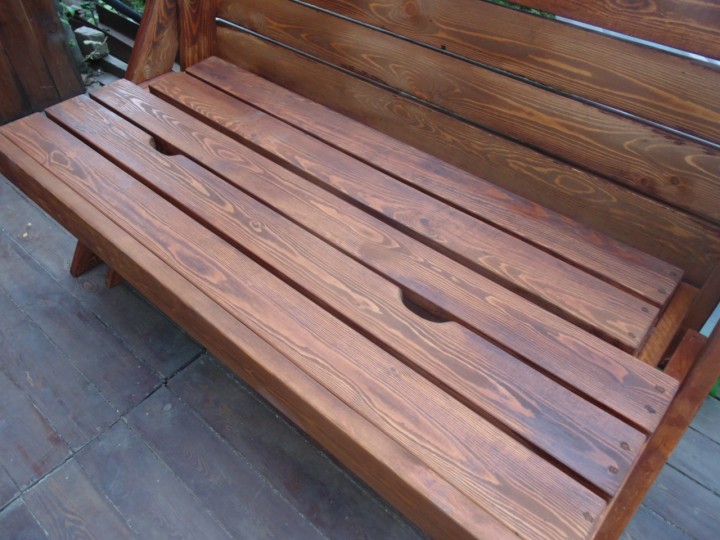
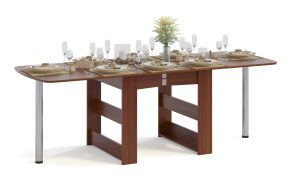
The next step is to make the tabletop. You will need five boards of the dimensions specified in the drawing..
They need to be sanded and connected with eight-centimeter-wide strips. Two connecting pieces are quite enough.
Connect everything with screws.
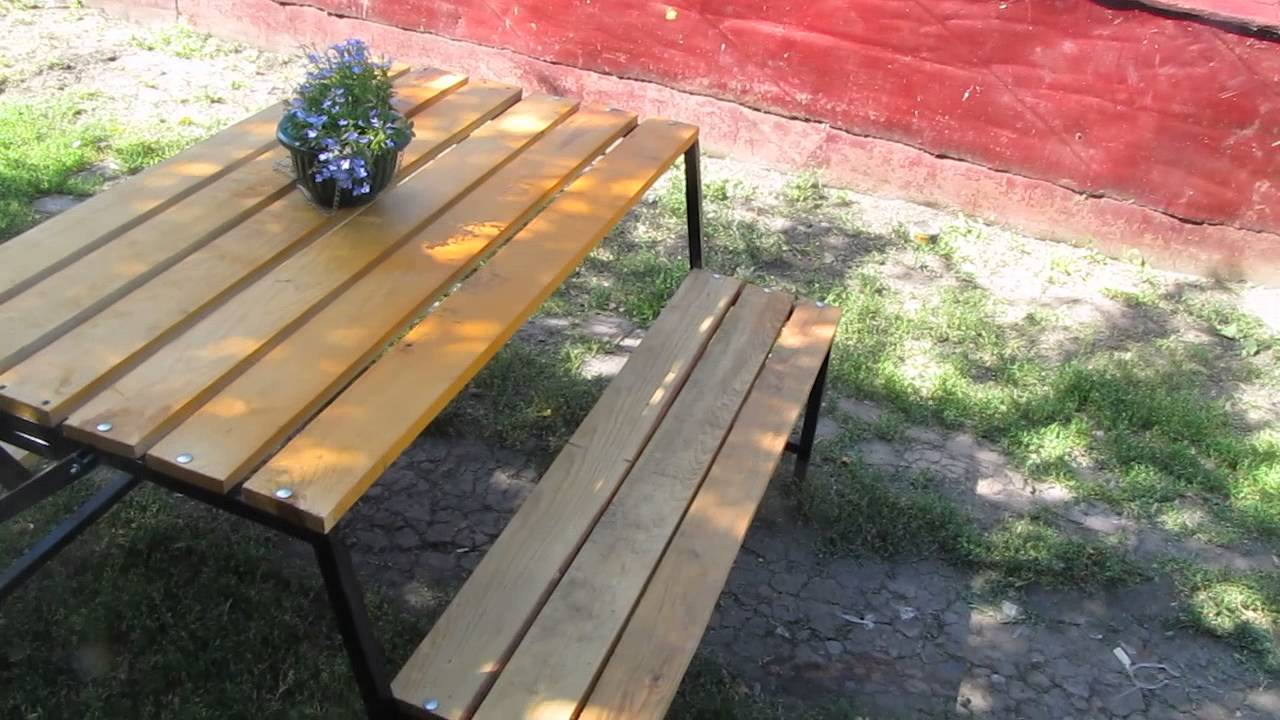
When will the bench be ready?,the table top is screwed to it.
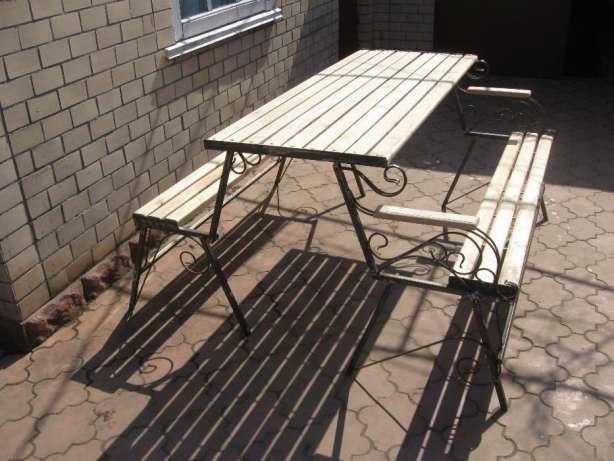
If a design with two seats is assumed, you can start making the first one; its size depends on the general parameters of the product; according to the drawing, it is made of boards (1-2 pcs.); their number is related to the width of the bench.
- The seats are screwed to the legs;
- They are reinforced from below with spacers.
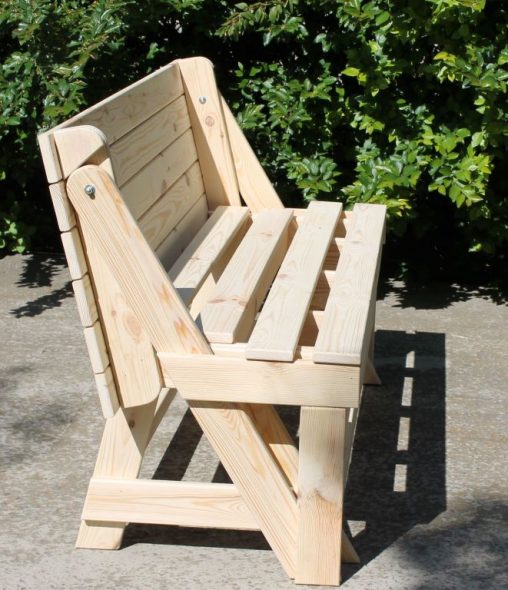
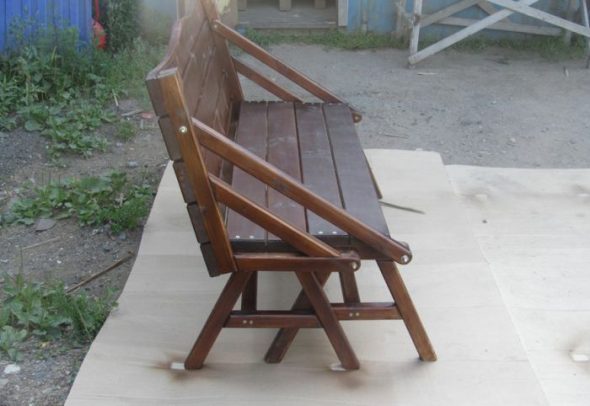
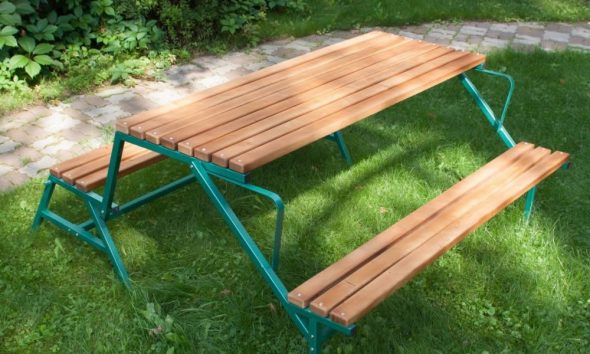
The second bench is made in a similar way:
- the legs are made from 40x40 bars; they are attached to the seat in the shape of the letter "A";
- the parts of the bench are connected with a beam, reinforced for strength with wood glue and self-tapping screws;
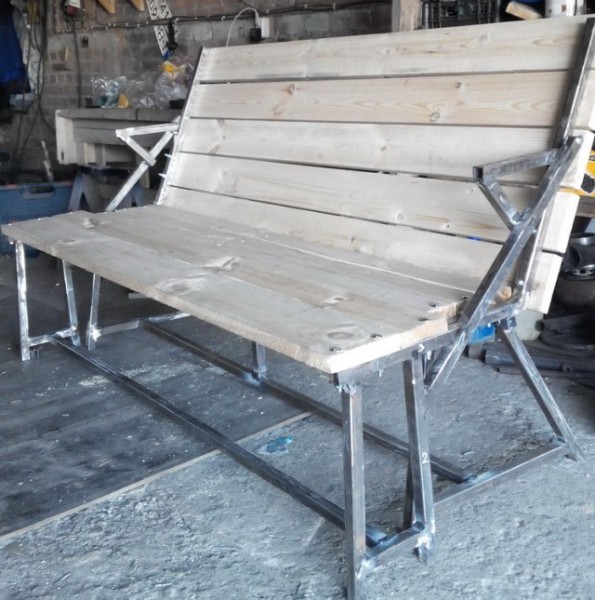
- If it is assumed that a back will be attached to the bench, it is made from boards, reinforced with bars, spacers, wood glue and self-tapping screws.
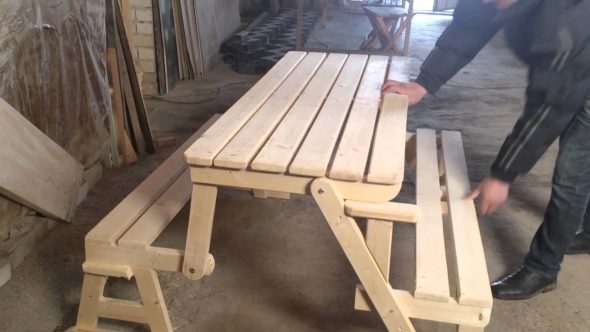
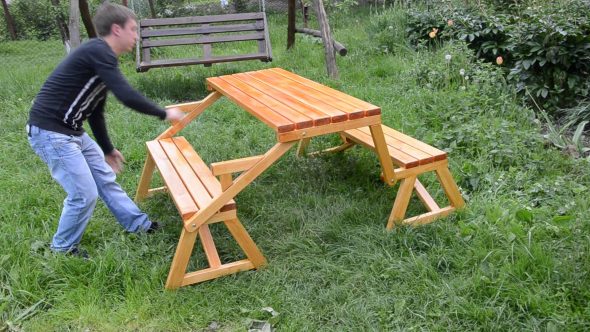
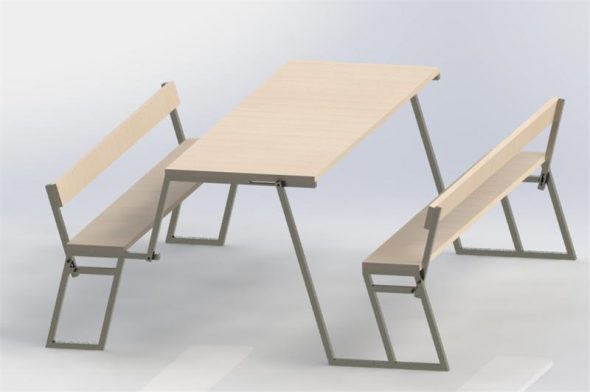
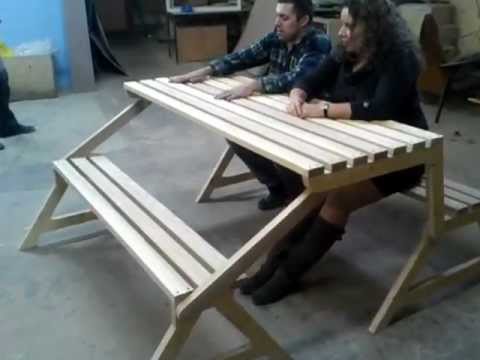
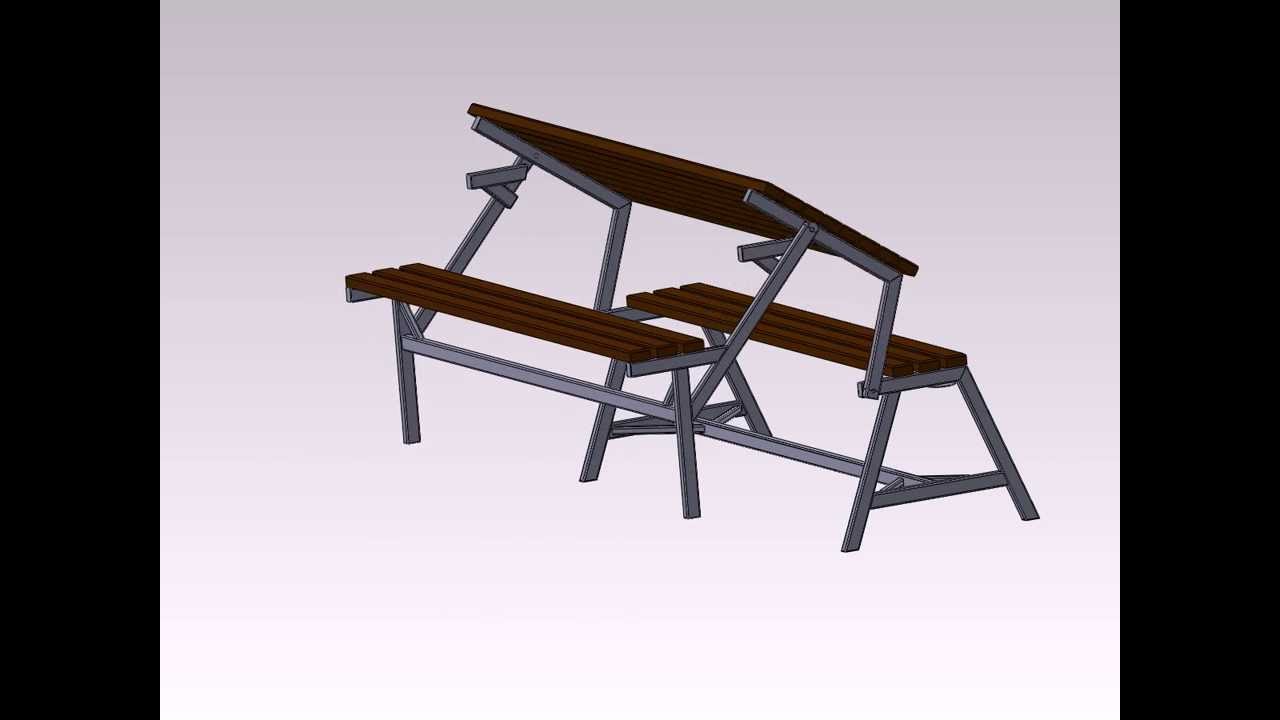
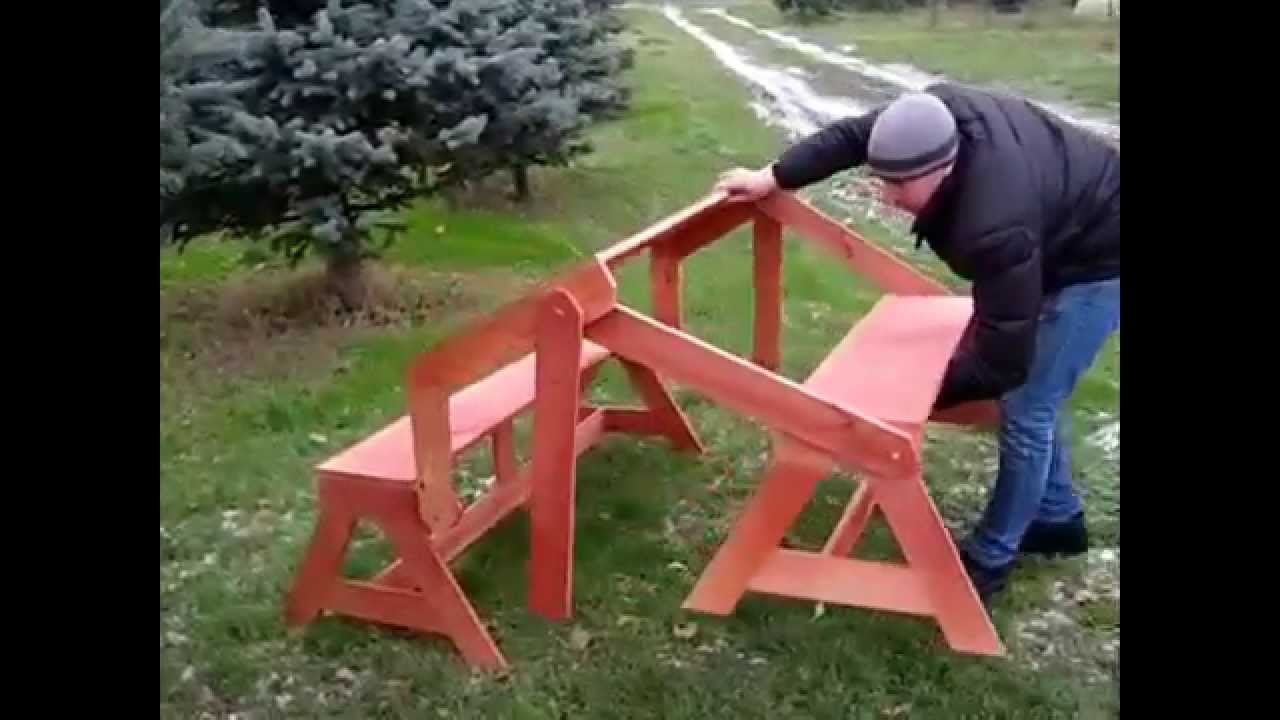
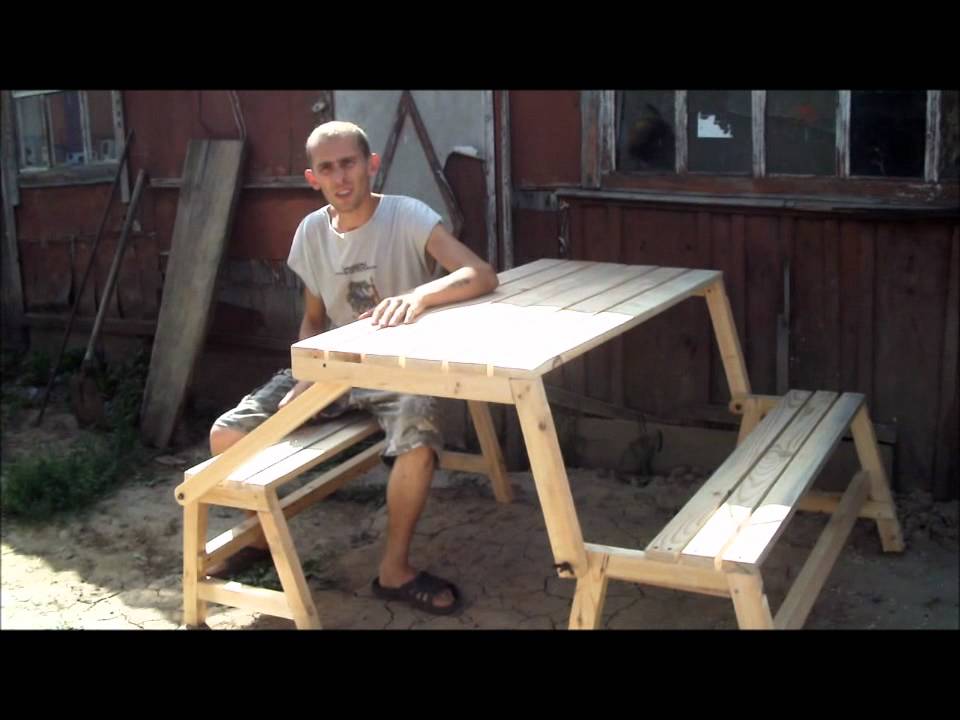
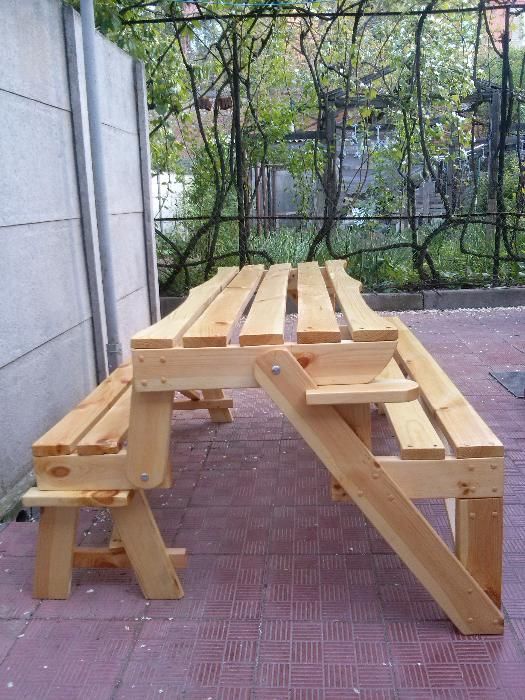
The next step is to assemble the prepared parts of the product. To avoid unpleasant surprises, you need to assemble the transforming table by connecting the elements one by one and checking the drawing.
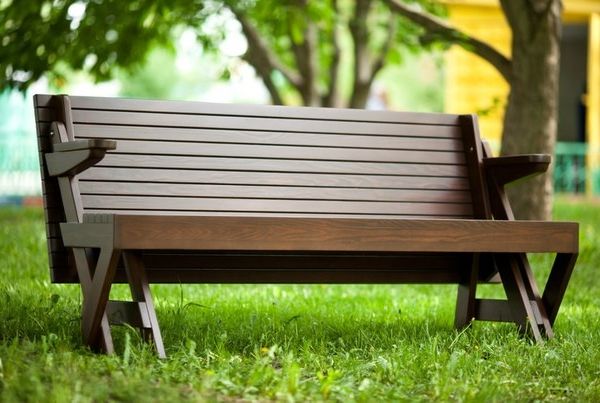
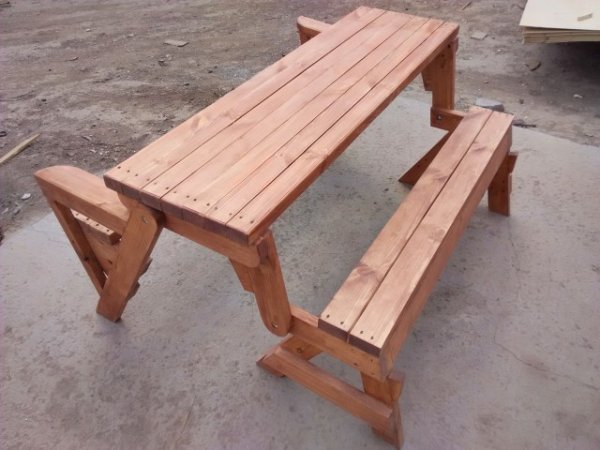
The nuance that attracts attention is the observance of the same height of the parts. If everything is done correctly, in accordance with the drawing, after the work is completed, you will see a lovely sofa.
The back must be securely reinforced; to do this, holes are drilled at the joints, into which furniture bolts are screwed.
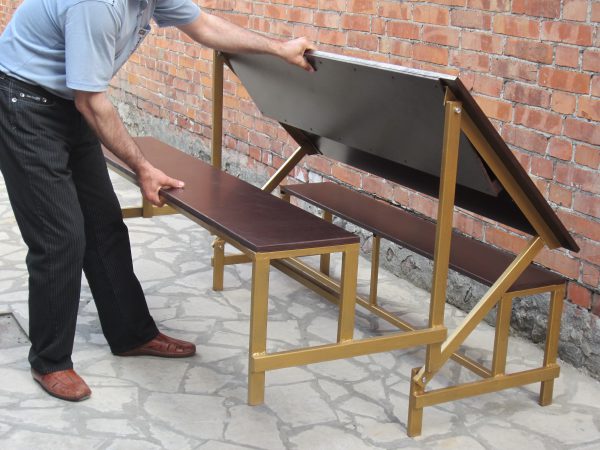
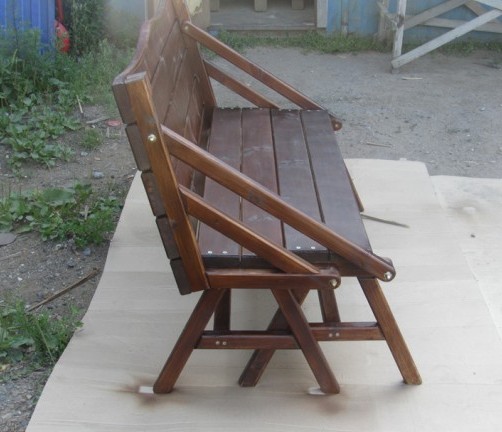
Then they check the correctness of the manufacture and strengthening of the back-tabletop. A simple and reliable way to check is to open and fix it with a regular stick.

If everything opens and closes smoothly, without much effort, the benches are connected to each other.
For complete convenience and comfort, you can install armrests. To make them, you need:
- two boards for coasters;
- four - for fastening to the seat.
They are fixed with wooden dowels or glued with carpenter's PVA. To complete this part of the work, you need to make a kind of lever that allows you to freely fold and unfold the transformer.You will need a beam secured with furniture screws and nuts, and it is connected to the armrest with self-tapping screws.
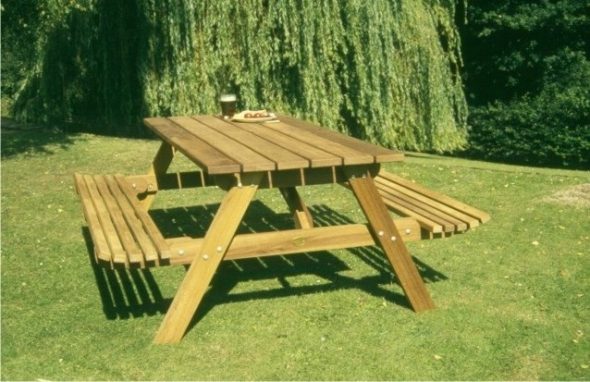
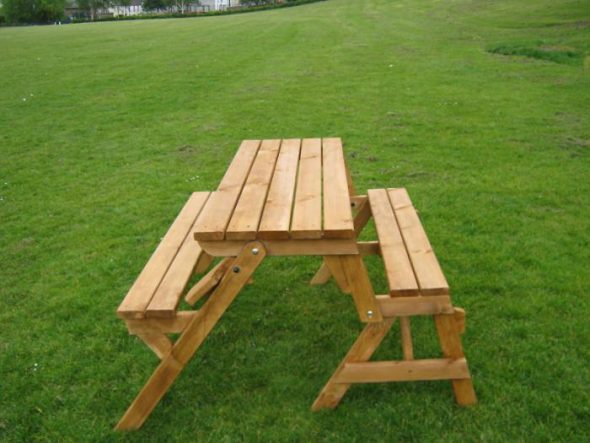
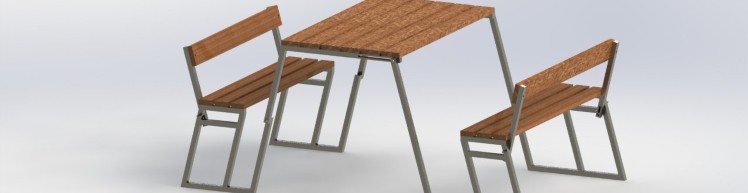
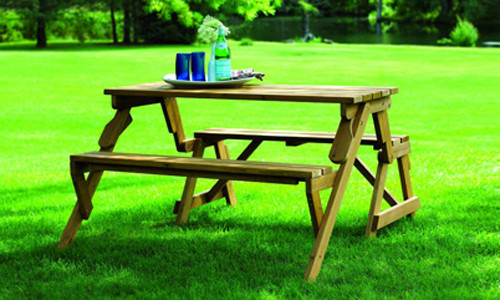
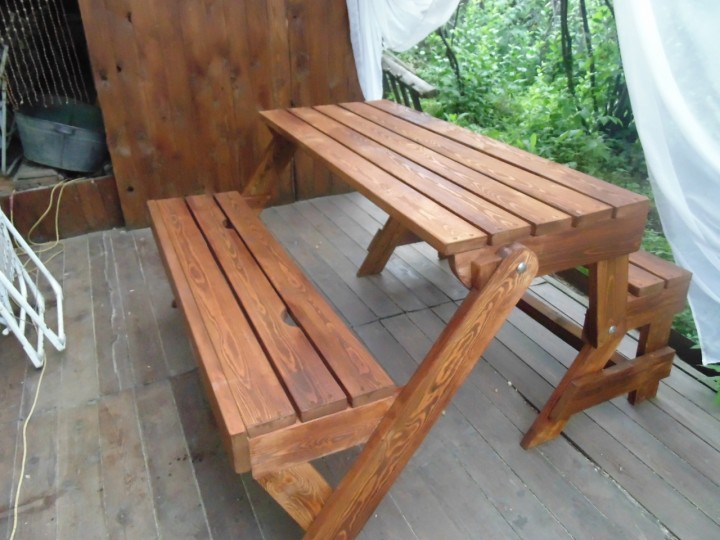
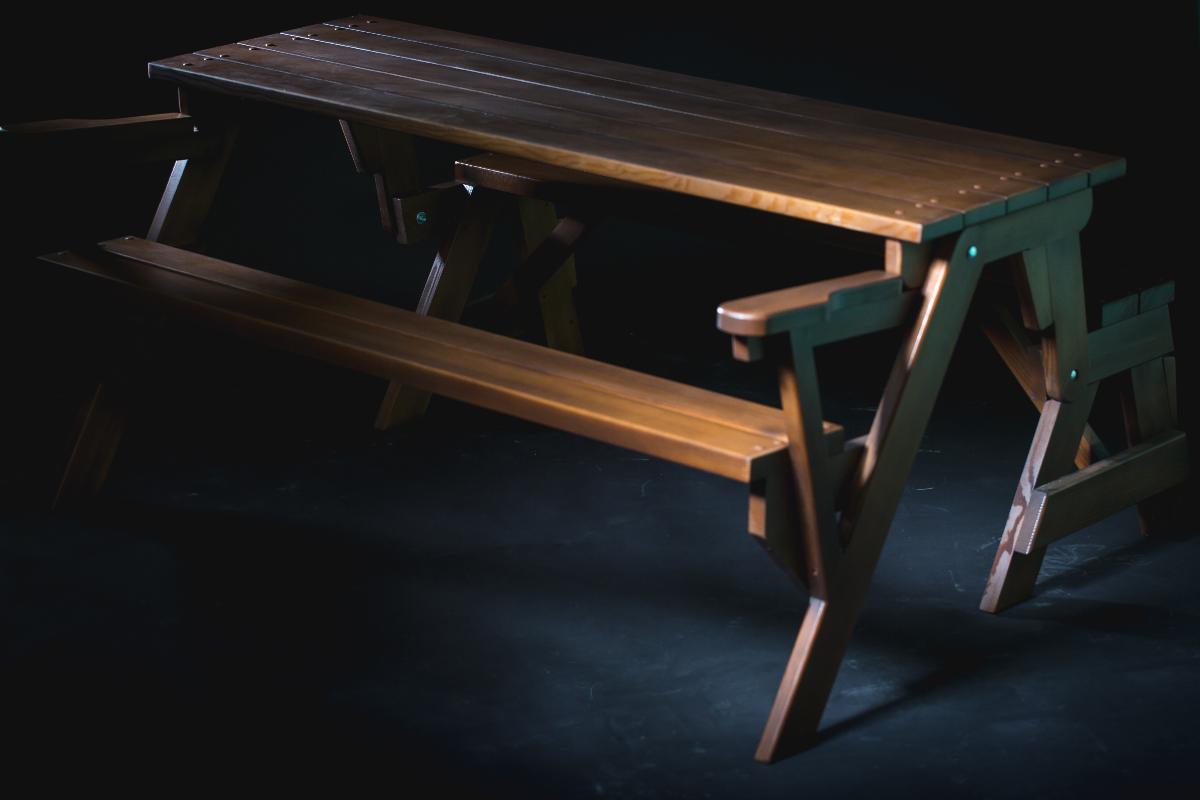
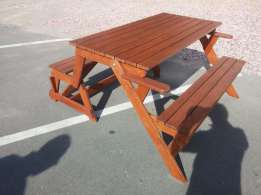
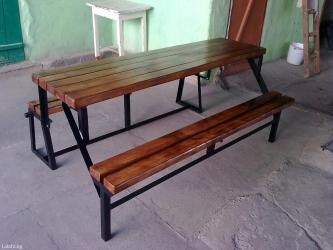
If the calculations are done correctly and the parts are connected correctly, you will get a wonderful table with two attached seats, which is easy to disassemble and assemble.
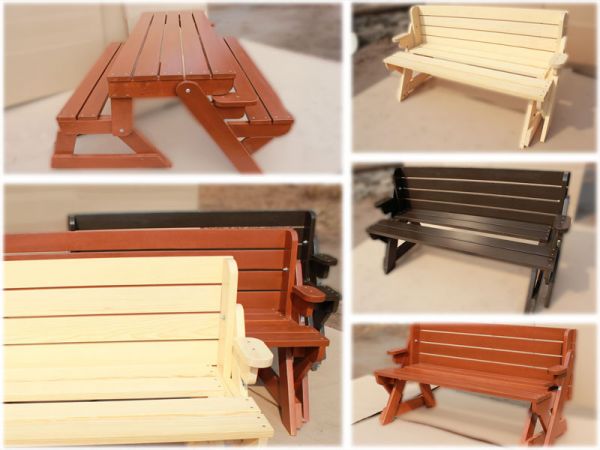
Decorating
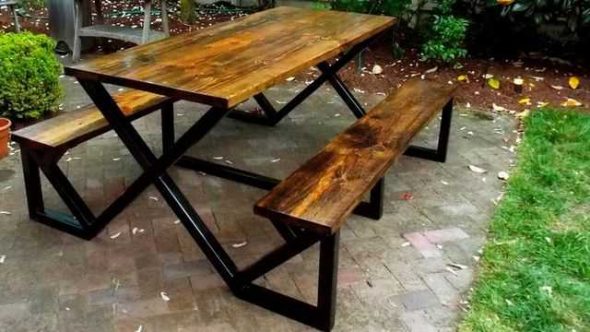
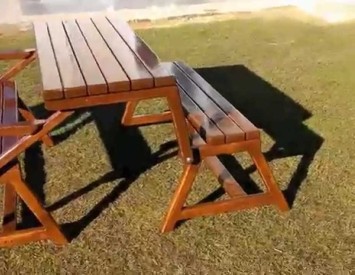
If it is assumed that the transforming table bench will be located outdoors, it is worth painting and varnishing it to increase its strength and make it last longer.

Designer ideas can be used in a wide range when it comes time to decorate, especially the backs of benches and seats. They can be decorated:
- drawings made with colored acrylic paints and varnish;
- decoupage paintings;
- cute figures of funny animals, applied with an electric pyrograph;
- Use a jigsaw to cut out a beautiful floral design or figures of characters from your favorite fairy tales; attach them to the backs with glue and screws.
There are many ways to make a homemade design incredibly attractive and original: it all depends on desire and effort, and success will definitely come!
VIDEO:How to make a transforming table with your own hands
50 Photo Ideas of Transformer Benches-Tables


Comments are closed