In the household, it is simply necessary to have multifunctional things. They allow you to save storage space and money. In addition, they fully perform their functions. One of such products is a step stool. It is useful for many jobs and can serve as a chair. But it is not necessary to run around the stores in search of it. We can make such an innovation with our own hands.
Content
What is this
First, let's figure out what it is. From the name it is clear that the product includes the functions of two items: a chair and a stepladder. Accordingly, it has their characteristic features.
So, a stepladder chair consists of steps, legs and a seat. Depending on the type of construction, the seat can be used as a step or folded back while performing the functions of a stepladder. It is worth noting that this product has more weight and dimensions than a regular chair. Nevertheless, this design is popular with many owners.
The benefits of DIY
We have already figured out why you need to have a step stool at home. Now let's talk about why we decided to create it ourselves. It's simple - in this case, there are many advantages.
- Cheapness. Making a chair at home will cost less than buying it in a store.
- Saving time. It is not always possible to find a suitable option, and the choice can take quite a while. But constructing a step stool with your own hands is not difficult and will not take much time.
- Self-affirmation. There is also a psychological aspect here. Any owner is pleased to see how his product is used in everyday life and brings benefits.
It has been noted from practice that furniture made by hand is treated more carefully, as a result of which it lasts longer. Before we get down to work, let's look at what types of these products exist.
Deciding on the type
We can divide the types of step stools depending on 2 criteria.
Material of manufacture.
- Natural wood. Pine is mainly used. It is the cheapest and easiest to process natural material. But you can also take other types of wood: acacia, oak, beech, etc. But they will be more expensive and will require certain carpentry skills for processing.

Step stool made of natural wood - Chipboard materials. They are used to create layers of steps, seats, backs, and rarely legs. Often these two options are combined. This results in an optimal type in terms of price and complexity of work.

An inexpensive version of a homemade chair made of chipboard - Metal. To create a metal step stool with your own hands, you will need some skills in working with this material and a welding machine. You can also buy a ready-made metal base and combine it with chipboard.

Step stool transformer with metal frame
Product type.
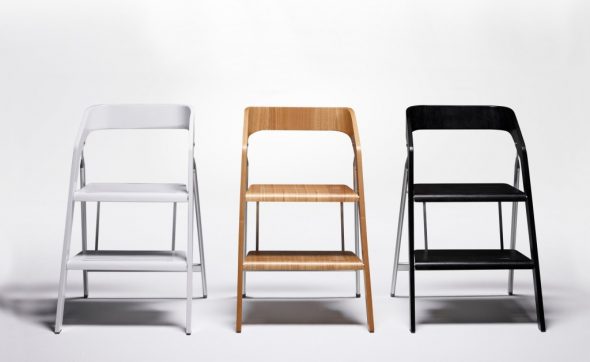
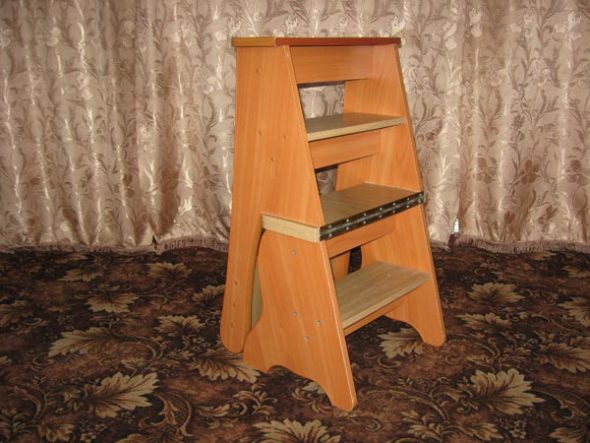
- Step stool. The simplest option. It looks like a high stool with several wide steps, usually 2 or 3.

Scheme of the design solution of a simple step stool 
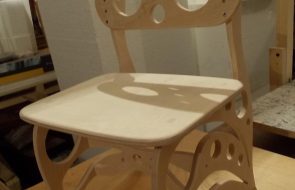
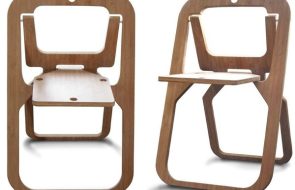
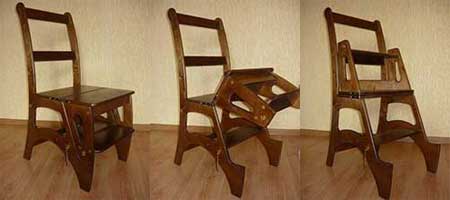
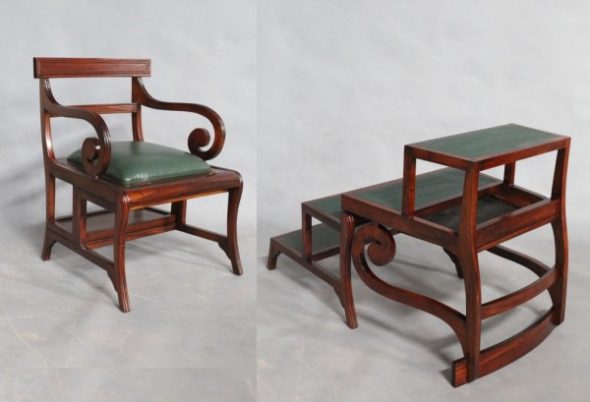
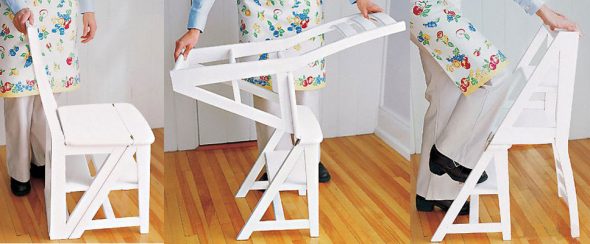
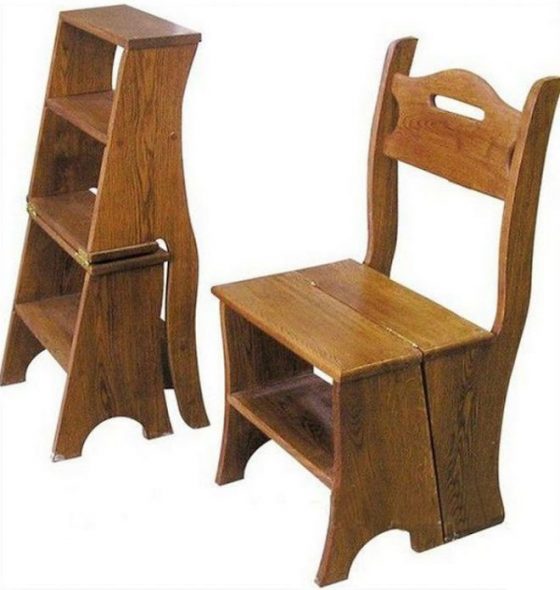
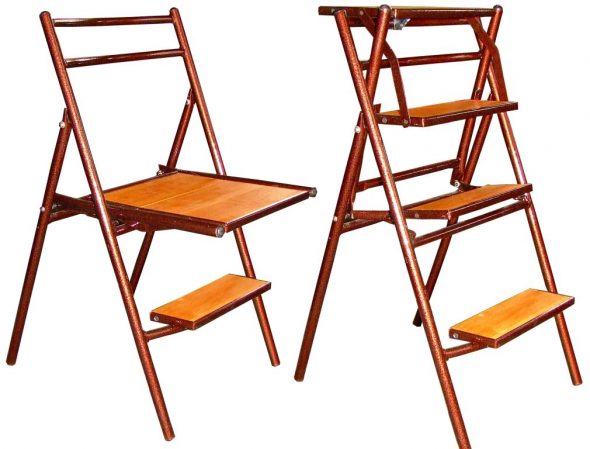
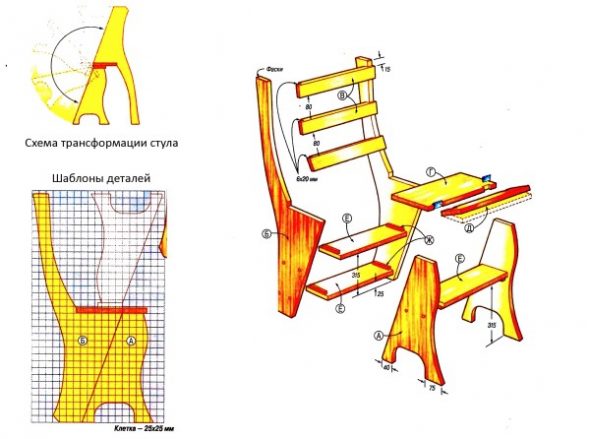
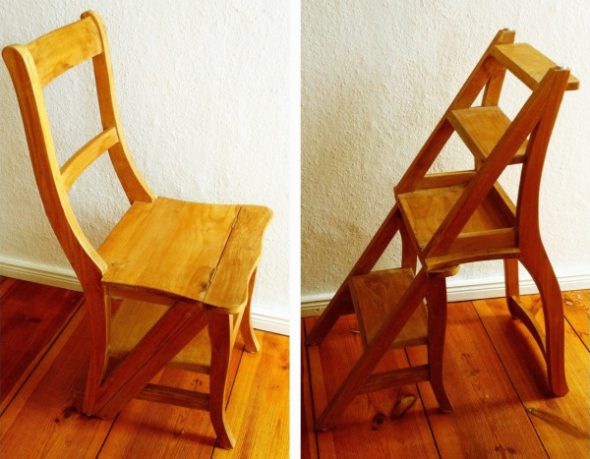
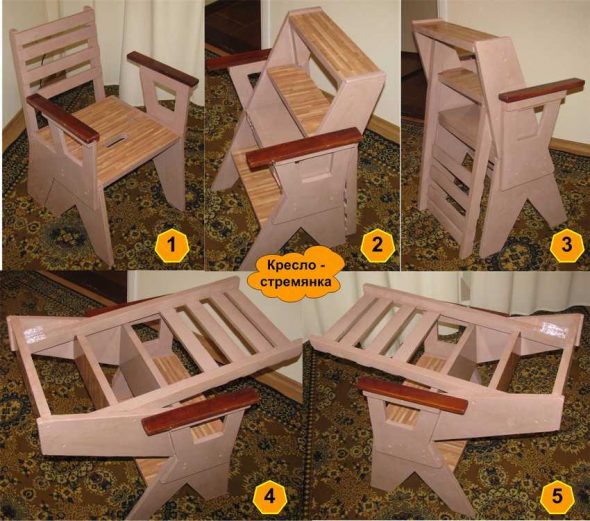
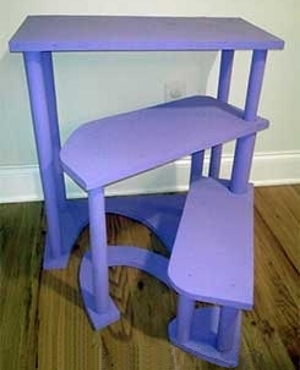
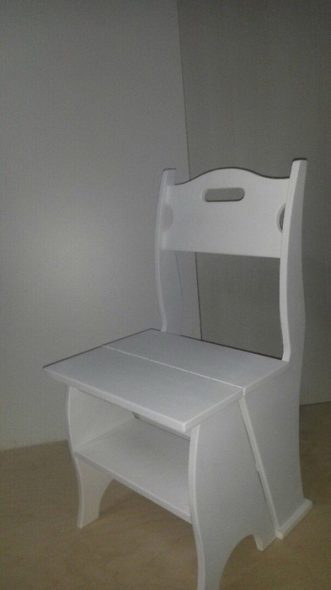
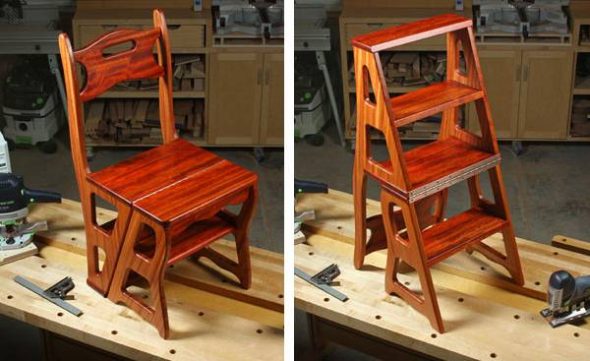
High wooden step stool - Chair-transformer. The part that is the chair undergoes changes. For use as a ladder, the seat folds down and creates an additional step.

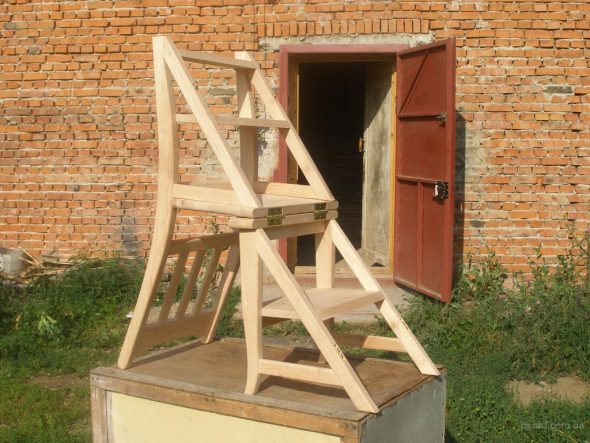
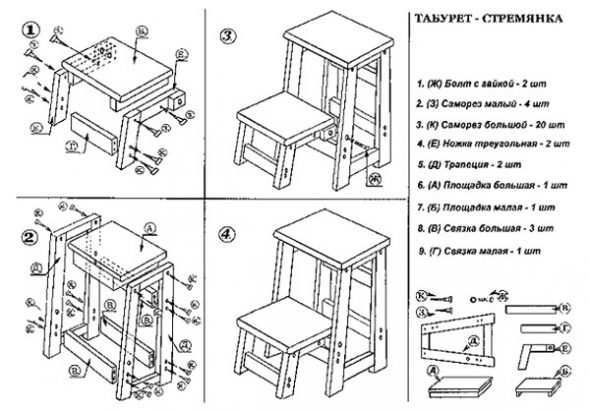
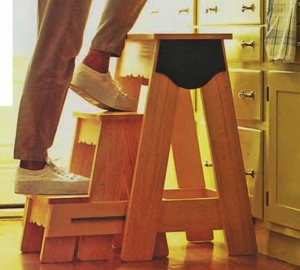
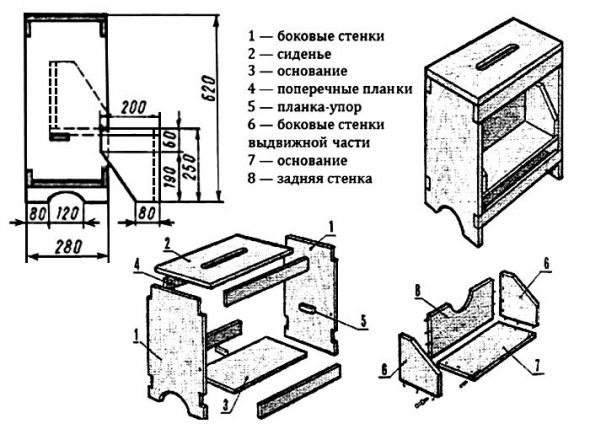
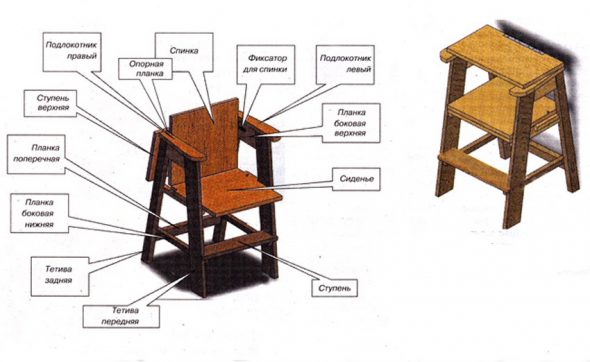
Design and assembly diagram of a transforming chair - Transformer ladder. The changes affect the functional part of the ladder. The product looks like a high stool. The steps of the ladder extend along the guides.

Assembly diagram of the transformer - chair-ladder
You can make any type yourself. The transforming chair is the most beautiful and disguised variation. But it will take more time to create.
For people who do not have experience in creating furniture with their own hands, we recommend starting with a stool. It is the easiest to make, does not require much time, material, tools and effort. And as an experience, it is an excellent work.
Manufacturing process
Let's look at the steps that need to be taken:
| Stage | What needs to be done |
| Creating drawings | Make a detailed assembly diagram with all measurements. |
| Preparatory | Select the required amount of material, prepare the necessary tools |
| Manufacturing of parts | Make a seat, support stand and ladder |
| Assembling the parts | Using connecting rails and appropriate tools, bring all parts into the condition of a single product |
| The final one | Perform final sanding, varnish, create decor |
In general, our work consists of the 5 steps described above. This is a conditional description of the work, now let's move on to a detailed review.
Preparatory work
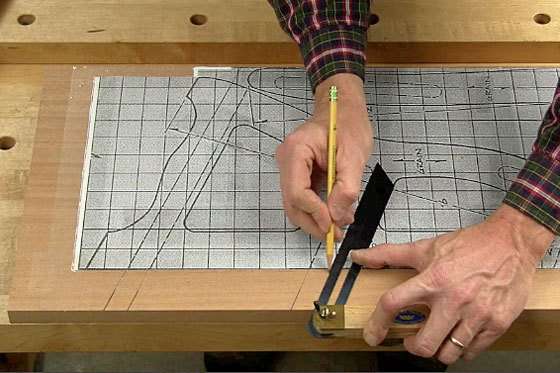
First, you need to create a drawing. You can do it yourself or find a ready-made one on the Internet, which is also profitable and convenient. If you draw it yourself, do not forget to indicate all the dimensions and details. The correct drawing is the key to a successful business.
Now, in accordance with the drawing data, we select the required amount of material, prepare the tools, and construct individual parts.

Tools and materials
We chose pine as a base. So, we will need:
- for sitting: 2 wide boards, 2 beams;
- for the support post: 2 guide bars of the same length, 2 for transverse connection, 1 for diagonal connection;
- ladder: 2 guides, step boards;
- connecting rails.
Select all the above parts in accordance with the dimensions specified in the drawing. For further work we will need some tools:
- grinding machine;
- drill;
- paint brush;
- sandpaper.
Self-tapping screws are required for the connection. Also, primer and furniture varnish are needed. The preparatory work is complete, let's move on to creating the chair.
Main works
We have cut out and sawed off all the necessary parts. Now we assemble them. For this we use self-tapping screws and a drill.
- First, we make the seat. Take 2 wide boards and connect them tightly to each other, glue them if desired. On the back side, 2 bars are attached for strength.
- Connect the parts of the support post. Do this using screws according to the diagram in the drawing: attach 2 crossbars to the guides, one diagonally.

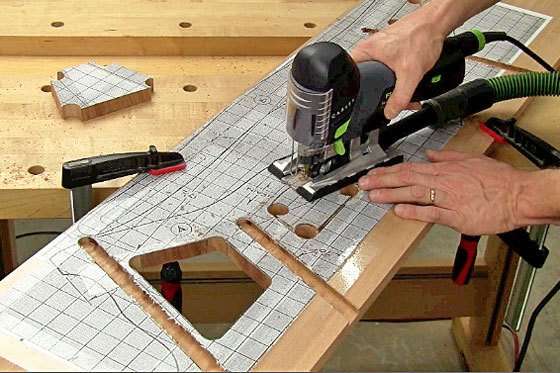
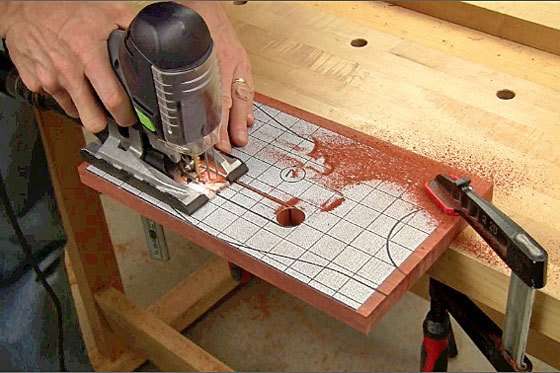
We make the sidewalls (legs) of the chair We cut out the inner contour of the side using a drill and a jigsaw - Make a ladder: place it at an angle and attach the steps parallel to the ground.

All the parts are ready. Now let's assemble them.
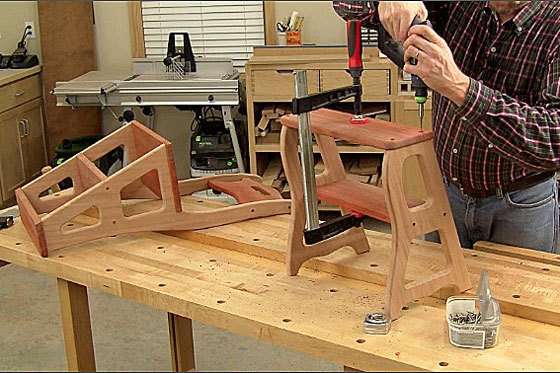
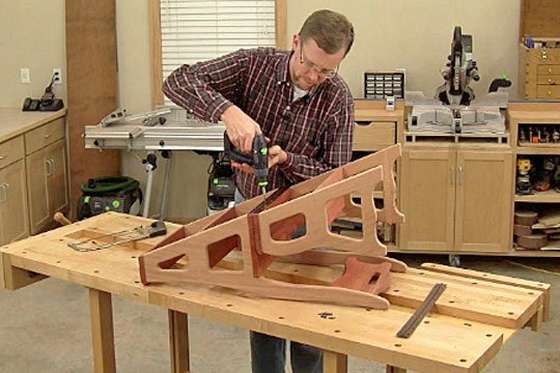
- Attach the support post guides and ladder stringers to the seat.
We make and fix a step-seat - Connect the ladder and the support post by securing the slats with one end under the seat and the other end in the middle of the support posts.
The finishing touches remain. Cover the product with primer and three layers of varnish. If desired, it can be painted or decorated.
As we can see, it is not difficult to make a step stool. And such a useful thing will definitely come in handy around the house.